I thought I would introduce paper piecing for this tutorial Tuesday. It is essentially a way to fill in your stamped images using cut pieces of paper. It can be a great way to introduce colour, pattern or texture into an image and can help to coordinate with the background papers in a card too.
 |
| stage 1-stamping |
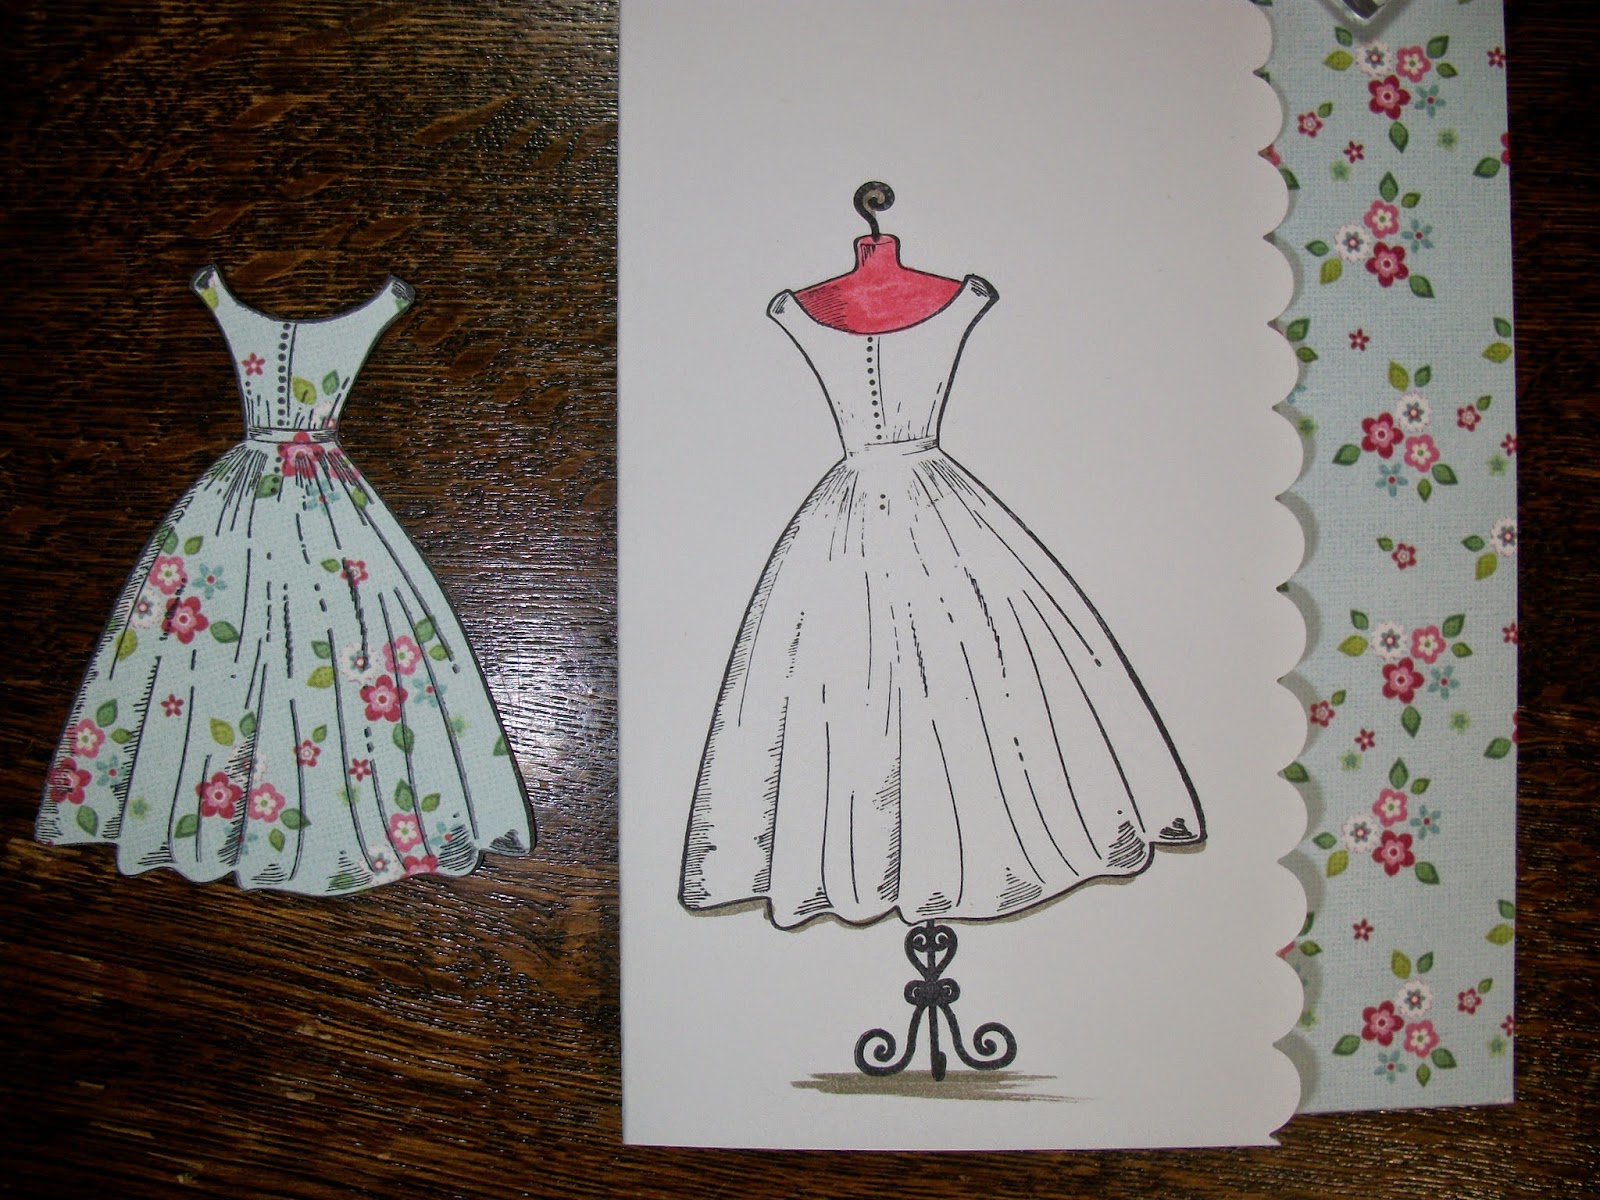
stage 1 is to stamp the image you will use. You need to position it on your card blank or matt and stamp again onto the paper you will be using to fill the image.
 |
| stage 2- cut and colour |
The next stage is to cut the section of the image you will use out of the paper. Depending on the image, this can be a little tricky so choose carefully. You will also need to prepare the image on your card blank by colouring any pieces you wont cover with paper. I have also chosen to cut the card down with a scalloped edge and added a strip of the same paper to the edge inside the card. This helps to tie the rest of the card in with the image and make a feature of the pretty paper.
 |
| stage 3 - stick down to complete |
the final stage is sticking the paper onto the stamped image. The trick here is to line them up perfectly so the paper sits inside the stamped outline. If you are worried about getting it right, choose a glue which gives you a bit of wiggle time.
 |
| inside completed to match |
I repeated the same process with the handbag to complete the decoration inside this card. This example is quite a simple one using only one paper to show you how it works. But, once you have mastered the basics, you could use several different papers to fill the various parts of your image to create cards like the ones below.


Mx
No comments:
Post a Comment