Thursday 24 August 2017

chatty chic

  • hunkydory especially for her luxury card collection: chatty chic!
  • hunkydory especially for her little book
  • gold mirri card
  • 3 6x6" & an A5 card blank
For the A5 card, I covered my card front with half a sheet of patterned cardstock. I then positioned the topper pieces with the central panel glued flat and the frame raised on foam pads. I added a sentiment topper onto the border of the background, to complete the front. I trimmed an insert down to fit inside and coordinate with the front of the card.


inside

I trimmed the remaining paper down to remove the pink border, leaving a floral trim along the base of the 6" square card front. I then cut a page from the little book down to create a square topper. I matt and layered the topper onto gold mirri and glued down on an angle. I positioned a sentiment topper in the bottom corner of the card front and added an insert to finish.


inside

With the other sheet of cardstock from the collection, I created another 6" square card. For this, I covered the card front with gold mirri cardstock. I then layered on the trimmed down patterned cardstock so the image filled the front. I simply finished with a sentiment topper on foam in the top corner and an insert inside.
inside
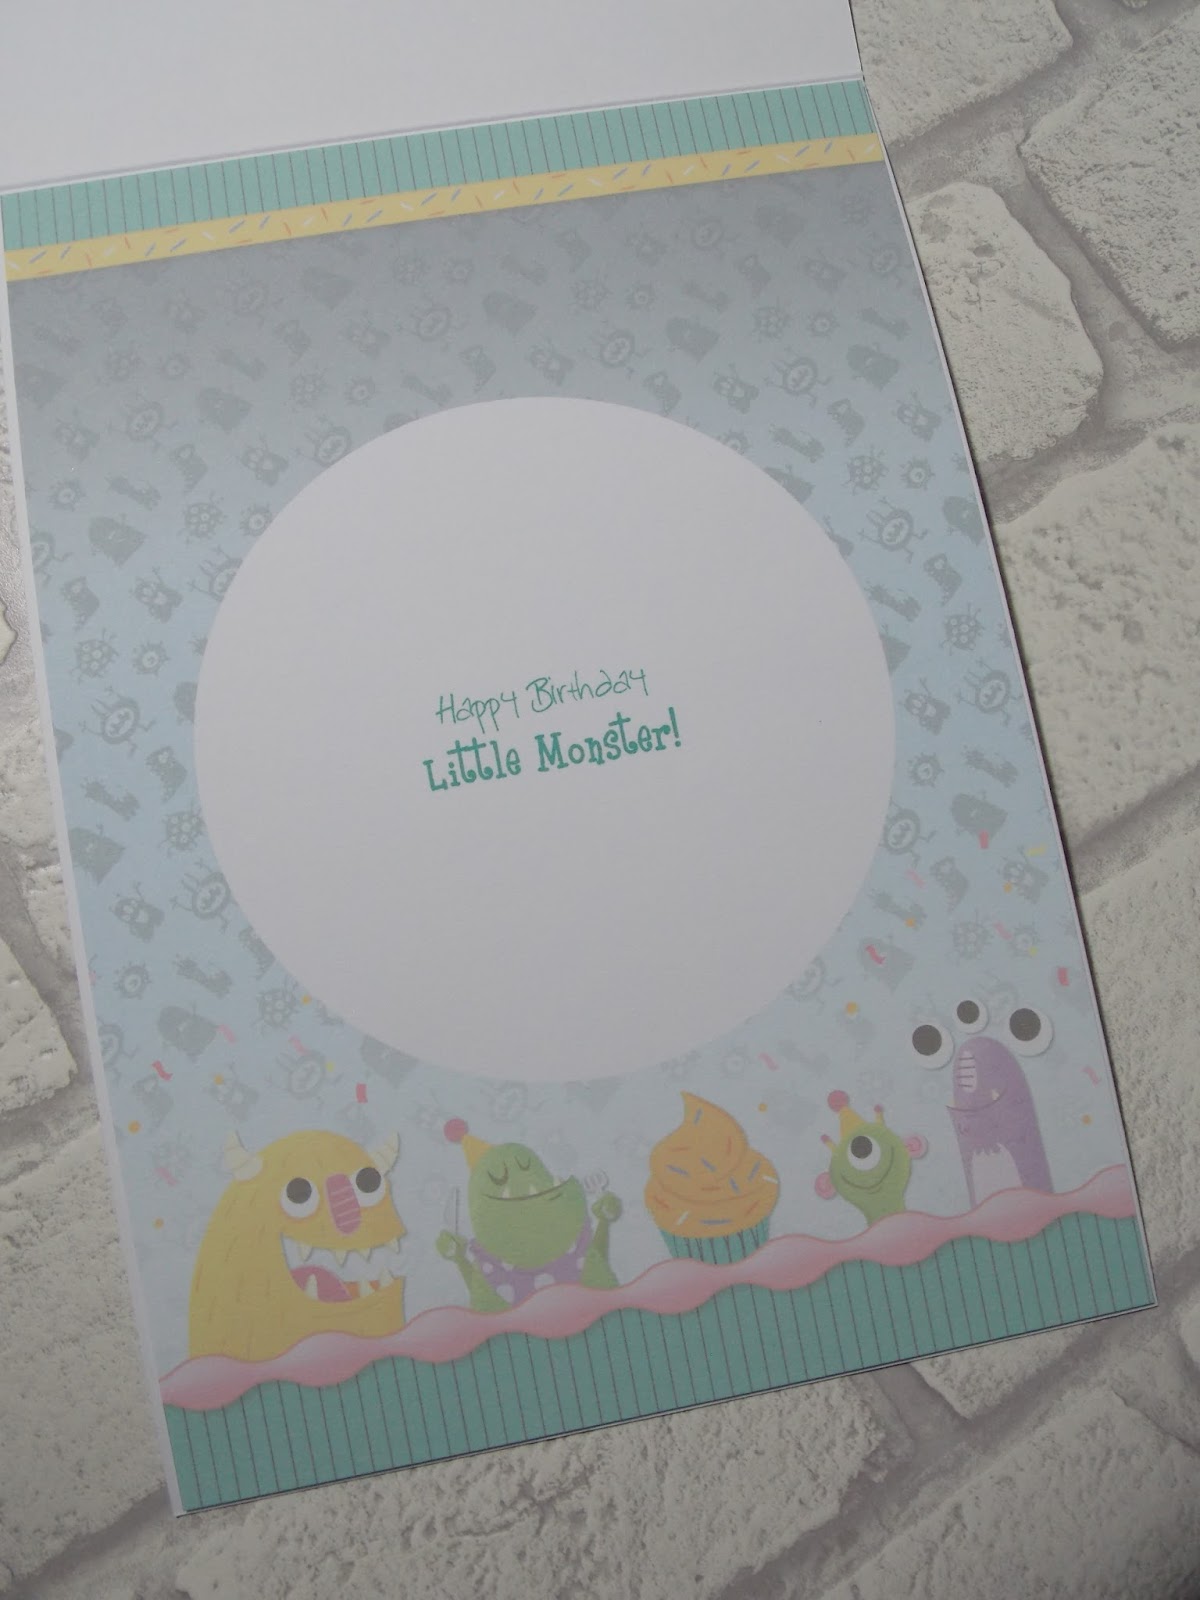
I created this final card using the remaining cardstock, insert and topper. I added the image section of the insert to the inside of the card blank. I then placed the border, (trimmed from the patterned cardstock) along the outer edge of the inside of the card. I cut away a section from the front of the card blank to reveal the panel inside. I covered the remainder of the card front with the patterned cardstock. I carefully positioned the topper and frame in the centre of the card, just overhanging the front edge, ensuring no glue spilt over onto the inside.


inside
Mx

Wednesday 16 August 2017

Fresh flutterby


  • LOTV-hand written phrases
  • SU!- butterflies thinlit die
  • DCWV- fresh floral 12" paper stack
  • White glitter card
  • Archival 'jet black' ink pad
  • Atyou spica pink glitter marker
  • 7x7" card blank

I chose 5 coordinating papers to work with the die cut for this card. I trimmed the 2 main papers to size for the card front, following the sketch layout. I then glued these down flat. I finished the joining edge using a line drawn with the pink glitter marker. I die cut the butterfly from white glitter card and glued this into position. I stamped the sentiment onto the yellow paper and matt and layered onto the pink paper. This was glued in place to complete the card. 

I would like to enter the following challenge:
Case this sketch #234


Mx

Happy reindeer


  • LOTV- happy reindeer stamp
  • SU!- flurry of wishes stamp set
  • SU!- softly falling textured impressions embossing folder
  • Memento'tuxedo black'ink pad
  • Neenah classic crest cardstock
  • Copics- skin:E51,21,93. hair:E35,37. raindeer:E42,43,44,47,49&93. carrots:Y38,YR16,G14&17. aqua:BG10,32,23,49. pink:R81,83,85. white:C00,1.
  • Archival'jet black'ink pad
  • American crafts pink baker's twine
  • White cardstock & 6x4" card blank
I cut a piece of white cardstock to fit the front of my cardblank. I embossed this to make a snowfall effect. I tied baker's twine around the top of the matt and tied a bow, before I glued it to the cardblank. I stamped, coloured and fussy cut the image. I added a sentiment stamp below then glued onto the bottom of my card blank using foam tape for dimension.
Mx

The cgallenge I would like to enter:
Simon Wednesday says- for a child

Sunday 13 August 2017

pretty peacocks

  • hunkydory especially for her luxury card collection: 'pretty peacock'
  • hunkydory little book of especially for her
  • teal & silver mirri card
  • a sheet of hunkydory cardstock I had spare from another set
  • my favourite things: stitched rectangle scallop edge frames die set
  • 7x7", 5x7" & 3 A5 card blanks

For this 7" square card, I cut the background to fit the card blank with a matt of teal mirri card, trimming off the top border. I then positioned the topper in the centre of the top section. I placed the message on the border beneath the topper. I completed the card with a trimmed down matching insert, which I will later stamp with a sentiment.
 
inside
 
For the 5x7" card, I used the remaining cardstock to matt directly onto the card blank. I then die cut a frame from teal mirri card. I trimmed down a page from the little book to sit inside the frame and glued these onto the card. I cut down the insert to decorate the inside with an image and sentiment.
 
inside
 
For the first A5 card, I used half a sheet of cardstock and positioned an image and sentiment topper on using foam. Again, I added a section of insert inside ready to add a message onto. 

inside
 
For this A5 card, I trimmed the image from the remainder of the card above to use as a topper. I framed this with die cut teal mirri card. I used more mirri card to matt onto the card blank before adding a sheet of coordinating cardstock. I glued down the topper and completed the design with a sentiment border across the bottom.  The insert used the same image along with a message to finish off the inside of the card.
 
inside
 
The last A5 card used the rest of the coordinating cardstock along with a page from the little book. I simply matted each onto silver mirri and glued to the card blank. I completed the inside with an insert which echoed the borders on the topper image.
 
inside
 I love the pretty images in this collection, so I was pleased to make five good sized cards to make the most of it by adding a few extra bits from my stash.
 
I would like to enter the following challenge:
 
Mx

Thursday 10 August 2017

yellow roses

  • DCWV fresh floral stack 12x12" paper pad
  • sentimentally yours 'elegant milestone birthdays' stamp
  • do crafts papermania stamp set (mum stamp...lost the packaging so I cant be certain)
  • archival 'sepia' ink pad
  • 7x7" kraft card blank
I chose this paper as the focal point for the card. I fussy cut the flowers and leaves from the background to fit the card front, making sure they remained connected as one piece. I took the remaining paper for the background and trimmed this to size as a matt on the card front. I then stamped the paper with the two sentiments, carefully positioned to sit together with the floral paper cut piece. Once the pieces were ready, I glued the paper flat onto the card blank, then added the flowers using foam pads to create dimension. It's fiddly work to fussy cut an image like this, but I think the results feel special enough to be a worthwhile celebration for a special someone's big birthday!
Mx

Saturday 5 August 2017

monster mash

  • hunkydory tots to teens luxury card collection: monster mash
  • hunkydory tots to teens little book
  • 2 x A5 card blanks
  • holographic mirri card
 
For this card, I cut the backing cardstock down to fit the card front. I then added the layers of decoupage to the topper, using foam to create dimension. I added the topper to the card front along with a sentiment topper, both stuck down with foam pads. I completed the card with the matching insert, trimmed to fit in the card blank.


inside

For the other card, I used the remaining paper matted onto the card front. I layered a page from the little book onto holographic mirri card to create a topper. I placed this onto the card front with a sentiment topper from the monster mash collection. I added the other half of the insert onto the inside to finish the card.


inside
I still have a sheet of cardstock and the matching insert leftover from this collection. As these are just confetti with no monsters, I thought they could be used either with the little book or for other projects, so they have been added to my stash to use later on.
 
Mx