Saturday, 14 March 2015

butterfly meadow...

 
  •  LOTV butterfly meadow stamp, SU! crazy about you and matching hello you thinlit die
  • memento ink pad, copics and promarkers, black micron pen, sakura glitter pen
  • purple carstock (to make card blank & message), craftwork cards digi cardstock
 I made my card blank, and cut digi cardstock to size. I stamped and coloured the lovely bunny image in the bottom corner. I added the die cut and stamped sentiment to the top of my card. the finishing touches were some faux stitching lines and glitter accents.
I also made an insert by simply matting a piece of white cardstock to the inside. i added some faux stitching around the outer edge to match the front of my card and stamped a sentiment in the centre.
 
I am entering the:
 
Mx 

Friday, 13 March 2015

a fathers tools...

  • SU! guy greetings and teeny tiny sentiment, label punches also SU!
  • craftwork cards digi cardstock and card candi
  • barn door and black soot tim holtz distress ink pads
 
I cut a strip of card and stamped all over with the tools, I mat and layered then glued to my card blank. I stamped and punched out my sentiment, then added this to my card with foam pads. I inked some card candi to match my colour scheme and added to the bottom of my card to match the sketch.
 
http://sketchsaturday.blogspot.co.uk/
Mx
 

Thursday, 12 March 2015

lotus blossom!!


  • su! lotus blossom stamp and banner punch
  • a selection of tim holtz ink pads
  • craftwork cards digi cardstock.
 
I have been wanting to use this stamp and have finally done it... I two step stamped the image in pink tones. I added a bit of mat and layering and the banners to complete the sketch.
 
http://casethissketch.blogspot.co.uk/
 
Mx

Tuesday, 10 March 2015

decoupage basics

For this tutorial Tuesday, I thought I would introduce you to decoupage. This is basically an image made up of lots of layers, with each layer taking away a section of the image until only the foreground is left. There are multiple forms of decoupage you can buy: die cut pieces (ready to pop out and assemble), multiple prints of an image you cut out yourself and homemade decoupage using stamps. For this tutorial I will begin with the pre-bought die cut decoupage. The pieces come on a sheet and pop out as you can see below.
 
the pieces

 
the layers
 
 You then simply assemble the layers from the largest up to the smallest. the pieces fit one on top of another, but unlike mat and layering you must ensure the pieces are directly on top of the lower layer so the image doesn't distort. I like to use foam pads, but you can also use silicone glue for more depth and the ability to shape the layers. On an image like this one, you don't really need to shape it, but something like a flower always looks better with a bit more form. With silicone glue, you also get some wiggle time, which can be useful as lining the pieces up perfectly is the key to a successful decoupage. Just remember that this adds weight to the card which can make postage expensive !!
 
finished easel card
 
I turned this spring time decoupage into an easel card, using the coordinating backing papers and a stamped sentiment inside.
 
inside
Mx

Friday, 6 March 2015

lazy days...

 
  • LOTV 'waterlily' stamp
  • SU! 'express yourself' stamp (sentiment)
  • SU! 'labels collection framlits' and 'bigz alphabet typeset'
  • 8x8 card blank
  • craftwork cards 'digi cardstock' 
  • purple, green and patterned cardstocks
  • Memento ink 'tuxedo black' and 'grape jelly'
  • copics markers
  • stickles glitter
  • white satin ribbon
 
 
I thought this fun image for a big birthday card I wanted to do. I stamped the main image and coloured it with copics. I die cut this out with a larger purple mat to layer behind. I also die cut the numbers from green and patterned card sticking them together offset to create a drop shadow effect. I then cut and matted my patterned paper, added the ribbon tied in a bow and glued onto the card. the image and numbers were stuck down with foam pads for dimension. finally, I added glittered accents to the image for that extra special feel. 
 
Mx

Tuesday, 3 March 2015

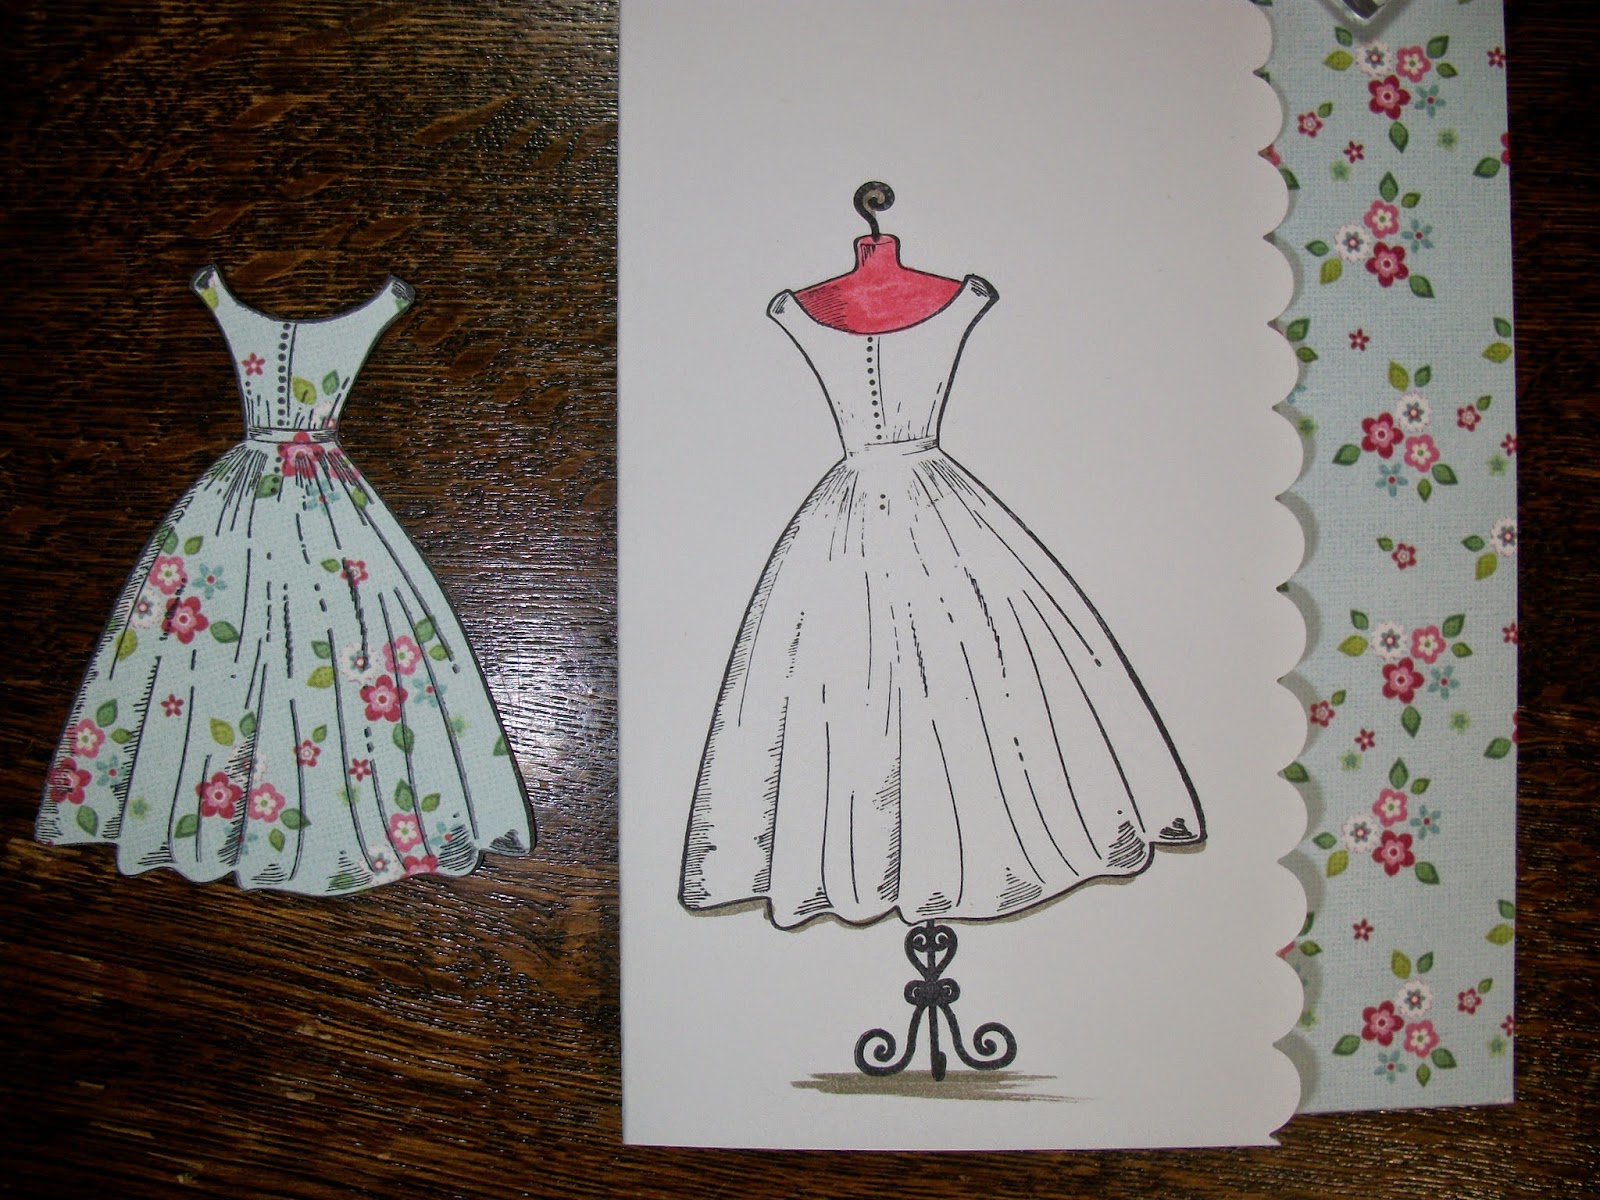
paper piecing...

I thought I would introduce paper piecing for this tutorial Tuesday. It is essentially a way to fill in your stamped images using cut pieces of paper. It can be a great way to introduce colour, pattern or texture into an image and can help to coordinate with the background papers in a card too.
 
stage 1-stamping
 
stage 1 is to stamp the image you will use. You need to position it on your card blank or matt and stamp again onto the paper you will be using to fill the image.
 
stage 2- cut and colour

The next stage is to cut the section of the image you will use out of the paper. Depending on the image, this can be a little tricky so choose carefully. You will also need to prepare the image on your card blank by colouring any pieces you wont cover with paper. I have also chosen to cut the card down with a scalloped edge and added a strip of the same paper to the edge inside the card. This helps to tie  the rest of the card in with the image and make a feature of the pretty paper.

stage 3 - stick down to complete

 the final stage is sticking the paper onto the stamped image. The trick here is to line them up perfectly so the paper sits inside the stamped outline. If you are worried about getting it right, choose a glue which gives you a bit of wiggle time.
 
inside completed to match
 
 I repeated the same process with the handbag to complete the decoration inside this card. This example is quite a simple one using only one paper to show you how it works. But, once you have mastered the basics, you could use several different papers to fill the various parts of your image to create cards like the ones below.


Mx

Sunday, 1 March 2015

made in monochrome...

 
  • white and black plain card
  • SU! 'summer afternoon' and 'crazy about you' stamps
  • SU! 'hello you' thinlits dies
  • SU! 'whisper white' ink pad
 I thought the strong sentiment in the sketch would work well with a bold monochromatic colour scheme. I cut a black mat to fit my white card blank. I stamped the image in white in the bottom corner. I then die cut the 'happy' sentiment and added this to the card with the 'birthday' stamped just below. I think the simplicity of this card is quite effective.
 
sketch #112
Mx