Tuesday, 18 June 2013

flutterbys

stamps: blooming with kindness, papillon potpourri, mixed bunch from stampin up!
inks: worn lipstick and black soot distress inks by tim holtz and tuxedo black memento
other: scallop trim border punch and elegant butterfly punches from stampin up!, adhesive stones and digi card stock from craftwork cards
 
I coloured the base card with pink, then cut the border from black card. I layered them with a white matt, decorated with the flowers. I stamped the message in the bottom corner. the black butterfly was laid flat to act as a drop shadow for the dimensional patterned butterfly layered on top. the stones were added as a finishing embellishment.
 

 stamps: blooming with kindness and papillon potpourri from stampin up!
inks: tumbled glass, faded jeans and mustard seed distress inks by tim holtz
other: elegant butterfly punch from stampin up!, adhesive stones and digi card stock from craftwork cards

similar to above, i inked the base card and then layered a further colour in digi cardstock on top. a white layer was added and stamped onto with the flower and message. i then stamped the patterned butterflies in coordinating colours and cut them out with the punch. these were then positioned and glued in the centre to allow the wings to stand free of the card. rows of stones were added for detail and sparkle.
 
Mx

Friday, 14 June 2013

bottoms up !!

got dad a bottle of booze for fathers day and thought it would be nice to wrap it up and decorate it with a bottle hanger. used stamps from lili of the valley, the bear was perfect holding his glass and the new bottoms up just finished it a treat !!
 
 
stamps: set 43 statement stamps, set 26 simply sophisticated and cheers bear from LOTV
 
tools: promarkers and cobalt archival ink pad, tuxedo black memento ink pad, xcut corner rounder, sizzix big shot machine with circle die
 
other: blue card, digi cardstock from craftwork cards, bakers twine and blue tissue


june 'use a sentiment' challenge !!

Friday, 7 June 2013

wood and wisdom !!

 
so I was having a play around with my owl punch and thought I would do a couple of card designs using similar products and the same colour scheme to show how versatile the products can be. I went for neutral green and browns here as I think it works with the imagery and goes for either gender, (especially good for couples) but it would also work in other colours.
 
 
stamps: petite pairs, beyond plaid from stampin up!,wallpaper and wood from stampers anonymous tim holtz collection.
punches: scallop trim border, owl builder, large oval, scallop oval all from stampin up!
inks: brushed corduroy & peeled paint tim holtz distress ink pads, memento in rich cocoa.
other: big shot and sizzix circle and scallop circle dies
 
this is a 4x6 inch kraft card. I cut the aperture through the front of the card to reveal the owl inside, as I thought this would make a cute feature. I have added detail to the design with three little hearts from the owl builder punch. I cut all the pieces from digi cardstock, that I coloured and then stamped with the beyond plaid stamp set to make my own patterned paper.
 
inside
 
stamps: language of friendship
inks: tim holtz distress markers in brushed corduroy & peeled paint and ink pad in the brushed corduroy
 
I made this insert as I think it decorates the inside of the card nicely. its cute to see the owl peeping through the card, but I popped him on a branch so he wasn't just floating inside. I think it works well as there is still just enough room to write a message!!
 
 
stamps: made for you, French foliage, beyond plaid from stampin up!
punches: scallop trim border,owl builder from stampin up!
inks: brushed corduroy & peeled paint tim holtz distress ink pads, memento in rich cocoa.
other: big shot and sizzix circle and scallop circle dies, woodgrain embossing folder from stampin up! and some ribbon and twill.
 
this is a variation on the design, this time on a 6x6 card. the little water marks are stamped to create a subtle background. I embossed the wood, instead of stamping, to add texture. I then layered the owl on sizzix circles as a topper for the card. the border punches in green define the edges of the centre piece, with the ribbon and twill as a finishing touch. this one is a thankyou card, but of course you could change the sentiment depending on the occasion.
 
hope you found the ideas of how to vary a design useful (or just like the cards)
please let me know what you think to the new recipe inspired layout ... thought I would try something new.
comments welcome !!
Mx

Friday, 31 May 2013

boy oh boy!!

 
so news this week is that I joined facebook, finally. a friend asked me to make a card for a car mad 2 year old boy... so when I saw the monthly challenge on LOTV I figured it was perfect!! Love this cute little stamp, think it works really well with the bright colour scheme for the little ones. the banner is a great way to personalise the card with a name.  

 
paper was taken from DCWV all about boys stack, various punches from stampin up! the image was of course from LOTV (little lorry bear) and coloured using promarkers. all other bits of cardstock used are digi cardstock from craftwork cards and coloured using to promarkers to coordinate.
 
Mx

bags of fun !!


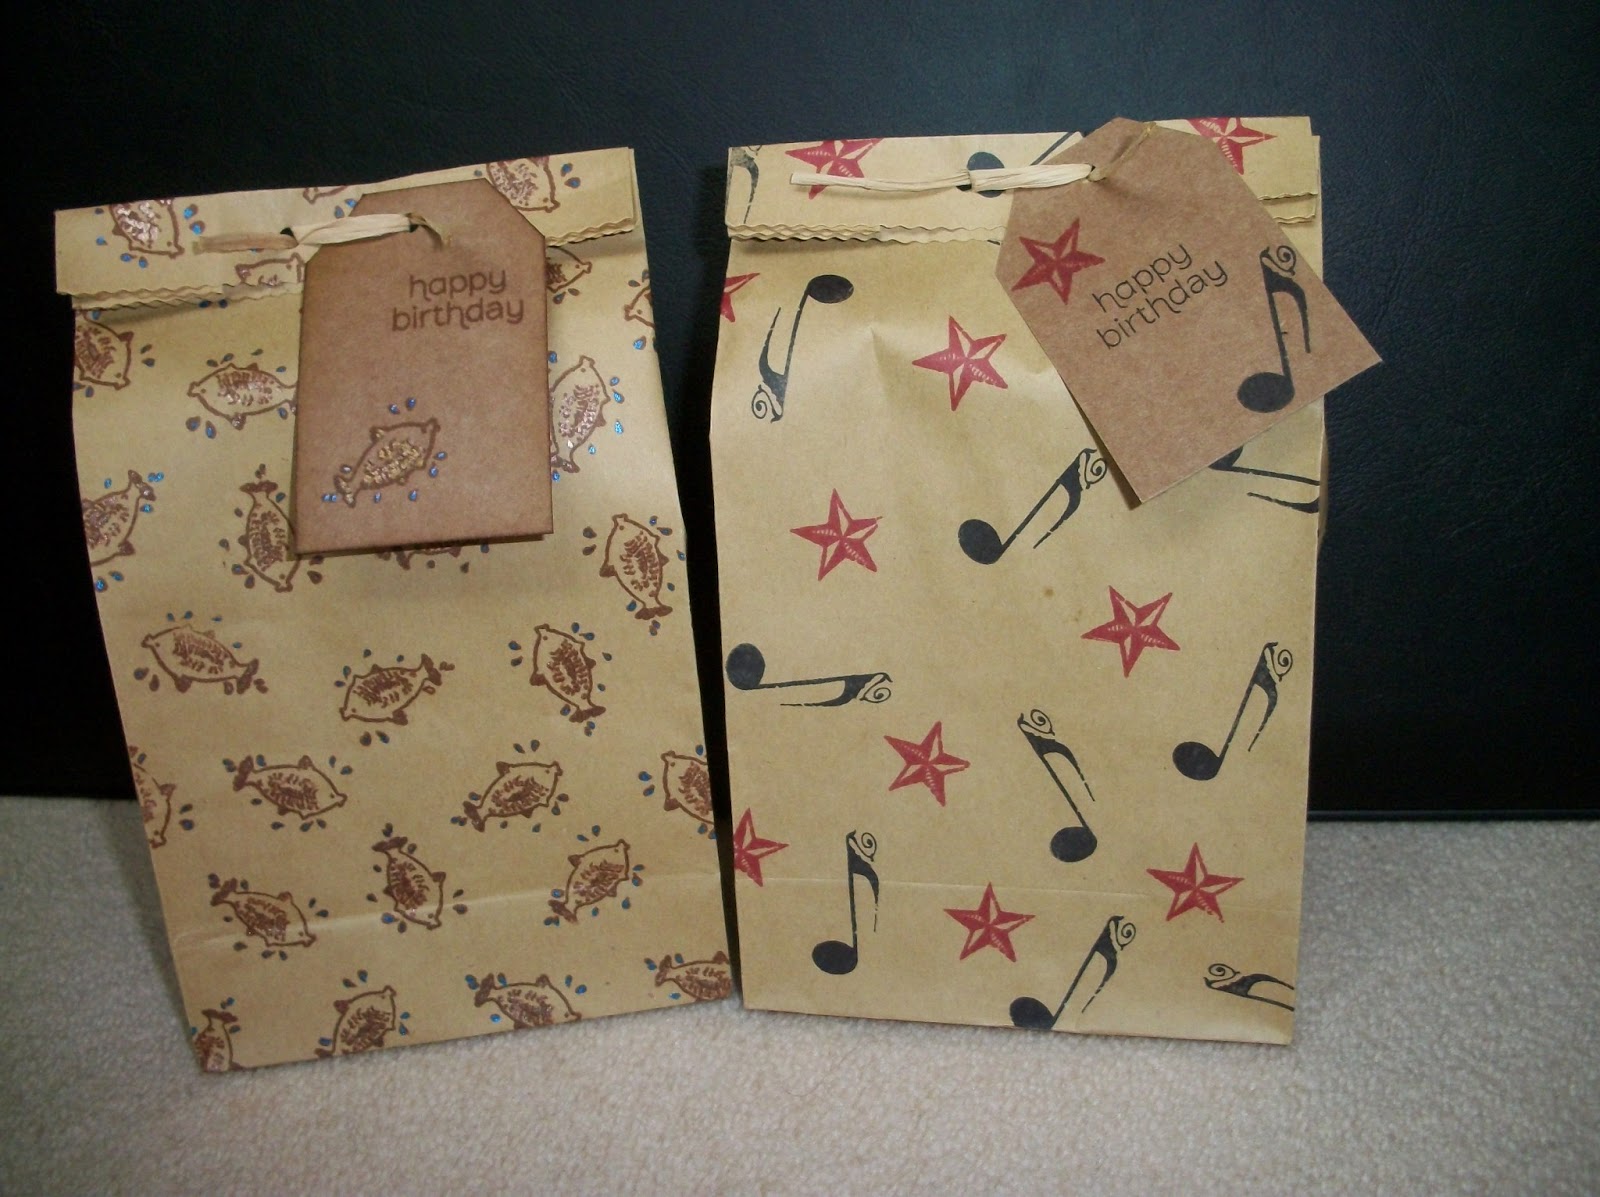
ive made birthday gift bags for some loved ones that i thought i would share with you all. i filled this one with a handmade soap and a flannel with a coordinating wrap. i think it makes a nice little gift, with the bag and tag adding the handmade, personal touch. 

i bought these kraft bags and cut the tags from kraft cardstock to match, tied on with rafia. i simply stamped the bags front and back and decorated the tag to match. all of the stamping is done with archival coloured inks and some of the bags have extra detail i hand-painted using cosmic shimmer iridescent water colour paint. the happy birthday message on the tags is from the made for you stamp set by stampin up!.

you can use any of your stamps and pick the colour scheme to suit the person its for. its up to you what you fill them with. some of these have handmade soaps, but others have shop bought smellies. so dont worry if you cant make it yourself there are plenty of places to buy lovely handmade treats. you could even put chocolates or other goodies in and size the bag accordingly.


the good life forever friends clear stamps and inkadinkado rockstar clear stamps 
papermania nostalgia classic cars clear stamps and pigeon from gorguss girls 
stampin up! summer solstice and mixed bunch stamp sets 

im sure the person you send it to will appreciate the thought that has gone into it 
Mx

Tuesday, 28 May 2013

fiery chilli jelly

well what an eventful day. i made chilli jelly and got slighty more heat than i planned...


ingredients:
2kg granulated sugar
500ml white wine vinegar
200g scotch bonnet chillies
1 large red pepper
250ml certo apple pectin

method:
1. pour sugar and vinegar into preserving pan, over low heat (stirring frequently) dissolve sugar.
2. once dissolved, turn up heat and boil for 20 mins. until mix is syrupy & clear.
3. meanwhile, cut chillies and pepper in half and remove seeds. pulse in blender until finely chopped.
4. once sugar mix is ready add chilli mix and boil for a further 3 mins.
5. remove from heat and cool for 15 mins. then stir in certo, keep stirring until mixture thickens and chillis are suspended.
6. pour into clean sterilised jars. leave to cool, then seal tightly
!! if chillies rise to the top pour back into the pan and stir over low heat until suspended, then repeat step 6.

DO NOT let the jelly boil over during stage 4 ... i learnt the hard way that it sets on fire and makes a mess !! so please peeps go careful with this recipe and enjoy. (i cant say how mine turned out as i dont eat it, this one was for my sis and dad so they best like after all this drama and cleaning up!!) hopefully yours wont make flames like mine did, but with the scotch bonnet chillis i think it still deserves the label of fiery chilli jelly 
Mx  

Sunday, 26 May 2013

just for fun ...


ok, so i'm guilty of doing another girly card but what can i say ... i like pretty things !! this one was just to play around. it could be used for any occasion as i decided not to put a message on... you could stamp a little sentiment in the corner if you wished though. 

the stamped image is the water lily tilda stamp from magnolia. i coloured it with promarkers to match off cuts from 12 x 12 papers i used in a scrapbook album a while ago. i layered it up with a pretty craft doily, a decorative edge punch by martha stewart and an embossed piece of card. i used the craft concepts budding vine embossing folder and tim holtz distress inks to highlight the design. i also inked the edges on the other layers to match. i added further embellishments with a butterfly peel off which i coloured bronze to match the adhesive stones. i think it's those little details that really make a card. 

Mx