Showing posts with label men. Show all posts

Sunday, 9 May 2021

Summer afternoon


Stampin up!- summer afternoon & guy greetings 

Archival ink pad-jet black

Zig clean color real brush markers- 41, 43, 67,68,20.

Water colour cardstock, Kraft card blank, water & paint brush. 


I cut a piece of cardstock just abit smaller than the card front. I stamped my image and sentiment in black. I added bits of colour with the markers then blended out with a small brush and water. I added more colour by putting a bit of marker on a plastic sheet, then picking up the colour with the brush. Once happy I glued my panel to my card blank.

Mx

Monday, 19 April 2021

Big birthday


  • My favourite things- big birthday die
  • Stampin up- crazy about you
  • Tim holtz distress inks- salty ocean, shabby shutters, mowed lawn.
  • Black card blank and watercolour cardstock 


I cut down my piece of watercolour cardstock and added water. I simply squished the ink pad onto a sheet of plastic, and used a big damp paint brush to pick up the colours. I added them to the card in lines and blended them together slightly. I let this dry. I diecut the big birthday and glued it on to the panel. I stamped the ‘to you’ underneath. I finally added the panel to a black card blank to finish.

Mx

Sunday, 15 April 2018

Manly moments


  • Hunkydory- little book of manly moments
  • Lil’ inker designs- happy birthday border die
  • Paper mania ('son' stamp: not sure what the set was called)
  • Black & white cardstock
I made a 5x7” card blank and stamped son in the bottom corner. I trimmed the little book image to fit the remaining space and matted onto black cardstock. I then die cut the happy birthday border and placed over the top of the image to match the sketch. 
I think this simple card is great for men and could easily be adapted with a different image to suit the man!
Mx

I would like to enter the challenge:

Friday, 23 March 2018

Adrenaline rush part 2


  • Kanban 'adrenaline rush' paper craft toppers
  • DCWV Fresh floral stack 
  • Black & white spot paper (old one from the scrap box)
  • Silver mirri card
  • 7x7" card blank
I created a layout using two of the toppers with a frame from the collection. I then found two different dotty papers to coordinate. I mat and layered the orange spot onto silver mirri card to leave a white border on the card front. I then trimmed the black spot to fit as a band going down the card. With the toppers, I arranged them onto the card front and glued down with varied depths of foam pads to add more dimension to the card. I completed the front with the sentiment in the top corner, overlapping the circle frame to link it into the design. I think this is a nice bold design perfect for a birthday boy!!

Mx

Monday, 19 March 2018

adrenaline rush


  • Kanban 'adrenaline rush' paper craft toppers
  • Stamping up! Teeny tiny sentiments stamp set
  • Paper mania 'happy days' paper stack (& coordinating colours from my scrap box)
  • Silver mirri card
  • 5x7" card blank
I chose coordinating papers and cut them, following the sketch layout, to fit the card front. I stamped the sentiment onto the red band, before gluing the layers down. I added the topper in position using foam pads for dimension to complete this simple men's card. 

Mx

I'd like to enter the following challenge:

Thursday, 25 January 2018

motoring classics


  • Hunkydory charming chaps 'motoring classics' luxury card collection 
  • Silver Miri cardstock 
  • White card blank
  • Bakers twine (docrafts)
  • Su! Large numbers framelit dies
 To make this card i used the sketch as a starting point. I chose the cardstock with the image in the bottom corner. I trimmed to size, just smaller than my card blank. I added a coordinating baker's twine to create a band, securing it at the back of the piece of card and tied a knot at the front for added detail. I matt and layered onto a piece of miri, cut to the same size as my cardblank. I glued both layers to the front of my 5x7" cardblank. I diecut the big '50' from some silver Miri card for the sentiment, and added it to my card using foam tape. To finish the card I added the coordinating insert to the inside of my card.


 To make this card I simply Matt and layered the remaining cardstock onto some more Miri, cut to fit the front of a 7x7" cardblank. I chose the layout of my toppers and sentiment and glued it all in place, using different depths of foam tape for dimension. Finally I added the coordinating insert to complete my card.

Mx

I would like to enter the following challenge blog:

Thursday, 4 January 2018

Archaic birthday


  • Basic grey- archaic paper pad
  • My favourite things- brush stroke birthday greeting
  • SU!- endless birthday wishes
  • Archival 'jet black' ink pad
  • Black cardstock
  • White 6x4" card blank
For this card I used scraps of coordinating paper, and followed the sketch for my layout. I simply cut the cardstock into strips leaving one piece for the corner. Once all the strips had been glued to the card blank, I chose my sentiment. I stamped the 'happy' and die cut the word 'birthday' for a bolder detail.
I think this card worked well for a men's card and had the added bonus of using some leftover pieces of patterned paper!
Mx


I'm joining :

Wednesday, 8 November 2017

Christmas cocoa

  • Hunkydory classic Christmas luxury card collection: Christmas cocoa
  • Hunkydory second little book of Christmas
  • Hunkyory essential book of Christmas sentiments
  • Gold mirri card
  • A5, 5x7" & 6x4" card blanks
I created this first A5 card using the little book image as the topper. I trimmed the cardstock down to fit the card front with a matt of mirri card. I then layered the little book image onto a matt of gold mirri to create the topper.  I glued the topper in place with a sentiment from the essential book beneath, using foam pads for dimension. For the inside, I trimmed down the coordinating insert to fit neatly. 

inside

 I used the other half a sheet of patterned cardstock with the printed border for this 5x7 card. I trimmed the cardstock down to cover the front of the card blank. I then added the topper, layered up with the decoupage pieces for dimension. I completed the front of card with a little sentiment topper from the set, positioned in the bottom corner. I added an insert, trimmed to fit inside.
inside

I used another little book image as the topper for this A5 card. I covered the card front with the other patterned cardstock. The little book page was added to a matt of mirri before I glued this down flat, perfect for posting. I completed the inside with the coordinating insert.
inside

For the final card, I created this cute little 6x4" landscape card featuring the printed image from the cardstock. I simply trimmed it to fit the card front and finished with a sentiment from the essential book and the insert trimmed to fit inside.
inside
Mx

Tuesday, 24 October 2017

driving home for Christmas

  • Hunkydory snowy season luxury card collection: driving home for Christmas
  • Hunkydory essential book of Christmas sentiments
  • A5 landscape & 6x6" card blanks
I created this landscape A5 card using the large topper from the collection. I cut the patterned cardstock in half and removed the snowy border. I then cut the striped border from the remaining half a sheet of cardstock. I added the main piece of cardstock to the front of the card and trimmed off the end of the card blank to reveal the inside of the card. I then added the other matching border inside the card, to sit neatly in the reveal. I used half of the decoupage layers on foam to add dimension to the topper. To complete the card front, I simply positioned the topper image along with an essential book sentiment raised up on foam pads.
For the second card, I made a feature of the printed image on the cardstock. I trimmed down the cardstock to fit the front of a 6" square card. I then layered on the coordinating border across the top, raised on foam. I also layered the car with the remaining decoupage pieces to give this dimension and mirri accents. I completed the card with the sentiment topper from the set in the space above the car and the insert trimmed to fit inside.
inside
I felt the best use of the toppers in this decoupage style collection was to make two nice cards. I still have a full sheet of cardstock left over from this collection, which I will use later with either the little book images or some extra toppers from other collections.
Mx

Tuesday, 17 October 2017

Merry Christmas, sausage!

  • Hunkydory cute Christmas luxury card collection: Merry Christmas, sausage!
  • 7x7", 6x4" & DL card blanks
  • Gold mirri card
I created this 7" square card using the largest topper from the set. I mat and layered the patterned cardstock and gold mirri onto the card front. I then positioned the topper on using foam pads, so the scarf border on the topper lined up with the dog on the backing card. I completed the card with the coordinating sentiment from the set, overlapping the topper on deeper foam pads.
inside
Using the other piece of patterned cardstock, I created the DL card. I chose the DL format as it fit both borders on, I simply cut the cardstock to fit the card front. I then added the oval topper and large sentiment on foam pads for dimension. I completed the inside with the matching insert trimmed to fit.
inside
For the 6x4" card, I cut down the remaining cardstock to fit the front of the card, this time removing both borders. I then layered the bottom border onto the card with foam pads to create dimension. I added the square topper above the border on foam pads to complete.
inside
Mx

Sunday, 3 September 2017

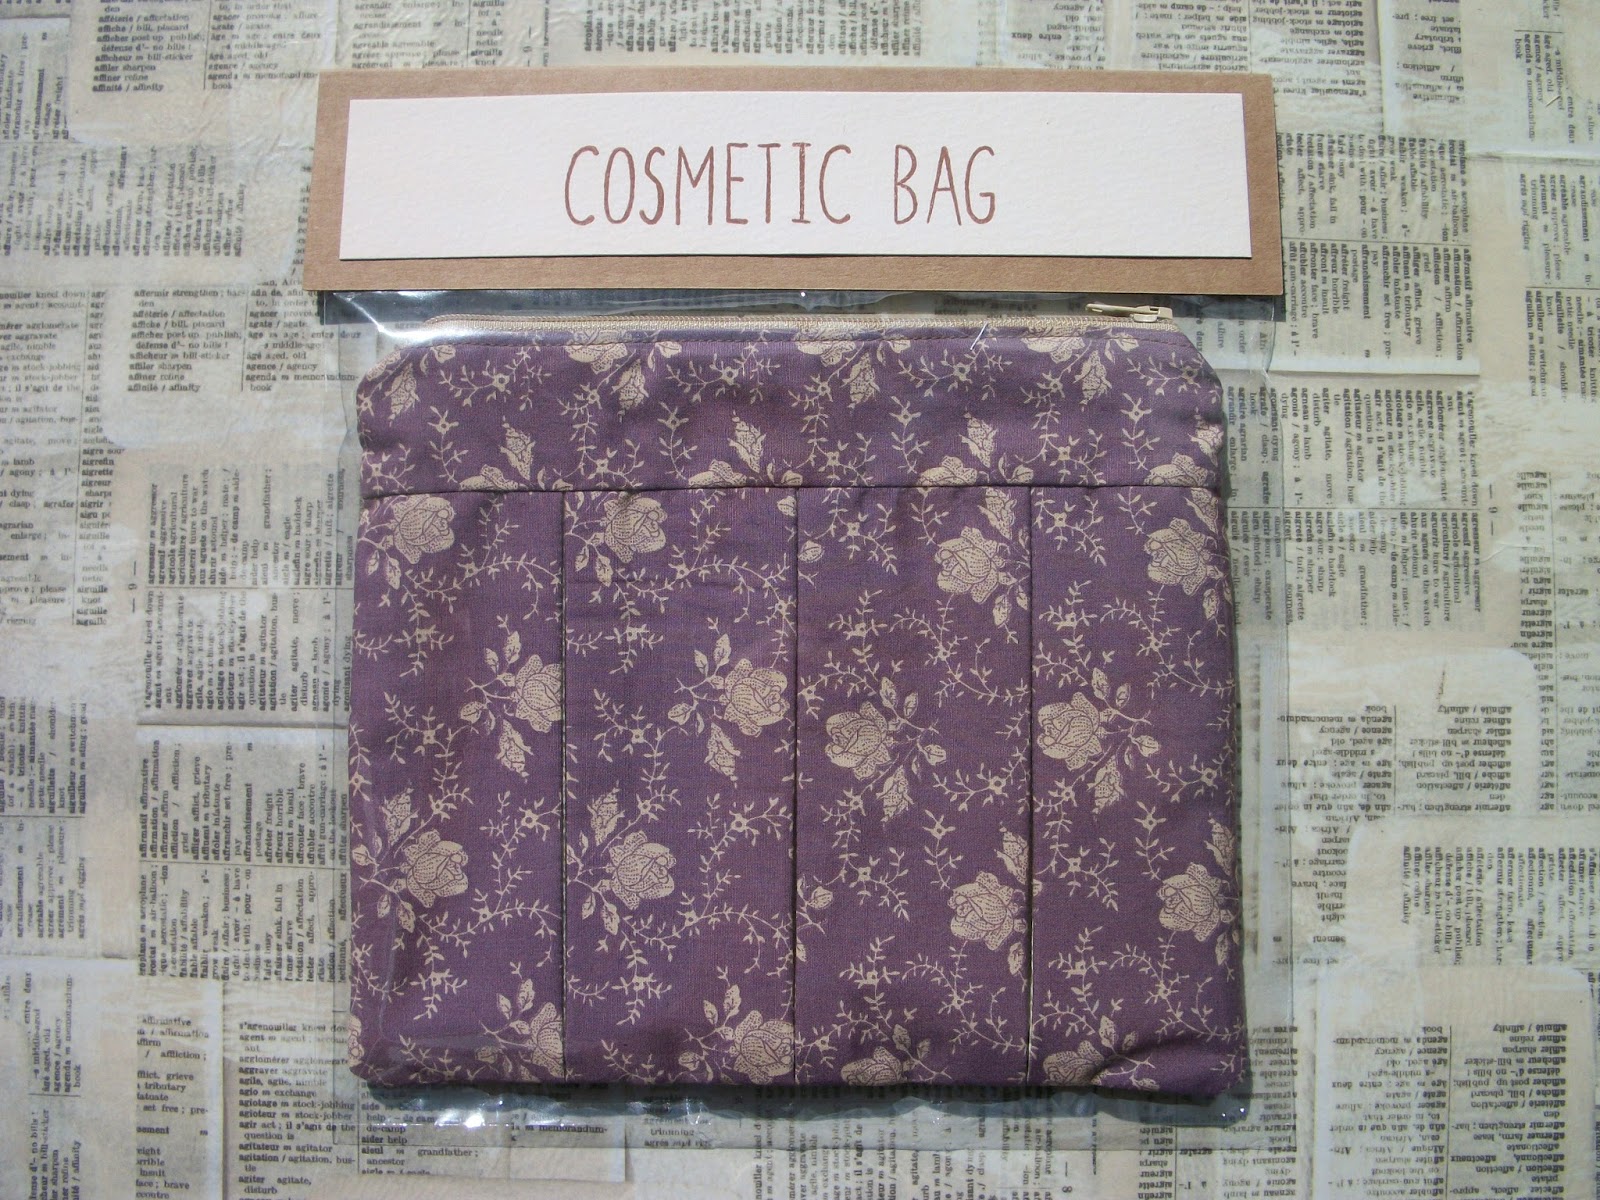
packaging pouches!!


  • Kraft & cream cardstock
  • Stampin up! 'skinny mini alphabet' & 'epic alphabet' stamp sets
  • Archival ' sepia' ink pad 
  • Card bags
I stitched these little pouches as gifts and wanted to package them nicely to send. I found clear card bags which fit the pouches in neatly and sealed them in. For the top piece, I measured the width of the bag and decided on the height I wanted, (bearing in mind the stamp size + matting). I cut the Kraft card to the right width and doubled the height. I folded the cardstock in half over the top of the bag and secured with staples. I then cut the cream cardstock to layer on top and cover the staples. Before gluing into place, I used the letter stamps to spell out the contents 'wash bag!' or 'cosmetic bag' to complete this simple packaging. 


Mx

Wednesday, 14 June 2017

vintage sports car

 
  • LOTV 'vintage sports' rubber stamp
  • memento ink pad 'tuxedo black'
  • Neenah classic crest cardstock
  • copics: R24, 27, 29, 89. E42. Y13, 15, 17. E23, 27. YG21, 23, 25, 61. G21, 24, 46. B0000, 41, 45. N0, 3, 5, 6, 7, 8 & 9.  
  • lawn fawn 'Finley's ABCs' dies & 'happy happy happy' clear stamps (inside)
  • road atlas (cut a page up for the map background)
I stamped the image onto Neenah card stock and coloured it with copics. I then fussy cut around the outer edge and coloured the frame. I die cut the letters from Neenah cardstock and coloured with a fade to the centre using copics to match the frame. I took a page from a road atlas and chose a section of the map to create a background for the card. I glued this onto the card flat, added the image on top using foam and liquid glued for the alphabet.
 
Mx
 
I would like to enter the following challenges:
The ribbon girl June card challenge
LOTV Facebook challenge 'summer'

Monday, 12 June 2017

Out of space...


  • Kirsty Wiseman - terrestrial friends
  • Neenahclassic crest cardstock
  • Copics-G46,24,21.YG61. R24,27,29. B14,16,18. A selection of Course marker's
  • Watercolour cardstock
  • Tim holtz distress inks- fossilized amber, blue print sketch, candied apple, chipped sapphire, black spot & hickory smoked
  • White paint
  • My favourite things- brush stroke birthday greeting dies
  • Tim holtz polkadot stencil
I cut a piece of watercolour cardstock to create my space background. I inked the cardstock using the brighter colours randomly spread to fully cover the cardstock. I then added the darker ink over the top to again cover the card. For the stars, I watered down some white acrylic paint and flicked this on to create a fine splattering over the ground. Once dry, I trimmed the background down into two panels to fit the card blank. I then stamped, coloured and fussy cut the rocket from Neenah cardstock. I also die cut a sentiment from watercolour cardstock. To soften the white, I added light patches of ink using the blending tool, then used the dotty stencil to produce a crater effect over the top. I glued the background onto the card blank using double sided tape. I then added the sentiment using liquid glue, and finally positioned the rocket on foam pads to complete the sketch.

I would like to enter the following challenges:
case this sketch #225
Simon Wednesday says: make it masculine
Mx

Sunday, 11 June 2017

for the mod man...


  • hunkydory the little book of charming chaps
  • hunkydory essential book of sentiments
  • bazzill bling: cream cardstock
  • white 5 x 7" card blank
I followed the sketch to create this simple birthday card, making the most of the ready to use images and sentiments in the hunkydory books. I cut the topper sheet across the border line to create the split background. I trimmed a piece of cream cardstock to cover the front of my card blank, then positioned the topper pieces and glued these down flat. Finally, I added the message overlapping the topper to complete the sketch and add some dimension, by using foam pads to stick it down.
 
I would like to enter the following challenges:
 
Mx

Friday, 21 April 2017

Man of the match

  • Hunkydory: for the gentlemen collection 'man of the match' toppers, background card and inserts (there's some left over!) 
  • 2 6x6" White card blanks
  • Gold mirri card
  • Blue adorable scorable
For the first card, I made an easel... 


I folded the front of the card in half and covered with a matt of patterned paper. I added the topper onto the front, only positioning the glue on the lower half of the topper. I then added an insert, cut down to size to fit inside making sure the image would be visible. I trimmed the border strip from the coordinating cardstock and added this across the bottom of the inside of the card, using foam to create a stopper. 

And for the second... 


I matt and layered the cardblank with gold mirri card and blue adorable scorable. I cut the centre from the topper and glued this down flat on the front of the card. I then trimmed the remainder of the topper down, cutting from the inside of the aperture to create a frame. I glued this in position using foam to raise it up surrounding the main topper. For the inside, I trimmed down another insert to fit inside neatly. 

Mx

Thursday, 20 April 2017

Happy times

 
  • LOTV- happy times
  • SU!- remembering your birthday
  • Craftwork card- man made paper pad
  • Momento 'tuxedo black' ink pad
  • Neenah classic crest cardstock
  • Copics- E30, 31, 34, 35, 37, 39, 47, 49, 50, 51, 21, 93. YR07, 18, B99. N1, 3, 4, 6. W00. W1, 4.
  • Silver pearl paper
  • White 5x7" cardblank
  • Brown button 
 
I cut a mat of pearl paper and a layer of patterned paper to fit the card blank. I then stamped and coloured the image on a mat of white card. I layered this onto pearl paper and glued it onto the card. To complete the sketch, I stamped the sentiment onto white card and shaped it into a banner, before matting onto pearl and adding onto the card. The finishing touch was a button secured in position with a glue dot.
 
Challenges I would like to enter:
Mx

Monday, 2 January 2017

Simple birthday...


  • SU! Big news
  • Archival 'colbolt' ink pad
  • Patterned paper
  • Red & white cardstock

 I kept this one really simple using a scrap of patterned paper from my scrap drawer and a nice bold sentiment. I stamped the sentiment and matted it onto red card. I then cut the patterned paper matt and layered with the red card. Following the sketch, I glued both pieces to a white card blank.
 
Mx

Challenge i would like to enter
Freshly made sketches #268

Monday, 21 November 2016

magical dragons...

 
  • my favourite things- magical dragons (stamps & dies)
  • SU!- made for you
  • mama elephant- landscape trio dies (before starting this card, i used the cloud die and some template plastic to make a mask)
  • tattered lace- circle dies
  • tim holtz 'tumbled glass & broken china' ditress ink pads
  • memento 'tuxedo black' ink pad
  • copics- V17,15,12. Y38,35. YG25,23,21. RV14,13. E42,41. C00,1. 0.
  • sakura micron '01' pen
  • white funky foam
  • white cardstock
 
I cut a piece of cardstock slightly smaller than my card blank to form a matt. I created a sky background using shades of blue ink and a mask (I created my own mask using the landscape die to form the clouds). I arranged 4 different sized circle dies according to the sketch and die cut them from the matt. I edged each aperture on the matt using a micron pen to create faux stitching. I also stamped a sentiment in the bottom corner of the matt, following the sketch. I temporarily placed my matt onto the card blank, then glued each cut out circle down onto the card blank in its original position. I removed the matt from the card blank and prepared my images.
I stamped, coloured and die cut my dragon images. Since you only see the top half of the dragon and the rest is trimmed off to fit neatly behind the apertures, I only coloured the areas which would be seen. I used the 0 copic marker to add texture/ scales to the dragons. On the reverse of the sky matt, I glued each dragon behind a circle so they were peaking through. I added funky foam (you could use foam tape instead) to the entire back of the matt, then glued in position on my card blank, ensuring all the circles lined up.
Mx
 
Challenges i would like to enter:


Monday, 13 June 2016

sunday drive...

  • lawn fawn- stitched rectangle stackables & louie ABC'S
  • hunky-dory- little book of manly moments
  • black & kraft cardstock
  • black funky foam
 
to make this super quick 'fathers day' card...I used a sheet from the little book (with a car image) to cover the front of a black card blank. I created a frame using the stitched dies from kraft cardstock and glued this on to my card. I die cut the letters from both kraft cardstock and black funky foam, to spell dad. I glued these layers together to add a dimensional element on to my card.
I took the inside of the die cut frame and stamped a fathers day greeting. I glued this to the inside of my card, to create a finished look and somewhere nice to write.
 you could easily use a different image and die cut words, to change the look of this card for other occasions.
Mx

challenge I would like to enter:
simon says: father's day/ for a guy

super striker!!

 
  • LOTV- super striker & for him sentiments
  • lawn fawn- happy birthday border die
  • memento 'tuxedo black' ink pad & copic marker friendly cardstock
  • copics (E000,00,01,11,55,57,59. N0,1,6,7,8,9. R24,27,29. G24,28,29.)
  • 6x6" black card blank
  • black & blue cardstock
  • foiled star cardstock (had it for years and im not sure where its from)

I mat and layered a black card blank with some blue cardstock. following the sketch, I cut the triangle shapes from a strip of star patterned card. I matted this on to black and attached it to my card. I then cut a piece of white cardstock, stamped the focal image and coloured this using copics. this was also matted onto black and added to the card using foam. To complete, I added a stamped sentiment at the bottom and a black die cut sentiment across the top.  
Mx

challenges id like to enter:
sketch Saturday- #416
paper players- colour challenge #299