Showing posts with label sewing. Show all posts

Wednesday, 27 June 2018

sew lovely

 
  • lawn fawn: sew lovely stamp set, zig zag rectangle stackables
  • SU!: bloomin' marvellous stamp set, soft suede & early espresso ink pads and oval, scallop oval & banner punches
  • at you spica glitter pens
  • white card and small paper scraps

 I die cut two pieces of card using the zig zag stackables for interest. On the first piece I stamped spools of thread all over to create a background. I used glitter pens to add colour and detail. On the second piece I stamped a button in the bottom corner and highlighted with the coloured glitter, leaving space to write.
I stamped my sentiment and cut it out using the oval punch. I used a scallop oval punch and a piece of coloured card to make a mat. I found coordinating patterned papers and punched into banners. I layered all of these together and positioned onto my spool background. To complete my note cards/ postcards, I glued the panels together back to back.
I think these are simple but a cute alternative to a card, although it would easily be recreated as a card front and insert. These are sewing themed (see more below) but you could use this idea for all themes by changing the stamps used.
Mx 
the back with button detail and space to write the message


Sunday, 3 September 2017

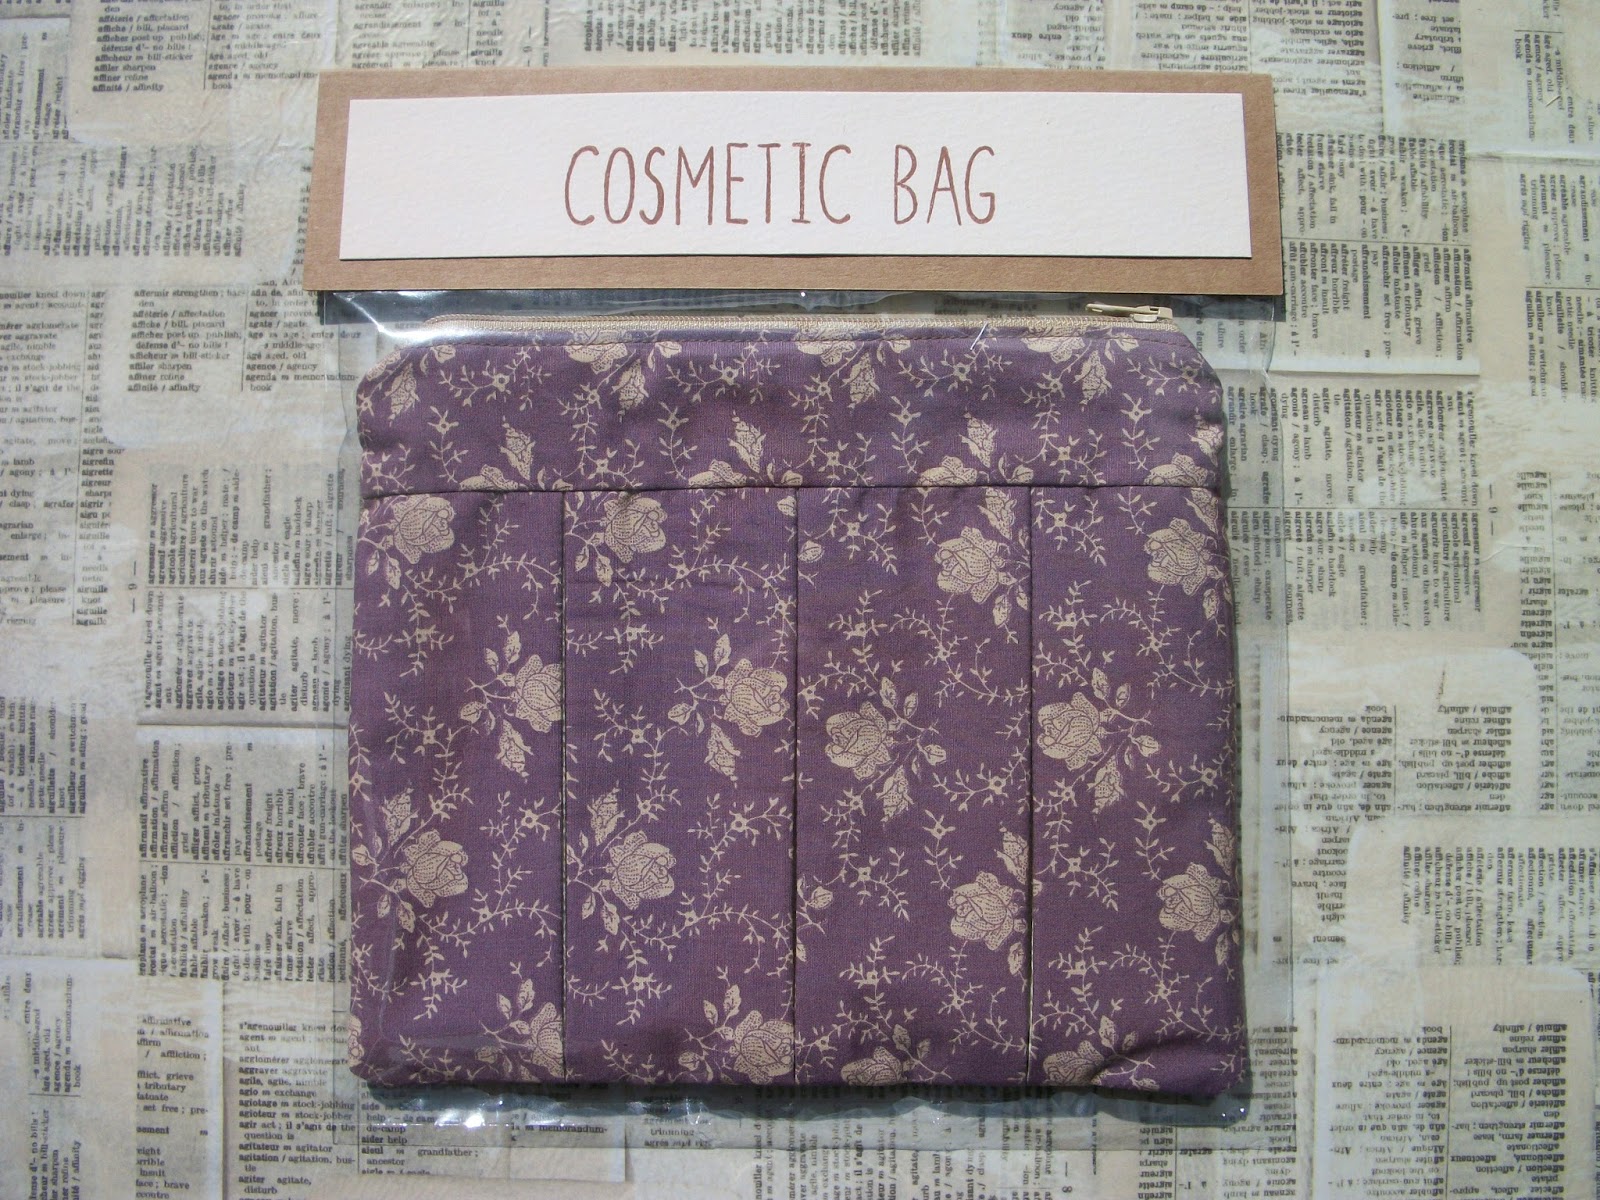
packaging pouches!!


  • Kraft & cream cardstock
  • Stampin up! 'skinny mini alphabet' & 'epic alphabet' stamp sets
  • Archival ' sepia' ink pad 
  • Card bags
I stitched these little pouches as gifts and wanted to package them nicely to send. I found clear card bags which fit the pouches in neatly and sealed them in. For the top piece, I measured the width of the bag and decided on the height I wanted, (bearing in mind the stamp size + matting). I cut the Kraft card to the right width and doubled the height. I folded the cardstock in half over the top of the bag and secured with staples. I then cut the cream cardstock to layer on top and cover the staples. Before gluing into place, I used the letter stamps to spell out the contents 'wash bag!' or 'cosmetic bag' to complete this simple packaging. 


Mx

Tuesday, 27 September 2016

Jingle all the way...

  • My favourite things - jingle all the way (stamps & dies)
  • SU!- wishing you
  • Lawn fawn- large stitched rectangle stackables
  • Lawn fawn- stitched borders
  • Neenah classic crest cardstock
  • Memento 'tuxedo black' ink pad
  • Copics- R24,27,46,59. E50,51,21,93. C00,1,2,5,7,9. G05,09,14. E30,31. 0.
  • HOTP patterned paper
  • wink of stella 'gold' glitter brush pen

I die cut my paper using the rectangle die and glued this onto my card blank. I cut a strip of white card, embossed stitched borders to either side of the panel. I stamped my sentiment and glued the panel on to the card, to match the sketch. I stamped coloured and diecut my Santa images and attached these onto the card using foam tape for dimension. The finishing touch was the gold glitter, on his belt buckle and the bow on the present.
Mx
 
 
challenges I would like to enter:
Paper players #314
ABC Christmas s is for... stitching


Sunday, 31 May 2015

feather fascinators

fascinators
 
As promised, I am sharing pictures of the fascinators I made with you. I bought some fabric and cut strips. I stitched these to prevent the edges fraying, then wrapped them around to shape them into flowers. These were sewn at the back to secure them. I then added loops of organza and satin ribbon and finished off with some black feathers. I backed the finished arrangement with a circle of black felt to keep it neat, securing this with fabric glue and blanket stitching. I then fixed the smallest of these onto a broach pin using thread. I added a fascinator back to the other one, using a hot glue gun, so it could be clipped into hair or pinned onto the outfit. I think its a great way to customise an outfit with something handmade and unique for a special occasion.
 
Mx

Wednesday, 21 January 2015

a totally great tote!!


this is a canvas tote I have free motion machine stitched some applique onto. it's quite simple to do, and although I did ok for my first attempt, I do think practise will make perfect !!
 
 I bought the blank canvas tote from hobby craft. I used heat n bond on to some tilde fabric I had and die cut the letters and butterflies using some of my sizzix dies. I then bonded my shapes where I wanted them and free motion stitched around the outline to secure the pieces in place.
 
Mx