Showing posts with label santa. Show all posts

Thursday, 7 December 2017

Santa's sleigh ride

  • Hunkydory festive elegance luxury card collection: Santa's sleigh ride
  • Hunkydory essential book of Christmas sentiments
  • Paper smooches Christmas words 2 die
  • red cardstock, silver & gold mirri card
  • A5, 7x7" & 6x6" card blanks

For the large square card, I mat and layered the cream cardstock onto the card front, to feature the border across the bottom edge. I then positioned the image topper with the sentiment beneath, both on foam pads. I cut down the coordinating insert to fit the inside of the card to finish.
inside
With the A5 card, I covered the card front with the cardstock. I then glued the topper and frame pieces to the top section of the card, all on foam for dimension. I chose a sentiment from the essential book to sit beneath. With the insert, I trimmed this down to centralise the message inside the card.
inside
For the final card, I mat and layered the 6" square card with gold mirri and the printed santa sleigh cardstock. I die cut the 'seasons greetings' from gold and red and glued together offset to create a gold shadow effect. I then positioned the sentiment onto the space beneath the image to finish the card front. Once again, I added the coordinating insert to fit the inside of the card.
inside
Mx

Monday, 4 December 2017

Santa Claus is Coming to Town

  • Hunkydory Christmas classics Luxury card collection: Santa Claus is Coming to Town
  • Hunkydory second little book of Christmas
  • Hunkydory essential book of Christmas sentiments
  • cardstock from various other Hunkydory collections
  • silver mirri card
  • A5, DL, 5x7", 6x4" & 6x6" white card blanks
For this DL card, I made a feature of the printed Santa image on one sheet of cardstock. I simply covered the card front with the cardstock and finished with a little sentiment from the collection. I added the coordinating section of insert to the inside of the card.
inside
I used the remaining cardstock to cover this A5 card. I matted the little book page onto silver mirri card to create a topper and finished with an essential book sentiment. I trimmed the insert down to cover the inside of the card and add the message.
inside
I took the second sheet of cardstock from the collection and created this A5 card. I cut the cardstock to fit the card front, with the border across the base. I trimmed down the other coordinating little book image to fit neatly in the frame. I glued the image and frame to the centre of the top panel of cardstock. I found a message from the essential book to compliment the design and positioned this on the printed border. I added the insert to the inside of the card.
inside
I positioned the border vertically on this square card to ground the large sentiment. I cut the cardstock to fill the card front. I then added the sentiment topper overlapping the border edge. Beside the sentiment, I glued the Santa image topper. I trimmed the insert down to centre the message inside the card.
inside
For this 5x7" landscape card, I pieced together an offcut of red cardstock from this collection alongside a neutral piece from another collection. I cut the cardstock to fit the card front, with a border strip covering the join. I added the little topper, edged with the same print as the border strip, off centre on the card. I completed the design with an essential book sentiment.
I used another of the small toppers from the collection, along with various offcuts of cardstock to create this 6x4" card. I pieced together the card front with a green strip of card from this set, edged with the coordinating red cardstock and border left over from another set. I positioned the essential book sentiment across the border at the top of the card and placed the long, thin Santa topper beneath on the green section.
Following the same design concept of using up remaining pieces of cardstock, I was able to make this 6" square card. The join between the cardstocks was edged with a fine green and gold ribbon this time, secured behind the cardstock panels before they were glued to the card front. I cut down a little book page to fill the frame, left over from this collection, to create the topper. I finished the card with the remaining sentiment, centred on the bottom border.
I found another piece of the cream cardstock used above, large enough to cover a 6x4" landscape card blank. I used a border strip to break up the plainer cardstock with a splash of colour. The topper chosen from the essential book sat across this border. I then angled the topper image onto the matching frame to create the focal point on the card.
Mx

Wednesday, 15 November 2017

Christmas is coming...

  • Hunkydory Christmas classics luxury card collection: Christmas is coming...
  • Hunkydory second little book of Christmas
  • Hunkydory essential book of Christmas sentiments
  • gold mirri card
  • gold ribbon
  • A5, DL, 6x6" & 6x4" portrait and landscape white card blanks

For this A5 card, I used a little book image to create a nice big topper. I simply matted the page onto gold mirri and covered the card front with the cardstock. I then glued the topper in the centre with an essential book sentiment beneath, raised up on foam pads. I trimmed the coordinating insert down to finish the inside.
inside

With the 6" square card, I cut off the top border and turned the remaining cardstock around so the border ran vertical. I mat and layered this onto gold mirri to fill the card front. I then arranged the topper and coordinating tag from the collection onto the card. I glued the topper flat, raised the tag on foam and finished with a gold ribbon bow. The remainder of the insert sheet was trimmed down, so the inside of the card matched the backing paper on the front.
inside
 
Using the other sheet of cardstock, I created this DL card to make a feature of the printed image. I simply cut the cardstock down to fill the card front and finished with the coordinating 'north pole' sentiment glued down with foam pads. I trimmed the sentiment section of the insert down to fit inside.
inside

I switched the vertical stripes of the cardstock to horizontal to work with the oval topper in the collection. I simply cut the cardstock to fit the 6x4" card front. I then added the image and sentiment toppers into place, again using foam for dimension.

For the final card, I pieced the front with the striped card and the cut off border from the first sheet. I edged the border with gold mirri card to create a neat finish. I then positioned the little train topper alongside a sentiment from the essential book to complete the card.

Mx

Thursday, 19 October 2017

The north pole

  • Hunkydory cute Christmas luxury card collection: the north pole
  • 8x8" & 6x6" card blanks
  • Gold mirri card

For the 8" card, I cut a mat of mirri card to fit the card front. I then trimmed the cardstock down and layered this onto the card, with the border down the folded edge. I then added the snow globe topper and sentiment on foam pads to create dimension.

inside

I created the first 6" card using the other patterned cardstock from the set. The decoupage layers for the snow globe fit the printed images on this sheet. I cut the card to sit on the card front with a mat of mirri card. I then layered up the santa and added the north pole beside him to add the mirri shimmer, give the card dimension and complete the scene. The finishing touch was a sentiment above.

inside

I used the remaining cardstock for the final card. I trimmed the border to sit across the base of the card and glued it down flat. I then measured and cut the printed North pole piece to fill the space above. I then added the postcard topper, positioned to be framed by the north pole sign.
inside
Mx


Wednesday, 14 December 2016

Santa wishes...


  • SU!- Christmas wishes
  • Archival 'vermillion' ink pad
  • Memento 'tuxedo black' ink pad
  • Copic- E50,51,21. C1,00.
  • Hotp patterned paper
  • Baker's twine

I stamped the image using red and black ink. I then used my copics to colour the face and add shading to the beard. To complete the sketch, I added patterned paper to the front of the card blank and matted the image panel onto some coordinating green paper. I wrapped bakers twine around this panel and glued it onto the card, using foam tape for dimension. I wanted to keep this one really quick and simple since Christmas is almost here and I haven't made enough cards yet!!
 
Mx

Challenges I'd like to enter:
Freshly made sketches #267
ABC Christmas 'y for yikes & z for zoom'

Wednesday, 2 November 2016

The Santa Claus....


  • My favourite things - jingle all the way (stamp & dies)
  • SU!- flurry of wishes 
  • Lawn fawn- stitched borders 
  • Tim holtz 'black soot' distress ink pad
  • Memento 'tuxedo black' ink pad 
  • Copics
  • Atyou spica pens- red & gold
  • White cardstock 
I folded a card to make a card blank and inked it black. I then cut a white cardstock panel and added 3 embossed stitched lines using a metal die. I stamped a sentiment below and coloured the letters with red glitter pen. For the image, I stamped, coloured and diecut the Santa and used foam to attach him to the card for added dimension. I repeated the same card with a different santa stamp from the set to create a landscape version of the card.
Mx


Challenges I would like to enter:
Seven hills craft challenge 'favourite Christmas song/movie's (the santa Claus 1994- me and my sister have watched it every year since it come out when we were little)

Tuesday, 27 September 2016

Jingle all the way...

  • My favourite things - jingle all the way (stamps & dies)
  • SU!- wishing you
  • Lawn fawn- large stitched rectangle stackables
  • Lawn fawn- stitched borders
  • Neenah classic crest cardstock
  • Memento 'tuxedo black' ink pad
  • Copics- R24,27,46,59. E50,51,21,93. C00,1,2,5,7,9. G05,09,14. E30,31. 0.
  • HOTP patterned paper
  • wink of stella 'gold' glitter brush pen

I die cut my paper using the rectangle die and glued this onto my card blank. I cut a strip of white card, embossed stitched borders to either side of the panel. I stamped my sentiment and glued the panel on to the card, to match the sketch. I stamped coloured and diecut my Santa images and attached these onto the card using foam tape for dimension. The finishing touch was the gold glitter, on his belt buckle and the bow on the present.
Mx
 
 
challenges I would like to enter:
Paper players #314
ABC Christmas s is for... stitching


Sunday, 27 September 2015

a present from santa


  • my favourite things- jingle all the way stamps
  • SU!- holiday home stamp set, banners framelit dies and scallop boarder punch
  • memento- tuxedo black
  • copics
  • craftwork cards coloured card blank and cardstock plus kraft cardstock
  • wink of stella
  • glossy accents
I used the banners dies to create my mats, I stamped the large kraft banner with my sentiment. I placed a small green banner just underneath and punched a scallop edge on a strip of green card to go along the top edge of my card blank. I stamped, coloured and fussy cut my santa image and glued it to my card with foam squares. to finish the card, i added a bit of glitter to the presents bow and a bit of gloss to Santa's belt.
 Mx

I would like to enter this challenge:
 

Tuesday, 25 August 2015

super santa!!

 
  • kraft 6x4" landscape card blank
  • red and kraft cardstock
  • my favourite things- 'jingle all the way' stamps & dies
  • memento ink pad- tuxedo black
  • archival ink pad- carnation red
  • ranger glossy accents
  • copics- E01,21,51, R24,27,29, Y35, C00,0,1,7,8,9
 
I glued a piece of red cardstock at an angle on to my card blank (to follow the sketch), then used scissors to trim the excess off the top. I marked out my mat of kraft card and cut it out slightly larger than I needed. I stamped this piece with my sentiment all over, using my acrylic block to line the words up. I glued the mat down and again trimmed the excess. I stamped one of the santa images and coloured it with copics. I then die cut this and added it to my card using foam tape. the finishing touch was some glossy accents on the belt and boots. I think this makes a super fun Christmas card and it was so easy to do...
Mx
 
challenges I would like to enter:

Tuesday, 18 November 2014

chocolate box


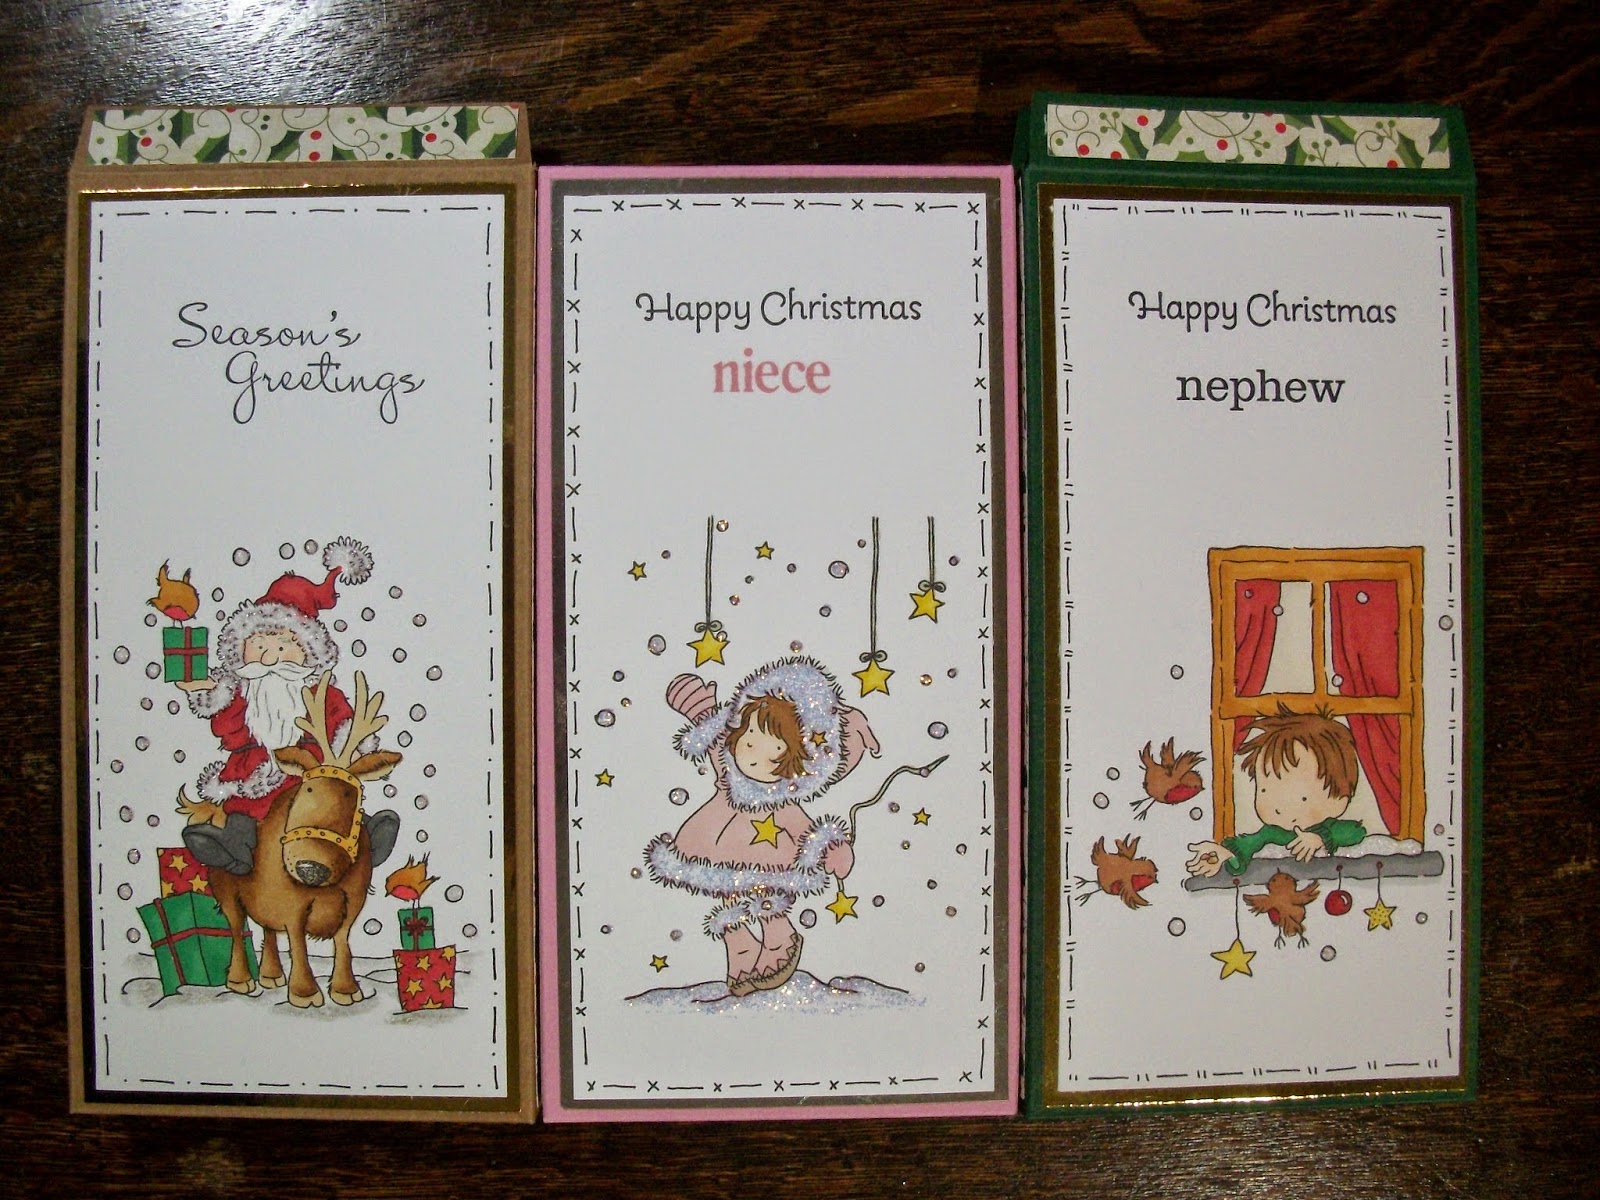
I've made these chocolate box cards to send the kids at christmas. I bought a chocolate bar and measured it to calculate the dimensions of the box. I took an A4 sheet of card and scored the net. folded it and cut it out. I then glued the box together. I then stamped and coloured an image from lili of the valley with a stampin up! sentiment on digi cardstock. I created a freehand border using the sekura micron pen, and added glitter to the images too. I layered mirri card behind the image and added this as a decorative panel to the front of the box. I also found coordinating papers to decorate the sides and top of the box. The chocolate was then sealed inside ready for the kids to open at Christmas.


I think this is a great idea to combine a card and a gift as the flap on the box creates somewhere to write your message and the box holds the gift. you can customise the boxes to have the card open at the front or back (depending on which way up you use the template!!) or make the box to fit a different sized gift. These aren't just for Christmas, change the image and you can send them any time of the year.
 
challenge #20 - Box it up!

'Merry Christmas'

Mx