Showing posts with label boxes. Show all posts

Monday, 12 March 2018

baby christening


for the card:
  • LOTV- baby christening
  • LOTV- for her sentiments
  • LOTV- vintage labels occasions
  • tattered lace- circle dies
  • LOTV- country lady paper pad
  • memento 'tuxedo black' ink pad
  • Neenah classic crest cardstock
  • copics- skin:E50,51,21,93. window:E31,43,55,57,59.BG70. dress:Wo,1,2,3. pink:R81,83,95,56.RV91. green:YG93
  • kraft cardstock
  • vintage lace ribbon
  • paper roses 
      
 I cut my background papers to size and glued the top section directly to the card blank. I added ribbon to the top edge of the second piece, securing the ribbon ends on the reverse, then glued this onto the front of my card blank. I stamped and coloured my main image on Neenah cardstock, then die cut into a circle. I diecut a larger circle from kraft to mat and layer. I created a custom sentiment by combining several stamps and masking off certain sections to create the saying I wanted. I die cut this into a smaller circle and again matted with a larger kraft layer. Once all of the elements were prepared, I decided on my floral arrangement. As I was using paper roses on wires, I put small holes into the toppers where I would need them and pushed the wire through. I added a small amount of glue directly beneath each rose, then for extra security, I taped the wire in place at the back of the topper.(If you were using flowers without wires or prefer to cut the wires off, you would attach the topper to the card then simply glue the flowers on using hot glue or silicon glue gel.) Finally, I added the completed toppers to my card using foam for dimension.


for the box:
  • a3 kraft cardstock
  • lawn fawn- Finley's ABCs
  • LOTV- country lady paper pad
As the flowers are raised from the card, I made a simple box with lift off lid to fit my card perfectly, instead of an envelope. I then decorated the lid with die cut letters to spell out the name, using the left over paper from the card. I think this adds an extra personal touch and a professional finish.

Mx
I'd like to enter the following challenges:

Wednesday, 14 December 2016

shoe perfect...

 
  • Do crafts artiste acrylic paint - iris & metallic silver
  • Studio paint - charcoal black
  • Tim holtz 'terminology' tissue wrap
  • Anna Marie designs - flowers & embellishments
  • Black satin ribbon
I covered the mdf shoe blanks with tissue wrap. I then coated them with the lilac paint. I drew the line to create the platform area and painted below the line with silver edged. I edged this with a black line of paint, ensuring it lined through on all sides when the pieces were assembled. To complete, I tied bows and created an arrangement of flowers, then used hot glue to secure them in place.


As this was made as a gift, I created a box for it using black cardstock and two sheets of acetate. Once opened, it can be used to display cards and hold photos, or just placed out on display as home décor.
 
Mx
 
challenge I would like to enter:

Thursday, 8 December 2016

letter rack...


  • mdf blank
  • ranger studio paint- traditional tan & stable brown
  • ranger glue n' seal - matt
  • tim holtz tissue wrap
  • golden gel medium -matt finish
  • adhesive backed felt pads
I made this letter rack using an mdf blank coated with some cream paint. I selected tissue wrap to cover the outer faces of the rack. I cut the pieces roughly into shape and glued them into place, sanding the edges once dry for a neat finish. I then coated the box with another layer of cream, to dull the print of the tissue giving a much softer look. I finished the edges using a small amount of brown paint applied with a sponge. This creates a distressed vintage feel to enhance the paper print. To seal the piece, I coated it with the gel medium. I added felt pads to the base to prevent the rack from scratching work surfaces.
 
  • Kraft & cream cardstock
  • SU! skinny mini alphabet stamp set
  • archival ink pad - sepia
  • red lining tape
  • acetate
As this one was made as a gift, I also created customised packaging using Kraft card. I made the box the perfect size to hold the letter rack snugly and provide some protection from knocks. The window of acetate provides a sneaky peek at what's inside, with the lettering on the band to let you know what it is. I think it provides a professional finish, with that extra attention to detail that makes it feel crafted rather than just 'homemade'... as well as making it easier to wrap up for Christmas !!
 
I would like to enter the following challenge:
 
Mx

Tuesday, 27 September 2016

butterfly box...


reverse of tag
  • Purple and white cardstock
  • SU! spring flowers embossing folder
  • SU! butterflies thinlits
  • SU! made for you & Christmas wishes stamps
  • Sizzix scalloped circle dies
I love making gift packaging, I think it makes receiving that bit more special. I made a simple gift box and a tag to coordinate and finished it with some bakers twine to secure the tag.
 
I also handmade the gifts for my special friend. I wood block printed a tote bag using a butterfly design block and purple fabric paint. I also painted this mdf heart, click here to find out how I made this!!
 
  
Mx 

Thursday, 24 September 2015

all wrapped up...


  • A3 kraft cardstock- cut to 30x29cm
  • cream card stock- cut to 14x7cm 
  • coloured bakers twine (150cm)
  • SU! little letters thinlit dies
To make the box, I scored the kraft cardstock and cut the flaps, to create the net below. I then added glue the appropriate areas and stuck them together.

 
 To make the label I cut my cream cardstock to 14x7cm and cut holes in all four corners. I used thinlit dies to cut out my letters to just leave a negative, you could cut the letters out of a coloured cardstock. another alterative would be to stamp on to the label. I added bakers twines through the holes on one short edge, then crossed them underneath, before bringing them up through the holes on the opposite edge. I tied the ends in a bow to keep the label on. I used coloured twine to coordinate with the colour of scarf in the box.
I chose to add the label in this way so the box is kept plain making it easy to reuse.
Mx

Tuesday, 22 September 2015

a notable gift...

 
i made this memo block by painting an mdf blank with some cream studio paint. i selected a section of the tissue wrap to cover each side of the box, and glued these down. once the glue had dried, i gave the box another coat of cream paint. this dulls the print of the tissue to give a much softer look, i just used cream to keep it quite neutral but you could add a wash of colour. i used a small amount of brown to the edges using a sponge, to give a distressed look and make it feel more vintage. i used the golden gel medium to seal and give a protective coat. i added felt to the underneath to make sure the memo block didn't scratch any work surfaces. i bought  white memo pad/blocks (the right size to fit inside) from ebay and added a couple of small pencils, to complete the memo block.
i think this makes a great gift as it would be useful to most people, the natural colour also means it will go with most décor.
Mx

Monday, 22 December 2014

delightful droplets ...


I made this simple pair of earrings for my nana. they are made from a head pin and a simple white drop bead, then an eye pin and a pink crystal bead. I connected them all together and attached them onto a clip-on earring finding. To make the earrings feel more special, I hand made this little gift box for them using kraft cardstock and acetate, embellished with patterned paper and ribbon.
Mx 

Saturday, 6 December 2014

spread the christmas cheer...

 
Here is another of my chocolate box cards. Just a quick post to say thank you to everyone for their lovely comments on my previous post with the box cards... I'm glad you're enjoying my free template. If you haven't seen it yet, here's the link to save you searching ( http://craftylilmouse.blogspot.co.uk/2014/11/chocolate-box.html )
 
Please share pictures of your makes, as I'd love to see what creative things you have made !!
 
Mx


Tuesday, 18 November 2014

chocolate box


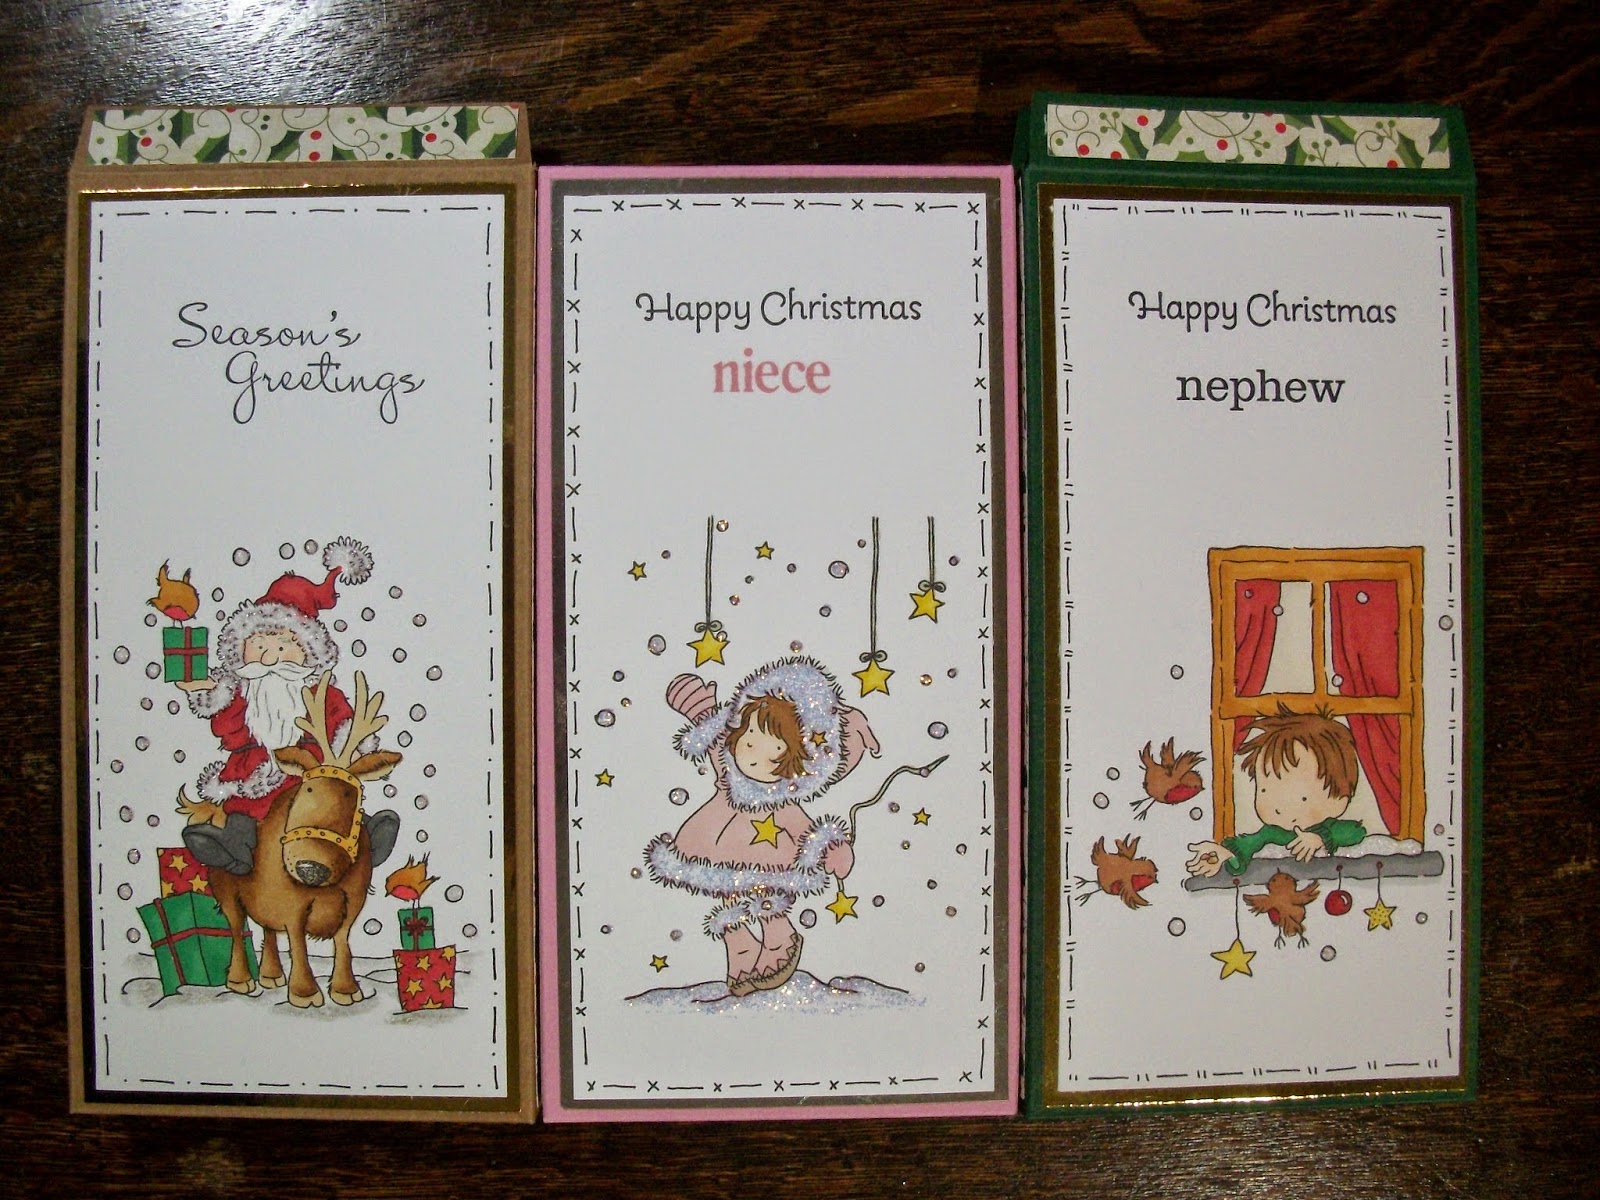
I've made these chocolate box cards to send the kids at christmas. I bought a chocolate bar and measured it to calculate the dimensions of the box. I took an A4 sheet of card and scored the net. folded it and cut it out. I then glued the box together. I then stamped and coloured an image from lili of the valley with a stampin up! sentiment on digi cardstock. I created a freehand border using the sekura micron pen, and added glitter to the images too. I layered mirri card behind the image and added this as a decorative panel to the front of the box. I also found coordinating papers to decorate the sides and top of the box. The chocolate was then sealed inside ready for the kids to open at Christmas.


I think this is a great idea to combine a card and a gift as the flap on the box creates somewhere to write your message and the box holds the gift. you can customise the boxes to have the card open at the front or back (depending on which way up you use the template!!) or make the box to fit a different sized gift. These aren't just for Christmas, change the image and you can send them any time of the year.
 
challenge #20 - Box it up!

'Merry Christmas'

Mx

Tuesday, 24 December 2013

12 days of christmas...

so ive been a little busy this year and haven't done an official 12 projects for Christmas, but ive put together some of my favourite projects from this year ...
 
 
Christmas cake simply decorated with icing, using the holly leaf cutter, with a little help from the family in the spirit of Christmas !!


I used craftwork card products to create this door hanger... you could take this idea to make your own version using any scraps and off cuts of paper or card left over from this seasons makes!!


I hope you have all enjoyed my makes this year, have a lovely Christmas and a fab new year !!
 
 Mx

Wednesday, 27 November 2013

a pretty pink parcel ...


stamp: moonlight wishes from LOTV
ink: promarkers, memento ink pad (tuxedo black) and claudine hellmuth studio paint (painterly pink)
cardstock: mirri card, craftwork cards digi cardstock
other: stickles (stardust), organza ribbon, martha stewart border punch (snowflakes), papier mache box from the works (also available from other stores... the range, hobby craft etc)

i decorated this cute little box as an alternative way to wrap up a christmas gift. i stamped this lovely image from LOTV, and coloured her in soft pastel tones with promarkers. i chose a few different shades of pink for her stocking to coordinate with the studio paint i used on the box (this is a good place to start as the box will take several coats to cover and need drying time too !!) i cut the image into a simple rectangle and rounded the corners for a nice shape. i matted the image onto a piece of mirri card. the ribbon was attached across the back then hidden under a further sheet of craftwork card for a neat finish. it also makes a better surface to write a message on. for the final touch i added some snowflakes, which i cut with the punch and glittered using stickles. the great thing about it is that when the ribbon is untied the tag comes off leaving a plain pink box ready for reusing ... a pretty and planet friendly way to wrap up your pressies !! 


Mx

Sunday, 10 February 2013

valentines day cards!!

 well since im not the worlds most mushy person, i enlisted the help of mum to whip up this batch of valentines cards. hope you like them all, i know i am pleased with how they all turned out!!
 first is mums card, im so proud as she did it by herself. she used a stampin up! stamp set (you are loved) and some embossing and cutting dies on the big shot. the page out of an old book, kraft card stock, an archival ink pad in verillon, some bakers twine and a button.
 i made a no glue box to match using kraft cardstock, then decorated it with a page of old book, archival ink pad in vermillion, and the stamp set (you are loved)
from stampin up!
 this is my card i used the owl builder punch & the bird builder punch both from stampin up! kraft cardstock, brown,white & cream cardstock, pages from an old book and various tim holtz distress ink pads.
 i looked for certain words to spell out a valentines message for the front of my card instead of stamping one, it did take a long time but i think
it was worth it in the end.
this card was a combined effort, the base is an acetate card blank i made, shaped dies from stampin up! and oval dies from sizzix, stamps from the you are loved set from stampin up! and some ribbon to finish.
(the paper was out of a 12x12" scrapbook pad
which i dont have the name of now)
inside, the acetate card is finished off with the same diecut shapes and a message from the you are loved stamp set by stampin up!
 
Mx