Showing posts with label home décor. Show all posts

Friday, 1 March 2019

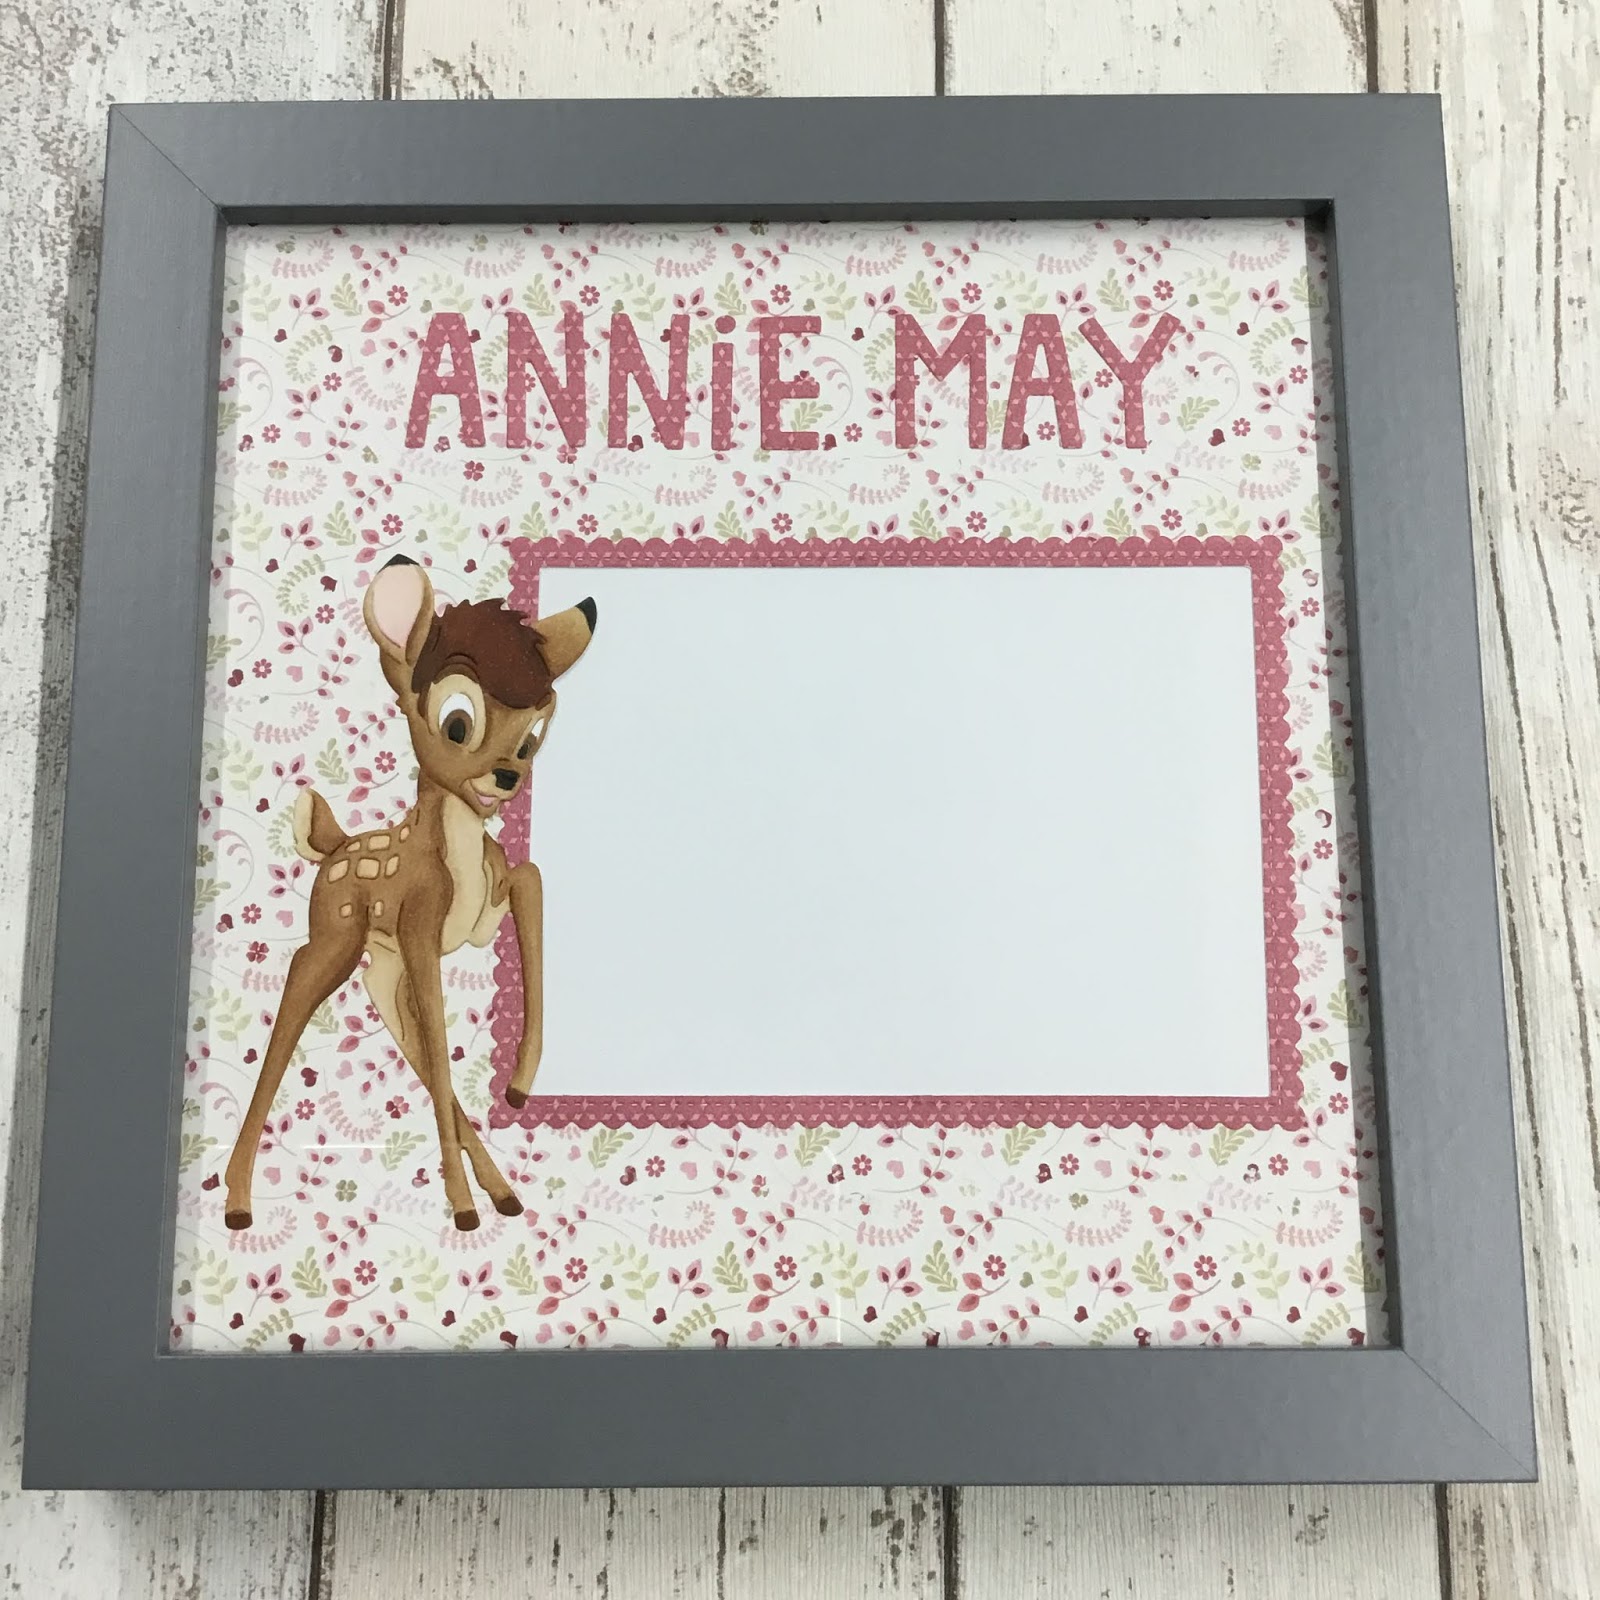
Bambi frame gift


  • Disney bambi metal die
  • Nit wit & LOTV- always & forever paper pad
  • My favourite things- stitch rectangle scallop edge frames
  • Lawn fawn- finley’s ABC’s dies
  • Copic friendly cardstock
  • Copic markers- E30,31,34,35,37,39,57,59. W8,10. R000,81,83.
  • Grey 8” square frame (mine was from wilko)
To make this frame gift, I selected two pieces of coordinating paper. I chose one 8x8 piece for the background and the other to die cut from for embellishments. I diecut the frame and letters to spell the name from the patterned paper. I also diecut my bambi image from white card and added tape to the back, whilst all the pieces where still in the metal die, to hold the sections together. I then removed the bambi from the die and added back in any pieces that had fallen out. I used copic markers to colour the image, using a picture online as reference. 
I decided on the best layout and glued all of the pieces onto the background paper. I used a craft knife to remove any paper showing through the die-cut frame to create an aperture for a photo to sit behind.
I slotted this finished piece into the frame and added a sheet of white card behind, to make it look nice for gifting. I prefer to leave it for the child’s parents to decide which picture they want to display rather than selecting one you like.
Mx

Tuesday, 24 January 2017

50!!

 
  • MDF/ laser cut wooden shape
  • melody ross- homespun chic 12x12" paper pad
  • studio paint and brushes
  • anna marie designs- flowers etc
  • pink ribbon
  • scrabble tiles (travel edition)
 
I painted the edges and the base with brown paint. I covered the front and back of the '50' with patterned paper. I placed the 50 into the base. I then created arrangements of fibres and flowers for decoration, which I secured in place with hot glue. I also added 'mum' in small scrabble tiles using the hot glue gun. I finished it with a ribbon around the base and tied it in a bow, then added another bow onto the corner arrangement.
 
Mx
 
Challenges I'd like to enter:

Wednesday, 14 December 2016

shoe perfect...

 
  • Do crafts artiste acrylic paint - iris & metallic silver
  • Studio paint - charcoal black
  • Tim holtz 'terminology' tissue wrap
  • Anna Marie designs - flowers & embellishments
  • Black satin ribbon
I covered the mdf shoe blanks with tissue wrap. I then coated them with the lilac paint. I drew the line to create the platform area and painted below the line with silver edged. I edged this with a black line of paint, ensuring it lined through on all sides when the pieces were assembled. To complete, I tied bows and created an arrangement of flowers, then used hot glue to secure them in place.


As this was made as a gift, I created a box for it using black cardstock and two sheets of acetate. Once opened, it can be used to display cards and hold photos, or just placed out on display as home décor.
 
Mx
 
challenge I would like to enter:

Friday, 9 December 2016

don't forget the gifts...

 
  • mdf blank
  • ranger studio paint
  • ranger glue n' seal - matt
  • tim holtz tissue wrap
  • golden gel medium - matt finish
  • adhesive backed felt pads

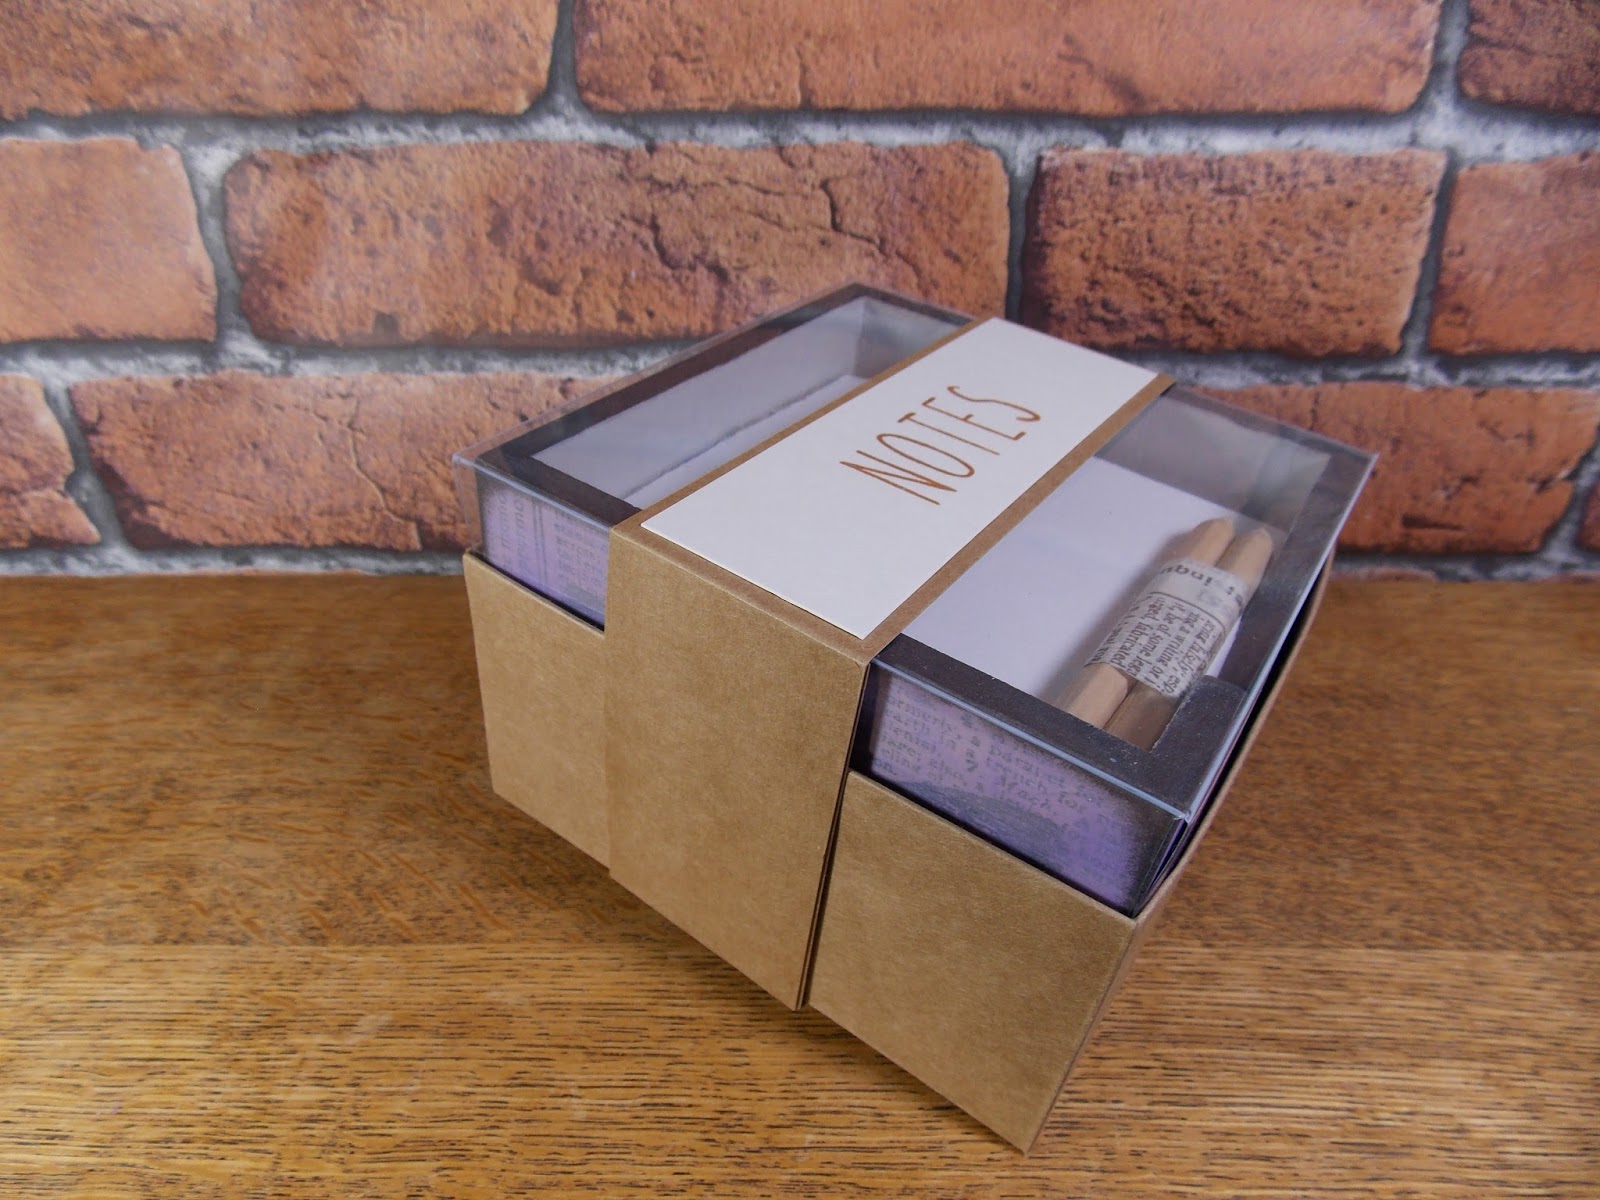
As the memo blocks from last year were a success and appreciated by those who received them as a gift, I decided to make another this year. I painted the inside of the mdf blank with grey. For the outside, I selected pieces of tissue wrap to add a butterfly to each side of the box. I shaped, glued, then sanded the tissue pieces to cover the outside. I then gave the box a coat of paint to soften the print. I used purple to add a wash of the recipients favourite colour. I sponged a small amount of black on the edges. I added a protective seal using the golden gel medium and felt pads on the base to protect work surfaces from scratches. The right size of white memo pad was purchased on ebay to sit inside, along with a couple of small pencils wrapped in the coordinating tissue to finish it off. 


As before, I packaged the memo block in kraft cardstock and acetate, with a hand stamped wrap ready for gifting.

I would like to enter the following challenge:
  
Mx 


Thursday, 8 December 2016

letter rack...


  • mdf blank
  • ranger studio paint- traditional tan & stable brown
  • ranger glue n' seal - matt
  • tim holtz tissue wrap
  • golden gel medium -matt finish
  • adhesive backed felt pads
I made this letter rack using an mdf blank coated with some cream paint. I selected tissue wrap to cover the outer faces of the rack. I cut the pieces roughly into shape and glued them into place, sanding the edges once dry for a neat finish. I then coated the box with another layer of cream, to dull the print of the tissue giving a much softer look. I finished the edges using a small amount of brown paint applied with a sponge. This creates a distressed vintage feel to enhance the paper print. To seal the piece, I coated it with the gel medium. I added felt pads to the base to prevent the rack from scratching work surfaces.
 
  • Kraft & cream cardstock
  • SU! skinny mini alphabet stamp set
  • archival ink pad - sepia
  • red lining tape
  • acetate
As this one was made as a gift, I also created customised packaging using Kraft card. I made the box the perfect size to hold the letter rack snugly and provide some protection from knocks. The window of acetate provides a sneaky peek at what's inside, with the lettering on the band to let you know what it is. I think it provides a professional finish, with that extra attention to detail that makes it feel crafted rather than just 'homemade'... as well as making it easier to wrap up for Christmas !!
 
I would like to enter the following challenge:
 
Mx

Tuesday, 27 September 2016

butterfly box...


reverse of tag
  • Purple and white cardstock
  • SU! spring flowers embossing folder
  • SU! butterflies thinlits
  • SU! made for you & Christmas wishes stamps
  • Sizzix scalloped circle dies
I love making gift packaging, I think it makes receiving that bit more special. I made a simple gift box and a tag to coordinate and finished it with some bakers twine to secure the tag.
 
I also handmade the gifts for my special friend. I wood block printed a tote bag using a butterfly design block and purple fabric paint. I also painted this mdf heart, click here to find out how I made this!!
 
  
Mx 

friendly butterfly

front


reverse

  • Heart shaped MDF blank
  • tim holtz tissue wrap- terminology
  • Claudine hellmuth studio paints and brushes
  • stampendous- jumbo butterfly trio
  • dreamees sentiment stamp
  • some lilac ribbon
I created this door hanger by covering the mdf shape with the tissue using ranger matt medium. I then painted a layer of cream over the tissue and sponged some lilac paint around the edges. I stamped the sentiment and images with archival ink. I then painted the butterflies in lilac. I relined all of the black lines, with black paint for a crisp bold image. The final touch was some ribbon tied in a bow on either side with a loop to act as the hanger. 
 
Mx
 
I would like to enter the following challenge:


Tuesday, 22 September 2015

a notable gift...

 
i made this memo block by painting an mdf blank with some cream studio paint. i selected a section of the tissue wrap to cover each side of the box, and glued these down. once the glue had dried, i gave the box another coat of cream paint. this dulls the print of the tissue to give a much softer look, i just used cream to keep it quite neutral but you could add a wash of colour. i used a small amount of brown to the edges using a sponge, to give a distressed look and make it feel more vintage. i used the golden gel medium to seal and give a protective coat. i added felt to the underneath to make sure the memo block didn't scratch any work surfaces. i bought  white memo pad/blocks (the right size to fit inside) from ebay and added a couple of small pencils, to complete the memo block.
i think this makes a great gift as it would be useful to most people, the natural colour also means it will go with most décor.
Mx

Tuesday, 11 August 2015

fruity!!


I have decorated some tea towel as a gift and felt they needed some packaging.
 I cut 2 pieces of white card to 14x19cm, I used them as a guide to fold the 2 towels neatly and to the same size. I next made a label I cut a 14x4cm piece of cream card, I used coffee archival ink pad and the SU! skinny mini alphabet. then I cut a 35x5cm band of kraft card, this was scored at 15cm, 16.5cm, 31.5 & 33. glue is placed on the left over 2cm flap, the label  is added to one of the long sections and a handmade stamp added to the 2nd. the final thing to do was stack the tea towel, wrap the band around and glue the flap to join the band. I put the finished item into a card bag and sealed it, to keep the tea towels nice and clean.
 
check out how I made these tea towels, on my other blog here...

Mx


Sunday, 28 December 2014

seasonal stitching !!

 
Merry Christmas all.... I hope you had a lovely day !! I thought I would quickly share this little felt bauble with you between the festivities. the background is similar to the Christmas pudding I made before. I cut 2 circles of blue felt, then added a wavey edged semi circle in sparkling white felt to the front piece. I satin stitched along the white and added some French knots as falling snow. using some green and brown embroidery threads, I also added a few trees in the background. I cut out the reindeer using the mini reindeer sizzix mover and shakers die by tim holtz. I then carefully stitched around him to secure him to the bauble. the final step was to stuff and blanket stitch the back and front together, including some matching ribbon at the top for hanging.
 
Mx

Wednesday, 10 September 2014

off the page crafting !!

since I haven't been blogging much whilst we have had builders in at home, I thought I would share what I have been doing. I haven't been able to craft much, so I kept busy with some upcycling and home décor projects ...


 I bought this chest of drawers and a matching dressing table (I forgot the take a 'before' picture of that). although it was painted a lovely grey colour, it didn't match the colour scheme for my bedroom. I decided to paint it using autentico chalk paint in rose, finished using their clear wax sealer. the paint went on easy and the furniture needed very little prep, just be aware that it does dry very quickly!! this is how they turned out...


i had been wanting my granddad's old bedside cabinet, so I asked my nana if I could have it... it took a little persuading but she gave me it with pleasure in the end. I sanded it down as there were a few little chips (which I fillered) and it had a polished surface.  I then painted it to match and added a matching knob. I also lined the shelf and cupboard using some pretty wallpaper. I think it looks great now and means so much more because it was my granddad's...

after sanding


after painting
I had bought some vintage lace cheap from an antiques fair, that my dad took us too. I used it as a simple way to add detail to a pair of old bedside lamps. I marked in pencil where I wanted my trim to be and used fabric glue to stick the lace on to them ...


before


after

 I also did the same to a cream lamp shade (from argos).


I'm pretty pleased with how my upcycling has turned out, adding some crafty touches to my new room. I must say a big thank you to my dad for helping me with my projects. I hope you have been inspired to have fun customizing some pieces too!!

Mx