Sunday, 28 December 2014

seasonal stitching !!

 
Merry Christmas all.... I hope you had a lovely day !! I thought I would quickly share this little felt bauble with you between the festivities. the background is similar to the Christmas pudding I made before. I cut 2 circles of blue felt, then added a wavey edged semi circle in sparkling white felt to the front piece. I satin stitched along the white and added some French knots as falling snow. using some green and brown embroidery threads, I also added a few trees in the background. I cut out the reindeer using the mini reindeer sizzix mover and shakers die by tim holtz. I then carefully stitched around him to secure him to the bauble. the final step was to stuff and blanket stitch the back and front together, including some matching ribbon at the top for hanging.
 
Mx

Monday, 22 December 2014

delightful droplets ...


I made this simple pair of earrings for my nana. they are made from a head pin and a simple white drop bead, then an eye pin and a pink crystal bead. I connected them all together and attached them onto a clip-on earring finding. To make the earrings feel more special, I hand made this little gift box for them using kraft cardstock and acetate, embellished with patterned paper and ribbon.
Mx 

a tweet little treat !!

 
these pegs are a fun and easy to make gift idea. I bought some plain wooden pegs, painted them and then hot glued an embellishment on. I choose these little wooden bird buttons I got from homebird house. (of course you could use whatever you liked... the idea is to customize them for yourself or someone special !!)
I added a strong magnet (cut into a strip) onto the back of each peg, making them perfect for holding notes on the fridge. as I was sending them as a gift, I made a presentation box/ packaging. for this I used a piece of card, cut into a strip and scored and folded into shape. It was very handy as they were a perfect fit for a 4x4 card bag.

Mx

Thursday, 18 December 2014

flower flourish...

 
to make this card I cut a piece of white card to shape, inked it using spun sugar tim holtz distress ink. I stamped the flourish from everything Eleanor (SU!) over the top in the same colour ink. I stamped 2 flowers from the flower shop stamp set (SU!) and coloured them with promarkers. I added a touch of glitter and punched them out using the pansy punch (SU!). I added this to my card using foam pads for dimension. I used the family sentiment die from tattered lace to die cut mum in white and glue this in place along the bottom edge. I added a final touch of glitter using a sakura pen along the edges of my pink panel.
 
Mx


Saturday, 6 December 2014

padded puddings!!

 
I've been hand sewing some tree decorations. these are my christmas puddings.. they are so cute and really simple to make. I took 2 felt circles (find a lid or any good size circle to draw around then cut it out). I also added a white half circle to make the icing, with the wiggly edge secured using satin stitch. I used french knots to create some texture on the main body of the pudding. the holly leaves were cut from some green felt and stitched into place at the top of the pudding with buttons for berries. I chose some gingham ribbon to be able to hang the puddings from the tree or cupboard handles. once everything was in place, I stitched the two halves together, (padded out with some wadding for nice fat puddings) using a decorative blanket stitch. 
 
I'm really pleased with how these have turned out. If you like them too, keep checking my blog as I'm busy stitching and creating more little bauble designs !!
 
Mx

spread the christmas cheer...

 
Here is another of my chocolate box cards. Just a quick post to say thank you to everyone for their lovely comments on my previous post with the box cards... I'm glad you're enjoying my free template. If you haven't seen it yet, here's the link to save you searching ( http://craftylilmouse.blogspot.co.uk/2014/11/chocolate-box.html )
 
Please share pictures of your makes, as I'd love to see what creative things you have made !!
 
Mx


Tuesday, 18 November 2014

chocolate box


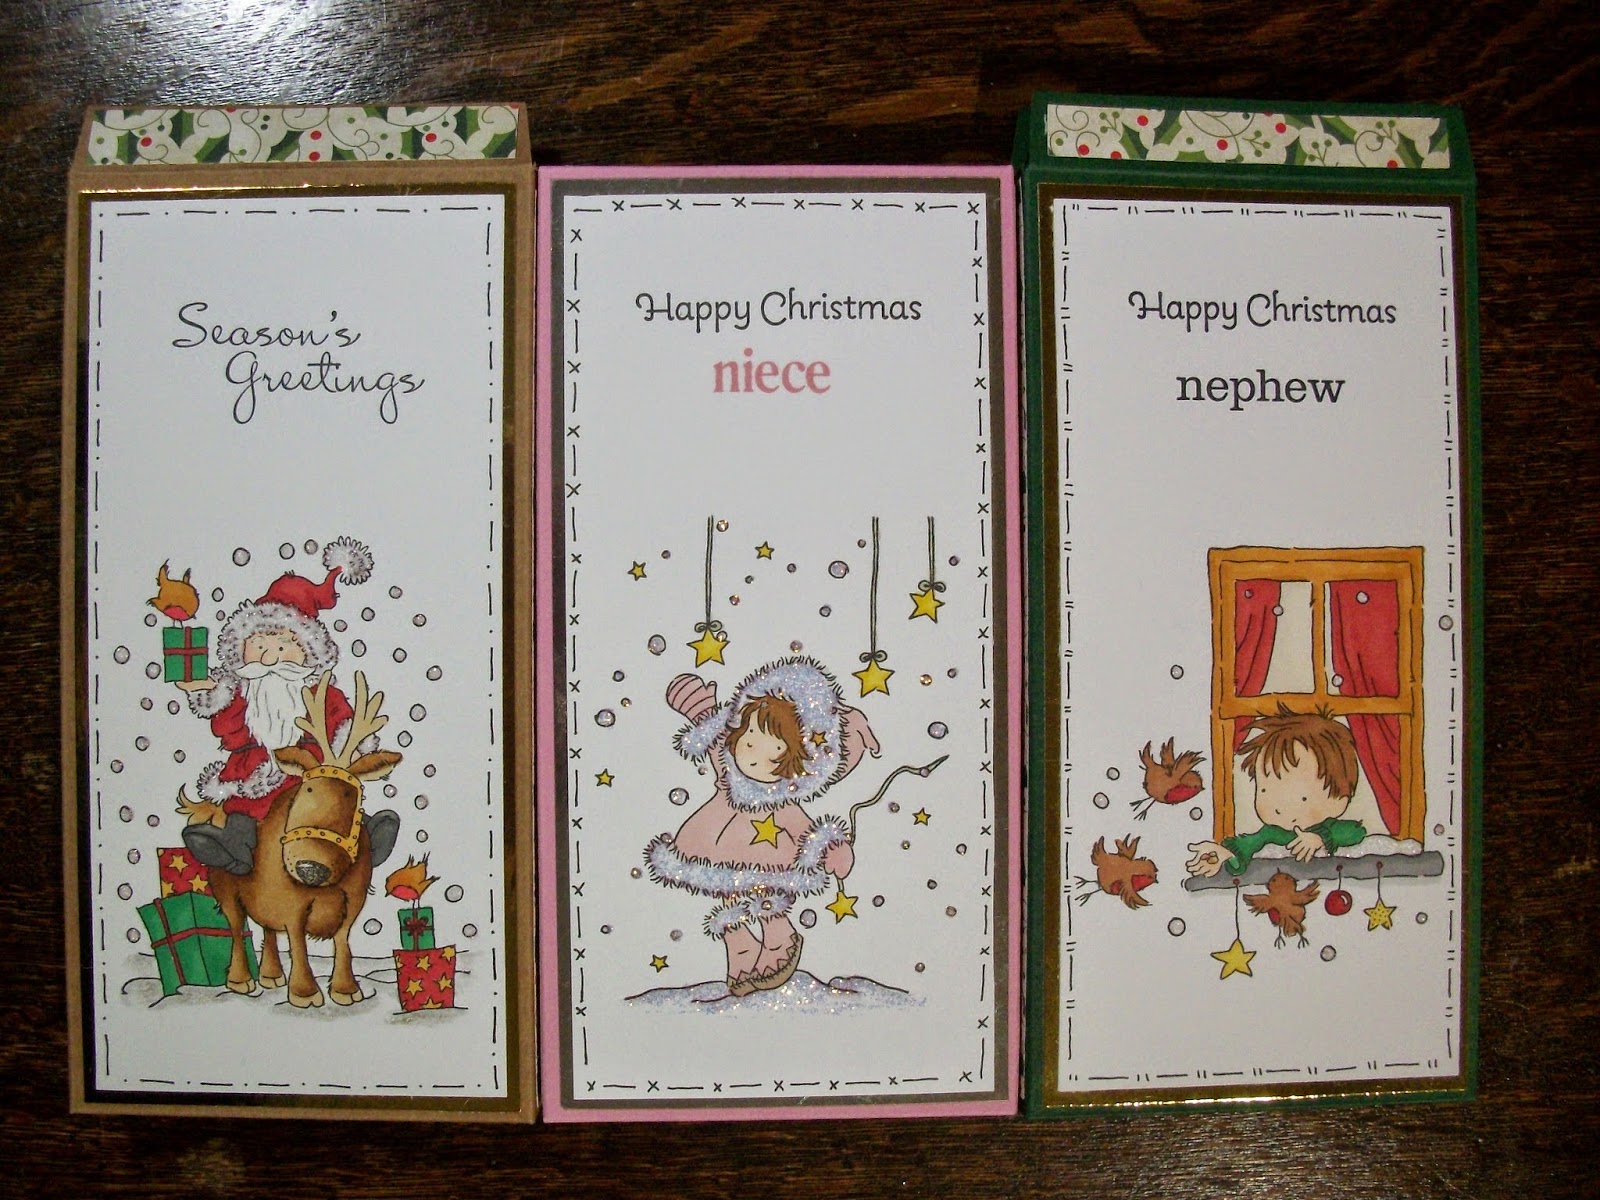
I've made these chocolate box cards to send the kids at christmas. I bought a chocolate bar and measured it to calculate the dimensions of the box. I took an A4 sheet of card and scored the net. folded it and cut it out. I then glued the box together. I then stamped and coloured an image from lili of the valley with a stampin up! sentiment on digi cardstock. I created a freehand border using the sekura micron pen, and added glitter to the images too. I layered mirri card behind the image and added this as a decorative panel to the front of the box. I also found coordinating papers to decorate the sides and top of the box. The chocolate was then sealed inside ready for the kids to open at Christmas.


I think this is a great idea to combine a card and a gift as the flap on the box creates somewhere to write your message and the box holds the gift. you can customise the boxes to have the card open at the front or back (depending on which way up you use the template!!) or make the box to fit a different sized gift. These aren't just for Christmas, change the image and you can send them any time of the year.
 
challenge #20 - Box it up!

'Merry Christmas'

Mx