Showing posts with label punches. Show all posts

Friday, 2 December 2016

'o' christmas tree...


  • SU!- polar party
  • SU!- petite pairs
  • SU!- oval & scalloped oval punch
  • HOTP patterned paper
  • Memento 'tuxedo black' ink pad
  • Neenahclassic crest cardstock
  • Promarkers- pear green, moss, cocoa, berry red, lipstick red
  • Wink of stella - clear & gold
  • Kraft &white cardstock

Mat a piece of patterned paper onto the card blank. Cut a mat of white cardstock, stamp and colour the image. I added glitter to the image for some sparkle. stamp and punch out the sentiment. layer onto a scalloped punched oval. cut a piece of coordinating paper and trim into a banner shape. glue onto the card blank following the sketch.
Mx


Thursday, 14 July 2016

Pretty petal...


  • LOTV- 'petal' stamp
  • SU!-watercolor wishes card kit (only used the stamp set)
  • Lawn fawn- large stitched rectangle stackables & stitched borders
  • Memento 'tuxedo black' ink pad 
  • Neenahclassic crest cardstock
  • Copics- skin:E50,51,21,11. Hair:Y21,E42,43,44. Wings:RV00,BV000,BG10. Shoes:E44,47. Socks:E40,41. Leaves:YG03,63,67. Yellow:Y35,38. Pink(dress used darker pens and lighter pens for flower):R56,85,83,81 V91.
  • SU!- scallop trim border punch
  • American crafts white twine
  • Wink of stella 'clear'
I die cut a panel of copic friendly cardstock and stamped my image in the bottom corner. I coloured this with copics and added sparkle to the wings. I stamped my sentiment towards the top of the card panel and added sparkle to this too. I glued this panel flat to my card blank. I then cut a strip of card and added a decorative border with a punch. I coloured this using a light pink marker to match my image. I cut a smaller strip of card and added stitched borders, I coloured this with dark pink. i glued these together and wrapped twine around and tied a bow. I added this to the top of my card blank using foam. 

I am entering this in to a challenge event over on the lili of the valley facebook page, click here to check it out!!
Mx


Sunday, 8 November 2015

a simple tree...

 
  • craftwork cards festive chalkboard kit
  • tree punch by SU!
  • ribbon
I took inspiration from the sketch challenge to create the layout for this card. I took a tag from the kit and trimmed it down and cut the square card blank down to a 6x4 to frame the tag nicely. I then used the tree punch to create the central shape in the tag. I tied some stitch detail ribbon through the hole in the tag before sticking it to my card. I finished it off with a seasonal banner sentiment across the front. For an extra special detail, you can add glitter or gems to the tree for that Christmas sparkle.
 
I think this makes for a nice simple card, perfect for when you have a long list of cards to make at Christmas time. Using the punches gives a creative twist on using a card kit to make it your own.
 
Id like to enter this card into the cas(e) this sketch! challenge #148
 
Mx

Friday, 2 January 2015

a new baby in the new year...

 
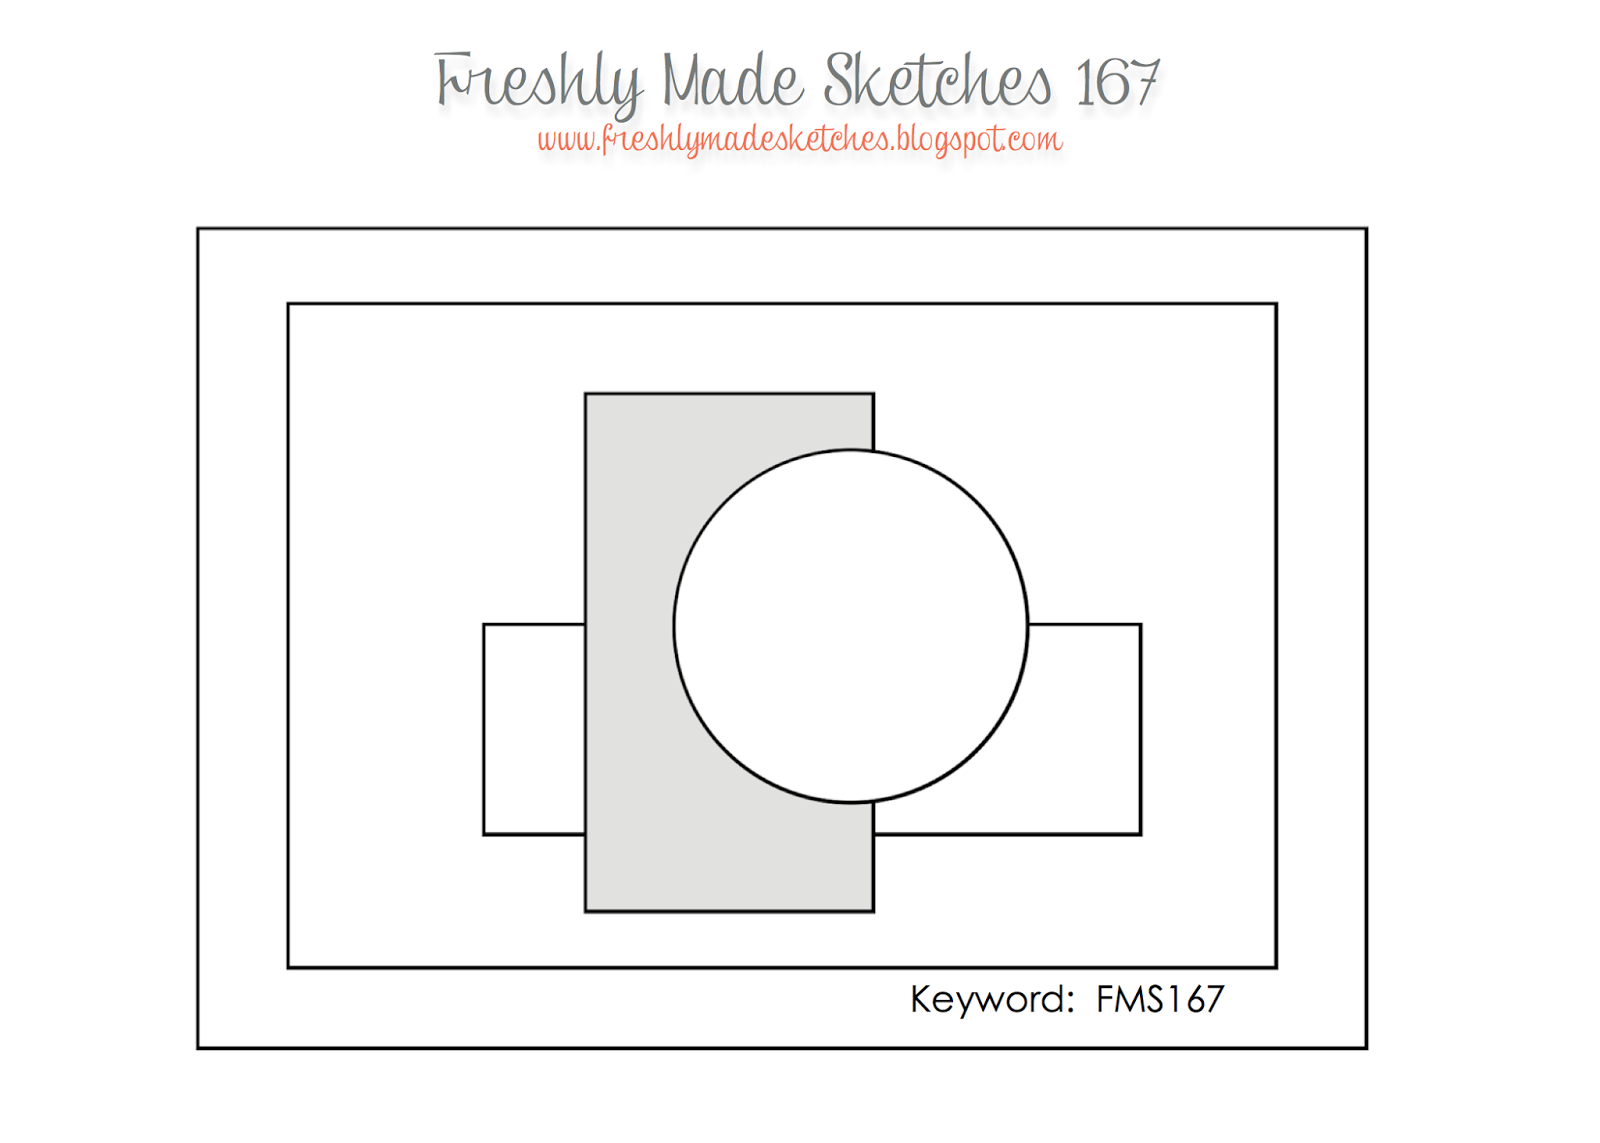
I made this cute baby card with a LOTV baby stamp. I coloured the baby's skin with promarkers then added the paper from a LOTV pad to paper-piece the bunny and clothes. following the freshly made sketch, I also cut the paper to layer the background. I added a decorative edge to the bottom white matt using the border punch (from stampin up!). I also used the scalloped and oval punches from stampin up! to frame the message from the petit pairs set. I added definition the edges of the image and message layers, as I was matting white on white, by using my Tim Holtz distress ink pad in spun sugar.
 
http://freshlymadesketches.blogspot.co.uk/
sketch #167
 
Mx

Thursday, 18 December 2014

flower flourish...

 
to make this card I cut a piece of white card to shape, inked it using spun sugar tim holtz distress ink. I stamped the flourish from everything Eleanor (SU!) over the top in the same colour ink. I stamped 2 flowers from the flower shop stamp set (SU!) and coloured them with promarkers. I added a touch of glitter and punched them out using the pansy punch (SU!). I added this to my card using foam pads for dimension. I used the family sentiment die from tattered lace to die cut mum in white and glue this in place along the bottom edge. I added a final touch of glitter using a sakura pen along the edges of my pink panel.
 
Mx


Saturday, 18 October 2014

mistletoe mice...

 
to make this card I cut a panel of white card just smaller than my 6x6" card blank. I then used the snowflake corner embossing folder from the snowman range to add intrest to the top section of my card. I glued a piece of patterned paper on to the bottom half of the panel and trimmed it to fit. I added a ribbon to hide the join and secured it behind, before sticking the panel on to the card. I stamped my moonbeam meadow kiss image from crafters companion, onto some digi cardstock, using a memento ink pad. I coloured my image using promarkers. I cut this out using a circle die from sizzix and cut another piece of co-ordinating paper (from the frosty Christmas pad from lili of the valley) in to a larger scallop circle, then layered to two together. I stamped the sentiment from the same stamp set on to digi cardstock, then cut it out using an oval punch from stampin' up!. I took the piece of paper I had used to make the mat and cut out a scalloped oval, again with a punch from stampin' up!, to layer with the oval. I added sakura glitter pen around to edge of my circle and oval layer, I added more glitter onto the image where the snow was.


Mx

Saturday, 17 May 2014

summer time flowers...


stamps:bloomin' marvellous (sale-a-bration) from stampin' up!, everyday greetings from wild rose studio, for her sentiments (set 20) from lili of the valley
inks: archival ink pads (chrome yellow, venetian orange, vermillion & sap green), ice grey1 promarker
cardstock: craftwork cards digi cardstock, 6x4" card blank
punch: bitty butterfly punch from stampin' up!
extras: adhesive gems

first i cut a mat of digi cardstock to fit my card blank. I stamped the flowers in the different colours and added in leafs in between. I used a scrap of digi cardstock to stamp two butterflies , which I punched out. I bend these slightly and ( only using tape in the centre) glue them onto my card. I added extra dimension to the leaves and flowers by using the promarker to add shadows.  I inked the card blank in orange, then used the same coloured ink to stamp my two sentiments in either corners. 
i glued the mat on to the card blank and added a final bit of sparkle with some adhesive gems, on a few of the flowers.
Mx

Monday, 12 May 2014

decorating delight !!


stamps: a lick of paint from lili of the valley
inks: memento (tuxedo black) ink pad, promarkers
cardstock: born to shop go green paper pad, kraft 5x7 card blank plus extra cardstock, craftwork cards digi cardstock
dies/ punches: banner punch from stampin' up! ticket framelit dies from sizzix
extras: paint sample book
 
I chose a selection of coordinating papers and some paint colour swatches. I cut the various matts and layered them onto the cardblank. the paint colour samples were punched to shape them into banners and added to the card following the sketch. the topper was stamped and coloured in promarkers, to match the colour scheme. I die cut the image out and added it to the card using foam pads to create some dimension. I think the paint colour samples work really well for this image, for a quirky embellishment on a mans card !!
 

Mx

Monday, 10 March 2014

perfectly pearly !!

 
stamps: express yourself from stampin up!
inks: archival ink pad (coffee)
papers: 5 x 7 cream card blank, cream card stock, pearl cardstock (cream) embossed patterned cardstock (sorry about the lack of suppliers but these were all from my stash!!)
punches: pansy punch from stampin up! 
other: pearl brad

I used the sketch as inspiration for the layout of this anniversary card. since it is their year of the pearl, I kept the colour scheme very neutral, playing with different patterns and textures to create interest. the matts were cut by laying a ruler on the edge of the card, with the sheet of paper in position beneath on the card blank, the corners were then marked and the paper trimmed to create the angled layers. this was repeated with each of my chosen papers. the band was stamped with the sentiment before cutting it to size and layering it onto the card. I used the flower punch to cut several layers out of pearl paper. the edges were curled to give it dimension and a brad was added to the centre to secure it all in place. I think this makes for a very sophisticated card, perfect for the occasion.  
Freshly made sketch #126
Mx

Friday, 7 February 2014

a forest friend ...


stamps: petite pairs & language of friendship from stampin' up! wallpaper and wood from stampers anonymous tim holtz collection
paper: we r memory keepers anthologie 6x6 paper pad, my minds eye away we go 6x6 designer paper pad plus 4x6" kraft landscape card blank
inks: archival (sepia) ink pad
punches: bird builder & lace ribbon border punch both from stampin' up!

after creating the woodland wishes card, I thought I would use the design to make an alternative. I stamped the kraft card blank with the wood print background. I used the punch to create the border to layer over it. I chose a soft patterned paper in coordinating colours for the topper, matted onto a piece of kraft cardstock. I used some more kraft card to stamp and punch out the bird and its branch. again I cut two branches, one kraft one green and trimmed them by hand to give the effect of a branch with green leaves. I assembled the card together, finished off with a birthday sentiment in the corner of the topper. I think it makes a lovely variation on the fun owl card I made.
 
Mx