Showing posts with label LOTV. Show all posts

Saturday, 25 June 2022

christening day


  • LOTV: baby christening
  • SU!: inspired events
  • First edition papers ‘blank canvas’
  • Memento ‘tuxedo black’ ink pad
  • Neenah classic crest cardstock
  • Copics: R01,32. RV42. YR30. B41. BG70. YG93. E30,35,53,55,57. W00,1,3.
  • Sakura jelly roll ‘clear star’ glitter pen
  • Pink ribbon. 
To make this card, I cut a 5” square mat and stamped my image and sentiments in place. I coloured my image using copics, then added details to the sentiment and flowers using a glitter pen. 
I wrapped ribbon around the top of the panel and tied the ribbon into a bow. I then layered this panel onto a piece of pink paper.
I used the pink paper to cover the front of my 7” square card blank before adding a mat of cream patterned paper. I used foam tape to attach the finished panel to the centre of the card.
I think this is a nice christening card... it uses quite a traditional image, made clean and fresh by using the coral and keeping the design simple.
Mx

Friday, 1 March 2019

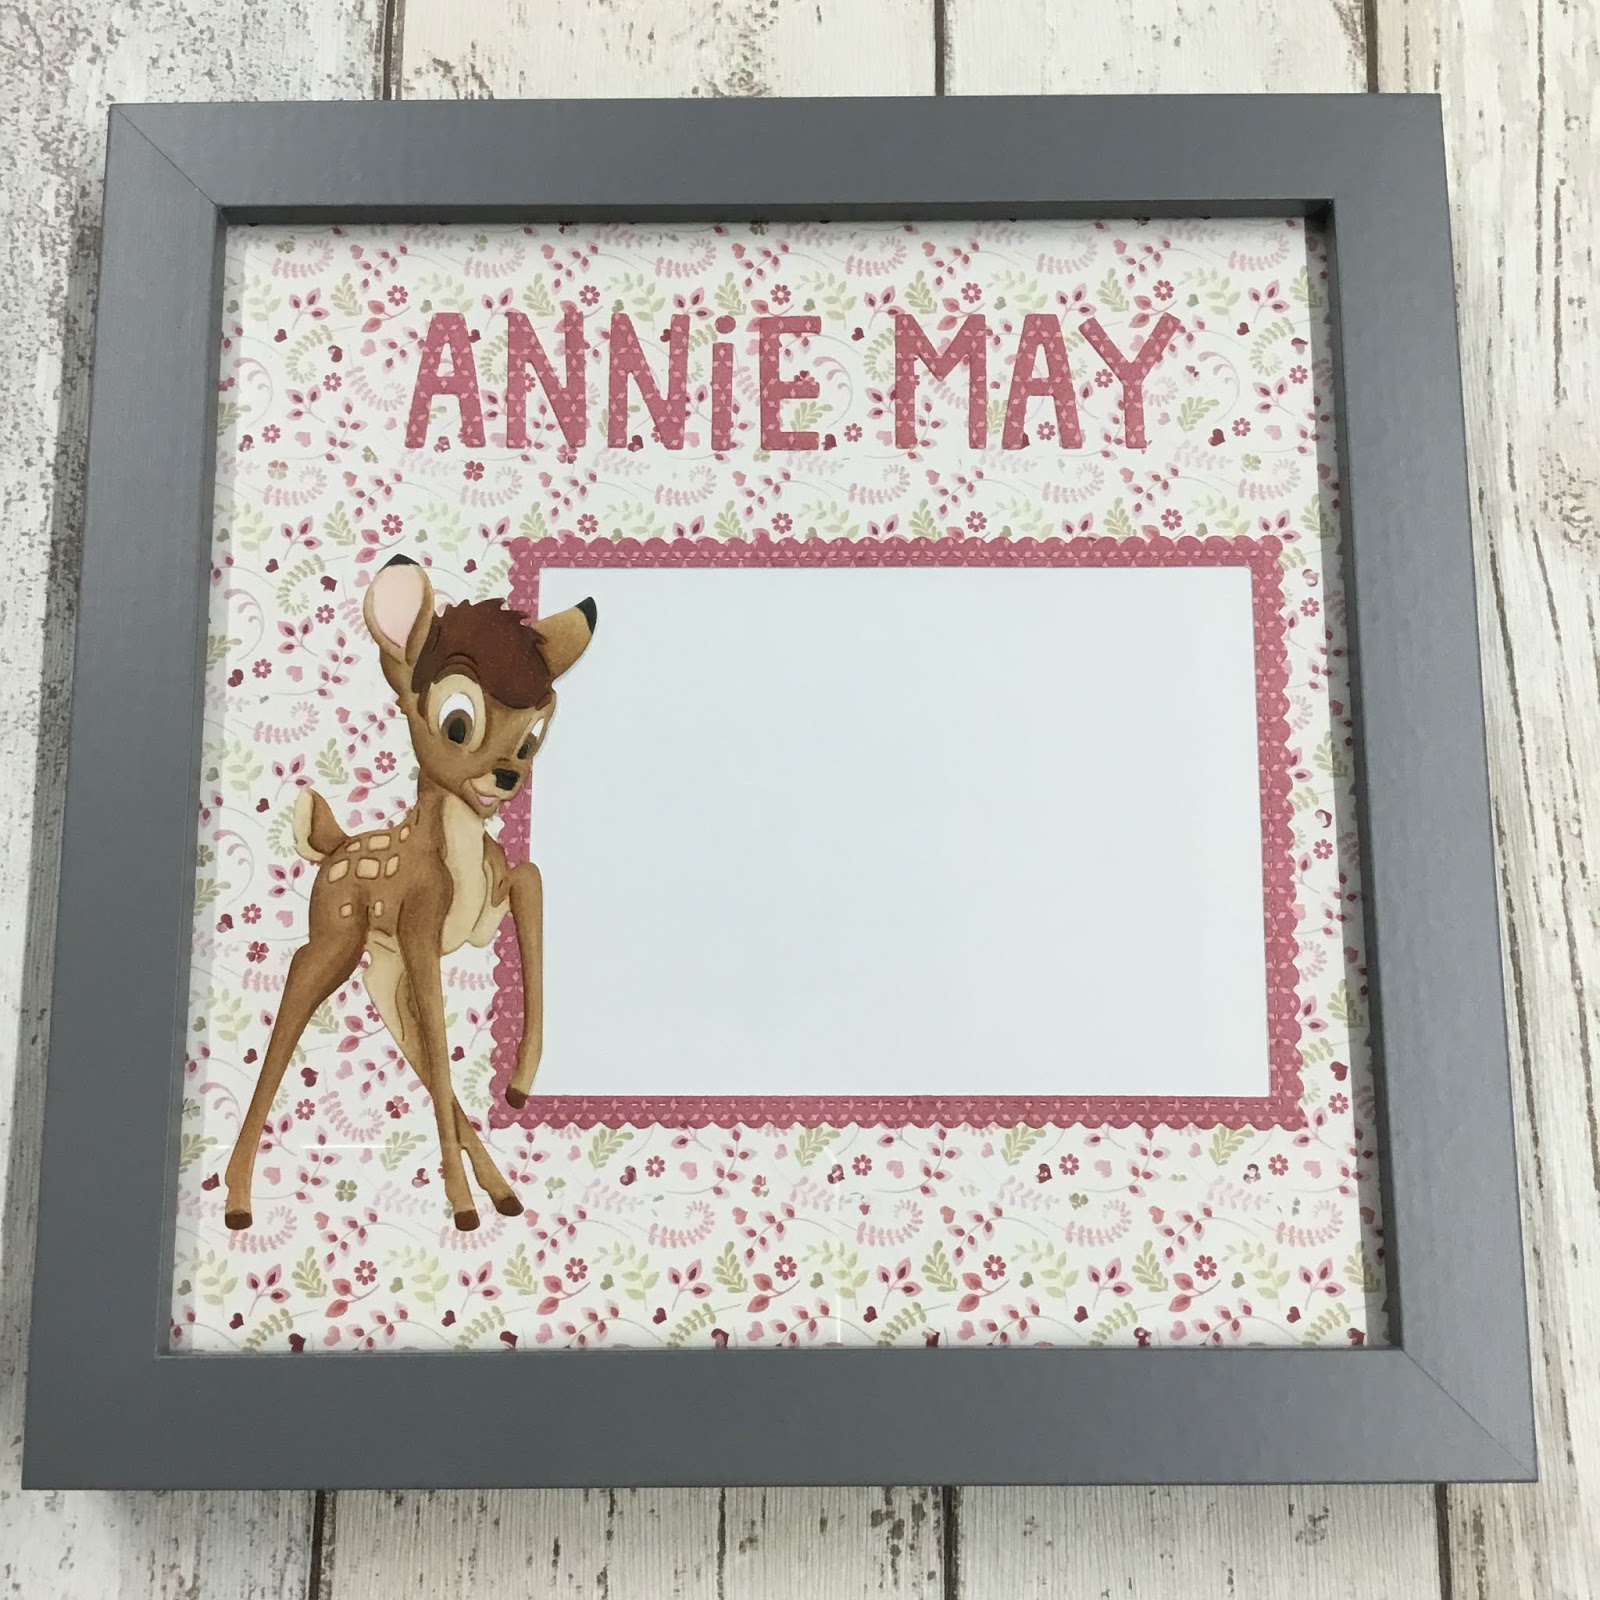
Bambi frame gift


  • Disney bambi metal die
  • Nit wit & LOTV- always & forever paper pad
  • My favourite things- stitch rectangle scallop edge frames
  • Lawn fawn- finley’s ABC’s dies
  • Copic friendly cardstock
  • Copic markers- E30,31,34,35,37,39,57,59. W8,10. R000,81,83.
  • Grey 8” square frame (mine was from wilko)
To make this frame gift, I selected two pieces of coordinating paper. I chose one 8x8 piece for the background and the other to die cut from for embellishments. I diecut the frame and letters to spell the name from the patterned paper. I also diecut my bambi image from white card and added tape to the back, whilst all the pieces where still in the metal die, to hold the sections together. I then removed the bambi from the die and added back in any pieces that had fallen out. I used copic markers to colour the image, using a picture online as reference. 
I decided on the best layout and glued all of the pieces onto the background paper. I used a craft knife to remove any paper showing through the die-cut frame to create an aperture for a photo to sit behind.
I slotted this finished piece into the frame and added a sheet of white card behind, to make it look nice for gifting. I prefer to leave it for the child’s parents to decide which picture they want to display rather than selecting one you like.
Mx

Thursday, 21 February 2019

Scooter boy


  • LOTV- scooter boy stamp
  • We R memory keepers- anthologie 6 x 6 paper pad
  • Lawn fawn custom craft dies- large dotted square & large dotted rectangle stackables 
  • Copics- C4, 5, 6, 7, 8. W00, 1, 3. E21, 35, 41, 50, 51, 55, 57, 93. R17, 27, 29. B95, 97, 99. YG00, 01, 21. G20. 0. 
  • Neenah classic crest card stock 
  • Red card stock 
  • 6” square cardblank

I was asked to make a great grandson card for a little boy turning 6. I created a custom sentiment on the computer to fit inside the rectangle die, printed it onto Neenah card stock and cut it out. For the image I stamped, die cut and coloured the scooter boy. I covered the cardblank with the patterned paper and die cut a panel of a coordinating red card. To complete the card, I simply arranged the pieces onto the cardblank, overlapping each other, with just the sentiment raised on foam pads for a bit of dimension. 

Mx


Saturday, 22 December 2018

for the grandparents


  • LOTV- twice as nice
  • Neenah classic crest cardstock 
  • Copics- C00,0,1,3,4,5,6. E21,50,51,93. RV91. R81,83,85.
  • Lawn fawn- large stitched rectangle stackable 
  • Wink of Stella ‘clear’ glitter brush marker

I was asked to make a grandparents card to say congratulations on the arrival of twins. As I was struggling to find the perfect sentiment, I created a custom one digitally and printed onto cardstock. I then stamped my image above the sentiment and coloured it with copics. I used stitches stackable dies to cut the cardstock and patterned paper into panels. These were simply glued down flat to the card blank. I added a touch of sparkle to the hearts to complete.
Mx

Thursday, 20 December 2018

twins !


  • LOTV- twice as nice
  • SU!- inspired events
  • Lawn fawn- finley’s ABC dies, dotted circle stackable 
  • Neenah classic crest cardstock 
  • Copics- C00,0,1,3,4,5,6. E21,50,51,93. RV91. R81,83,85.
  • First edition paper- sweet nothings paper pad
  • Pink glitter paper
  • Wink of Stella ‘clear’ glitter brush marker


  • To make this card, I stamped my image and sentiment onto cardstock. I coloured the image with copics and die cut into a panel. I also die cut the letters to spell out 'twins' from glitter paper to complete the sentiment. I cut a mat of patterned paper to fit the card blank, leaving a small white border and glued into position. I then added the panel with the letters beneath and finished with a touch of sparkle on the image.
    Mx

    Monday, 12 November 2018

    sweet baby


    • LOTV- sweet baby stamp set
    • Lawn fawn- large rectangle stitched stackables
    • LOTV & nit wit- country meadow paper pad
    • Neenah classic crest cardstock 
    • copics- E21,50,51,93. C00,0,1,2. R85,83,81. RV91. Y15,13,11. YR30
    • Wink of Stella ‘clear’ glitter brush pen
    I printed my custom sentiment made on the computer, onto cardstock leaving space for the image. I stamped the image above the sentiment and die cut into a panel. I coloured with copics and added sparkle to the dots. I then diecut some patterned paper using the larger die which fits neatly onto the card blank. I simply layered these together flat and glued onto the card front to finish.
    Mx

    Thursday, 19 April 2018

    Fairy birthday


    • My favourite things- big birthday die
    • Lawn fawn- large dotted rectangle stackable
    • LOTV- fairy a5 stamp set 
    • Memento ‘tuxedo black’ ink pad & dual marker
    • Neenah classic crest 
    • Copic- C1. E50,51,93. RV42,R43,R32. Y32,YR21. BG70.
    • Watercolour cardstock
    • Tim holtz ‘squeezed lemonade, worn lipstick’ distress ink pads
    • Cosmic shimmer ;burnt orange, straw yellow, scarlet mist’ pixie powders
    • Wink of stella’clear’ glitter brush marker
    • Cosmic shimmer ‘crystal stars’ glitter jewels
     
    I made a water colour background and die cut the happy birthday letters from it. I die cut a panel of white cardstock and positioned the letters, then glued them down flat. I stamped my fairy image to fit in the top corner on to the panel. I coloured the image and added sparkle to the wings. I glued the finished panel to a card blank. The final touch was to glue on some crystal stars for a bit of extra sparkle.

    Mx
    I would like to enter:


    Monday, 12 March 2018

    baby christening


    for the card:
    • LOTV- baby christening
    • LOTV- for her sentiments
    • LOTV- vintage labels occasions
    • tattered lace- circle dies
    • LOTV- country lady paper pad
    • memento 'tuxedo black' ink pad
    • Neenah classic crest cardstock
    • copics- skin:E50,51,21,93. window:E31,43,55,57,59.BG70. dress:Wo,1,2,3. pink:R81,83,95,56.RV91. green:YG93
    • kraft cardstock
    • vintage lace ribbon
    • paper roses 
        
     I cut my background papers to size and glued the top section directly to the card blank. I added ribbon to the top edge of the second piece, securing the ribbon ends on the reverse, then glued this onto the front of my card blank. I stamped and coloured my main image on Neenah cardstock, then die cut into a circle. I diecut a larger circle from kraft to mat and layer. I created a custom sentiment by combining several stamps and masking off certain sections to create the saying I wanted. I die cut this into a smaller circle and again matted with a larger kraft layer. Once all of the elements were prepared, I decided on my floral arrangement. As I was using paper roses on wires, I put small holes into the toppers where I would need them and pushed the wire through. I added a small amount of glue directly beneath each rose, then for extra security, I taped the wire in place at the back of the topper.(If you were using flowers without wires or prefer to cut the wires off, you would attach the topper to the card then simply glue the flowers on using hot glue or silicon glue gel.) Finally, I added the completed toppers to my card using foam for dimension.


    for the box:
    • a3 kraft cardstock
    • lawn fawn- Finley's ABCs
    • LOTV- country lady paper pad
    As the flowers are raised from the card, I made a simple box with lift off lid to fit my card perfectly, instead of an envelope. I then decorated the lid with die cut letters to spell out the name, using the left over paper from the card. I think this adds an extra personal touch and a professional finish.
    
    Mx
    I'd like to enter the following challenges:

    Sunday, 11 March 2018

    it's a girl

    • LOTV- push chair
    • Lawn fawn- it's a girl border
    • forever friends- kraft notes paper pad
    • Neenah classic crest cardstock
    • memento 'tuxedo black' ink pad
    • copics- E50,51,21,93. E43,55. Rv91,93,95. R83. V91,93. C00,1,3,6,7,8,9. W00,2.
    • wink of stella 'clear' glitter brush marker
    To make this card I cut a strip of checked paper and used the word die to cut the top edge. I die cut the words from a coordinating lilac paper. I then cut some copic friendly card stock to size and die cut the bottom edge, I also kept the word strip too. I stamped and coloured the image using copics.
    To make up the card, I glued the piece of check paper to the bottom portion of the card front. I added the white wording and then the image portion to the top of the card front. I glued the lilac word strip on top of the white one and added glitter pen over the words for a touch of sparkle.
    Mx

    I'd like to enter the following challenge:

    Friday, 9 February 2018

    Jasmine loves music


    • LOTV- jasmine music & for her sentiments (set20)
    • Tattered lace- circle dies
    • Lawn fawn- Finley's 123s 
    • Memento 'tuxedo black' ink pad
    • Neenahclassic crest cardstock
    • Copics- skin:E50,51,21. R00. Hair:E43,44,47,49. Pink:R81,83,85. Blue:BG15,23,34. Orange:Y38. YR15. Ground:W00,2.
    • Burgundy cardstock
    • 6x8" white card blank
     
    I mat and layered my patterned paper, following the sketch layout. I stamped 'niece' onto the smaller banner, then glued all layers on to my card blank. I stamped and coloured my image and diecut into a circle. I die cut the numbers, once from dot paper and once from card, to layer them to create a shadow. I added this to my card to finish.
     
    Mx
    I would like to enter:

    Sunday, 14 January 2018

    For my mum

    • LOTV-I'm here for you
    • Memento 'tuxedo black' ink pad
    • Neenah classic crest cardstock
    • Copics- skin:E50,51,21,93. Hair:E55,57,59. Dog:E43,44,47. Clothes:R20,21,22,24,46. Yg21. BG53,10. Y17. Stairs:C00,1,3.
    • SU!- teeny tiny sentiments
    • Patterned paper (from my scrap box so not sure which brand/ collection) 

    I chose to make a 5" square card and found strips of patterned paper that would fit the sketch. I cut the main panel from colouring cardstock and stamped my image. I coloured the image using copics makers that best fitted the paper colours. I then stamped my sentiment and layered on to some more of the patterned paper. I glued all the paper pieces down to complete the card sketch, (although I did flip it so the sentiment better fitted my image.)

    Mx

    Joining in with:


    Wednesday, 3 January 2018

    All our dreams


    • Lili of the valley- all our dreams
    • Lawn fawn- small stitched circle stackables, large stitched rectangle stackables, stitched borders
    • Forever friends (docrafts) Kraft notes 12" paper pads
    • Neenahclassic crest cardstock
    • Memento'tuxedo black'ink pad
    • Copics- skin:E50,51,21,93. leaf:YG61.G21,24. Pink:R85,83,81,0. Bunny:E41,42.
    • Wink of stella 'clear' glitter brush pen
    I cut 2 strips of lilac paper and glued these to down each edge of the card front. I then cut a strip of checked paper, using the stitched borders to add detail. I glued this down the centre of the card to complete the background. For the topper, I cut a mat of cardstock, stamped the image onto it and coloured using copics. For added detail, I brushed glitter onto the hearts. I glued the topper down flat onto the card. Using another piece of cardstock, I stamped then die cut the sentiment. This completed the sketch, glued down with foam for dimension.

    Mx

    Challenge I would like to enter:


    Sunday, 10 September 2017

    babies companion


    • LOTV- babies companion stamps
    • LOTV & nitwit- always & forever paper pad
    • Lawn fawn- small stitched circle stackables
    • Paper smooches- 'congratulations' word die
    • Neenah classic crest cardstock
    • Memento 'tuxedo black'ink pad
    • Copics- E30,31,34,35,37. R0000. R81,83,85. YG61. E40,41. C00,0,2. 0.
    • Wink of stella 'clear' glitter
    • 6"x6" white cardblank
    I followed the sketch layout to create this pretty card for a baby girl. I chose the paper and trimmed it down to create the border. I cut strips of silver paper to edge this top and bottom, before gluing flat to the card front. I stamped, coloured and die cut the image to coordinate. For the sentiment, I die cut the word, coloured it with copics and added glitter pen to make it sparkle. I glued the topper and sentiment into position to complete the card.
    I would like to enter the following challenges:
    Simon Monday says 'stamp it'

    Mx

    Wednesday, 16 August 2017

    Fresh flutterby


    • LOTV-hand written phrases
    • SU!- butterflies thinlit die
    • DCWV- fresh floral 12" paper stack
    • White glitter card
    • Archival 'jet black' ink pad
    • Atyou spica pink glitter marker
    • 7x7" card blank

    I chose 5 coordinating papers to work with the die cut for this card. I trimmed the 2 main papers to size for the card front, following the sketch layout. I then glued these down flat. I finished the joining edge using a line drawn with the pink glitter marker. I die cut the butterfly from white glitter card and glued this into position. I stamped the sentiment onto the yellow paper and matt and layered onto the pink paper. This was glued in place to complete the card. 

    I would like to enter the following challenge:
    Case this sketch #234


    Mx

    Happy reindeer


    • LOTV- happy reindeer stamp
    • SU!- flurry of wishes stamp set
    • SU!- softly falling textured impressions embossing folder
    • Memento'tuxedo black'ink pad
    • Neenah classic crest cardstock
    • Copics- skin:E51,21,93. hair:E35,37. raindeer:E42,43,44,47,49&93. carrots:Y38,YR16,G14&17. aqua:BG10,32,23,49. pink:R81,83,85. white:C00,1.
    • Archival'jet black'ink pad
    • American crafts pink baker's twine
    • White cardstock & 6x4" card blank
    I cut a piece of white cardstock to fit the front of my cardblank. I embossed this to make a snowfall effect. I tied baker's twine around the top of the matt and tied a bow, before I glued it to the cardblank. I stamped, coloured and fussy cut the image. I added a sentiment stamp below then glued onto the bottom of my card blank using foam tape for dimension.
    Mx

    The cgallenge I would like to enter:
    Simon Wednesday says- for a child

    Wednesday, 14 June 2017

    vintage sports car

     
    • LOTV 'vintage sports' rubber stamp
    • memento ink pad 'tuxedo black'
    • Neenah classic crest cardstock
    • copics: R24, 27, 29, 89. E42. Y13, 15, 17. E23, 27. YG21, 23, 25, 61. G21, 24, 46. B0000, 41, 45. N0, 3, 5, 6, 7, 8 & 9.  
    • lawn fawn 'Finley's ABCs' dies & 'happy happy happy' clear stamps (inside)
    • road atlas (cut a page up for the map background)
    I stamped the image onto Neenah card stock and coloured it with copics. I then fussy cut around the outer edge and coloured the frame. I die cut the letters from Neenah cardstock and coloured with a fade to the centre using copics to match the frame. I took a page from a road atlas and chose a section of the map to create a background for the card. I glued this onto the card flat, added the image on top using foam and liquid glued for the alphabet.
     
    Mx
     
    I would like to enter the following challenges:
    The ribbon girl June card challenge
    LOTV Facebook challenge 'summer'

    Sunday, 14 May 2017

    Jasmine phone's thirtieth

    • LOTV- jasmine phone
    • SU!- milestone moments & for my family
    • DCWV- the floral fair paper stack (there is a blue spot in this paper stack but I preferred the softer blue from the fresh floral stack)
    • Neenah classic crest cardstock
    • memento 'tuxedo black' ink pad
    • copics- skin:E50,51,21&R00 hair:E49,47,44,43 blue:BG34,11,10 pink:R85,83,81 phone:C6,3,1 ground:W0,2
    • burgundy cardstock
    • 7x7" card blank
    I started by deciding on my layout and choosing coordinating patterned papers to fit. I then stamped my image onto neenah cardstock and coloured with copics.  I trimmed this down and matted onto the plain cardstock. I stamped the 'thirtieth' sentiment onto neenah and trimmed and matted this too. I then cut my papers to size. I glued the floral paper onto the cardblank and matted the dotty papers onto card before layering these on top. I stamped the 'happy birthday' onto the blue paper, before sticking the image and sentiment in position using foam for dimension. 

    I would like to enter the following challenges​:

    Mx

    Sunday, 7 May 2017

    edna's cup of tea

    • stamping bella: 'Edna's cup of tea' stamp
    • LOTV A6 polymer sentiment stamp set (not sure on name-sorry!)
    • LOTV & nitwit collections 'always & forever' 8x8" paper pad
    • pink circle mat cut from patterned paper in my stash
    • neenah classic crest solar white cardstock
    • essentials by tattered lace 'circles' dies
    • copics- E50,51,21,R00. Rv00,R81,83,85. YG01,03,25.BV00. BG70. W0. C00,1,3. N2,4,6.
    • memento 'tuxedo black' ink pad
    • green string of sequins (another one from the old stash)
    • wink of stella 'clear' glitter pen
    I stamped and coloured my image using copics. I then used my misty to position the sentiment stamp beneath, to fit within the circle die. Once stamped, I die cut the image into a circle, and matted onto a larger die cut circle of pink paper. I cut a band of a coordinating paper to cover the lower half of my card blank. I then added a trim of sequins across the join. I layered the image on top using foam for dimension and to help it sit smoothly across the sequins, by not adding foam along this line. Finally, I added glitter the her wings for that added touch of detail.
    Mx

    I would like to enter the following challenge:

    Tuesday, 2 May 2017

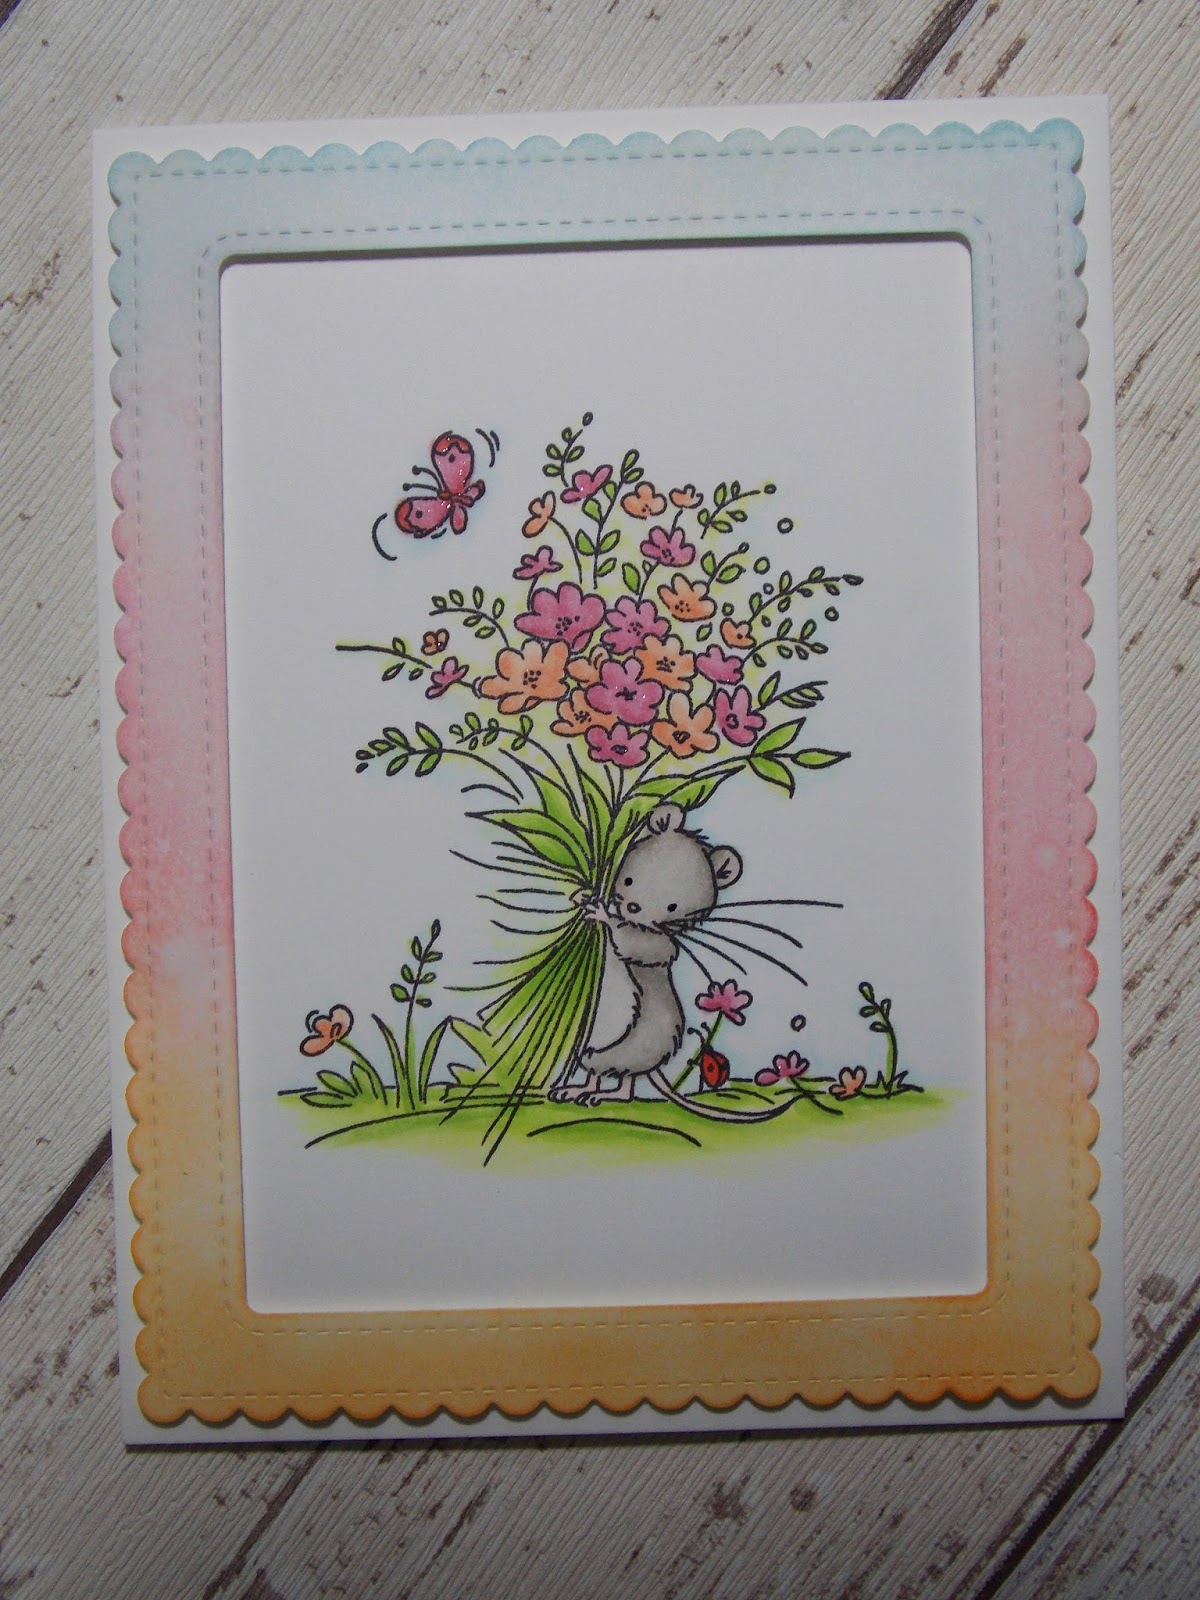
    Big Bouquet...

    • LOTV 'Big Bouquet' stamp
    • mama elephant: Madison avenue framed tags
    • Tim Holtz distress inks: 'tumbled glass', 'worn lipstick', 'carved pumpkin'
    • copics: W00, 0, 2, 4. R000, 00. R85, 83, 81. YR 02, 01, 000. R05. B0000. YG25, 03, 01, 21, 0000
    • wink of stella 'clear' glitter pen
    • sekura glaze pen
    • 6x4 white vertical card blank
    I inked up a piece of white card, blending the three colours together. I then die cut this to create the frame. I centred the image stamp on the card blank and coloured it with copics. I added the frame to the card using foam for dimension. I completed the card with glitter pen on the flowers and glaze pen on the eyes. I've kept this one nice and simple to make the most of the fresh spring colours and cute image.

    Mx
     
    I would like to enter the following challenge:

    Thursday, 20 April 2017

    Happy times

     
    • LOTV- happy times
    • SU!- remembering your birthday
    • Craftwork card- man made paper pad
    • Momento 'tuxedo black' ink pad
    • Neenah classic crest cardstock
    • Copics- E30, 31, 34, 35, 37, 39, 47, 49, 50, 51, 21, 93. YR07, 18, B99. N1, 3, 4, 6. W00. W1, 4.
    • Silver pearl paper
    • White 5x7" cardblank
    • Brown button 
     
    I cut a mat of pearl paper and a layer of patterned paper to fit the card blank. I then stamped and coloured the image on a mat of white card. I layered this onto pearl paper and glued it onto the card. To complete the sketch, I stamped the sentiment onto white card and shaped it into a banner, before matting onto pearl and adding onto the card. The finishing touch was a button secured in position with a glue dot.
     
    Challenges I would like to enter:
    Mx