Showing posts with label cream. Show all posts

Saturday, 25 June 2022

christening day


  • LOTV: baby christening
  • SU!: inspired events
  • First edition papers ‘blank canvas’
  • Memento ‘tuxedo black’ ink pad
  • Neenah classic crest cardstock
  • Copics: R01,32. RV42. YR30. B41. BG70. YG93. E30,35,53,55,57. W00,1,3.
  • Sakura jelly roll ‘clear star’ glitter pen
  • Pink ribbon. 
To make this card, I cut a 5” square mat and stamped my image and sentiments in place. I coloured my image using copics, then added details to the sentiment and flowers using a glitter pen. 
I wrapped ribbon around the top of the panel and tied the ribbon into a bow. I then layered this panel onto a piece of pink paper.
I used the pink paper to cover the front of my 7” square card blank before adding a mat of cream patterned paper. I used foam tape to attach the finished panel to the centre of the card.
I think this is a nice christening card... it uses quite a traditional image, made clean and fresh by using the coral and keeping the design simple.
Mx

Thursday, 14 December 2017

A Merry Little Christmas

  • Hunkydory festive elegance luxury card collection: A Merry Little Christmas
  • Hunkydory second little book of Christmas
  • Hunkydory copper mirri cardstock
  • A5 & 8x8" card blanks

For the 8" square card, I cut the cardstock down to fill the card front. To ground the sentiment, I added the border strip running across the base of the card. I positioned the sentiment to sit overlapping the border edge. For the main feature, I positioned the topper central with the border surrounds at angles to add interest. I trimmed the insert down to fit inside the card to complete.
inside

 I used the second sheet of cardstock to cover the A5 card blanks. I simply arranged the main topper and little sentiment underneath, sitting on the main panel between the printed borders. For the inside, I cut the insert down to fit neatly.
inside

 For the final card, I created a topper using the matching little book page. I cut the borders off the book image and matted onto coordinating mirri card. I then positioned it centrally onto the card blank, covered with the remaining cardstock. I completed the front with the additional sentiment topper from the collection, placed overlapping the bottom of the main topper. Again, I added the insert into the card for that extra finishing touch.
inside

Mx

Tuesday, 14 November 2017

pretty poinsettia


  • Hunkydory Christmas classics luxury card collection: pretty poinsettia
  • Hunkydory essential book of Christmas sentiments
  • gold mirri card
  • red & gold ribbon
  • 8x8" & 6x4" portrait and landscape kraft card blanks
 I used the main topper from the collection for the large square card. I mat and layered the printed cardstock onto gold mirri for the card front. I then added some of the decoupage layers onto the topper to create dimension. To complete the card, I simply glued the topper onto the card front and added the coordinating insert to the inside.
inside
For the 6x4" cards, I made a feature of the decorative corners on the other sheet of cardstock from the collection. I cut the cardstock to fit the card front. I then added some of the remaining decoupage layers to build up the floral border across the card. I finished with the sentiment tag and a little ribbon bow.
I repeated the same design, using the corner of the cardstock, this time sitting on a landscape card. For this card, I used an essential book sentiment, glued down with foam pads in the space above the decoupage. I trimmed the insert down to mirror the design on the card front and glued this inside to complete the card.
inside
Mx

Monday, 11 September 2017

Baby bear


  • SU!- baby bear
  • SU! 'crumb cake, soft suede & chocolate chip' ink pads
  • Kraft & ivory cardstock
  • brown adhesive pearl

I cut the ivory cardstock to matt onto the kraft card blank. I stamped the 3 layers of the bear, working from light to dark. To make lining up each layer easier, I used my misti, but the stamps are clear so you could manage without. I finished the card off with a simple message stamped onto kraft card. I cut the sentiment into a banner shape, finished with an adhesive pearl. I kept this card neutral with the ivory and brown tones for sending to those who wish to keep the babies gender a surprise.

Mx
I would like to enter the following challenges:

Sunday, 3 September 2017

packaging pouches!!


  • Kraft & cream cardstock
  • Stampin up! 'skinny mini alphabet' & 'epic alphabet' stamp sets
  • Archival ' sepia' ink pad 
  • Card bags
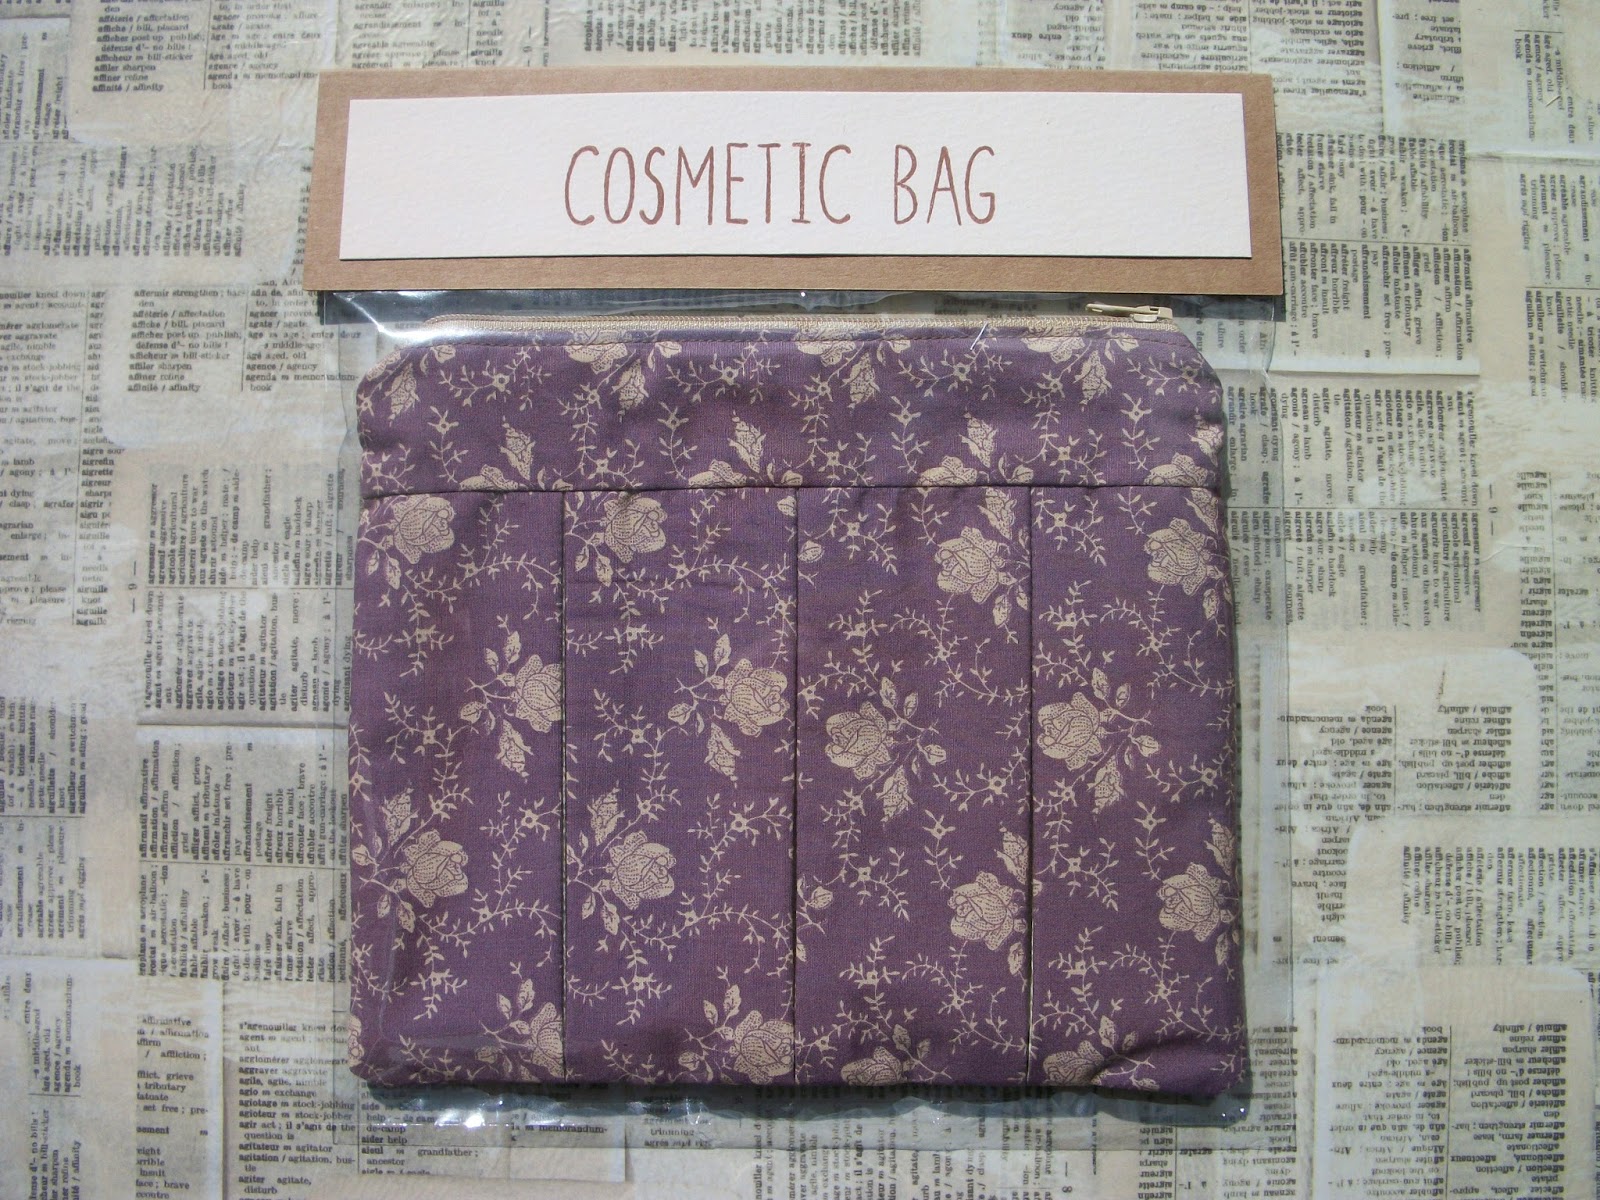
I stitched these little pouches as gifts and wanted to package them nicely to send. I found clear card bags which fit the pouches in neatly and sealed them in. For the top piece, I measured the width of the bag and decided on the height I wanted, (bearing in mind the stamp size + matting). I cut the Kraft card to the right width and doubled the height. I folded the cardstock in half over the top of the bag and secured with staples. I then cut the cream cardstock to layer on top and cover the staples. Before gluing into place, I used the letter stamps to spell out the contents 'wash bag!' or 'cosmetic bag' to complete this simple packaging. 


Mx

Sunday, 11 June 2017

for the mod man...


  • hunkydory the little book of charming chaps
  • hunkydory essential book of sentiments
  • bazzill bling: cream cardstock
  • white 5 x 7" card blank
I followed the sketch to create this simple birthday card, making the most of the ready to use images and sentiments in the hunkydory books. I cut the topper sheet across the border line to create the split background. I trimmed a piece of cream cardstock to cover the front of my card blank, then positioned the topper pieces and glued these down flat. Finally, I added the message overlapping the topper to complete the sketch and add some dimension, by using foam pads to stick it down.
 
I would like to enter the following challenges:
 
Mx