Tuesday 24 December 2013

12 days of christmas...

so ive been a little busy this year and haven't done an official 12 projects for Christmas, but ive put together some of my favourite projects from this year ...
 
 
Christmas cake simply decorated with icing, using the holly leaf cutter, with a little help from the family in the spirit of Christmas !!


I used craftwork card products to create this door hanger... you could take this idea to make your own version using any scraps and off cuts of paper or card left over from this seasons makes!!


I hope you have all enjoyed my makes this year, have a lovely Christmas and a fab new year !!
 
 Mx

Monday 23 December 2013

oh christmas tree ...


stamps: Kirsty wiseman (jolly holiday) and stampin up! (more merry messages)
inks: tim holtz distress ink pad (barn door), memento (tuxedo black), promarkers and copic spica glitter pen
cardstock: craftwork cards digi cardstock and 6x4 card blank
other: x-cut corner punch

I followed the sketch for this one, keeping it super simple. I think these tree stamps are fab, add a bit of colour, a dab of glitter and a nice sentiment... what more do you need?! with it being so close to chrsitmas, I thought this would be a good one to have on standby for anyone you didn't quite remember to write a card for!! I think the design would also work well for making in larger batches, ready for next year.
 
CTS #58

Friday 20 December 2013

the edible edition !!

 
I thought id share a quick post to show some of my other creations. these are some of the festive designs i've added to cupcakes recently. the snowman and snowflake are vanilla flavoured, the santa and star are chocolate fudge (yum!!). each of them are decorated with icing and details like the eyes drawn with an edible pen. some edible lustre by sugarflare adds that extra festive feel. the really great thing about the designs is that you can have them made in advance and ready to add to the cupcakes when you've baked them. the star and snowflake are beautifully simple with the swirled frosting. snowmen and santas are a little more work but worth the effort for the fun they bring ... kids love them (I hope you do too!!) 


Mx

Thursday 19 December 2013

sparkling sophistication !!

 
stamps: festive decorations and simply sophisticated from lili of the valley
ink: memento (tuxedo black), promarkers and copic spica glitter pens
cardstock: craftwork cards digi cardstock and black cardstock
other: ornate #3 framelits dies from sizzix, simply gorjuss bakers twine and black organza ribbon
 
I made this tag as a variation on the one I did (below). this time I stamped the whole image to fit inside this curved shape, including a sentiment at the top. I kept the colouring minimal, just highlighting the detail using grey tones in promarkers, using glitter to for extra emphasis. I added some coordinating twine and a black organza ribbon to the top and secured beneath. this was then matted onto a piece of black, die cut using the next sized shape. overall I think it gives a more sophisticated, grown up take on the Christmas tag.
 
 
'include a sentiment'
 
Mx

Monday 16 December 2013

one for the gents ...


stamps:  'for the gents' hunky-dory stamps and 'abc- 123 sketch alphabet and numbers' and 'for the family' by stampin up!
inks: tim holtz distress ink pad and archival ink pad (jet black)
card: 6x4 card blank, craftwork card digi cardstock and kraft card
other: inkssentials glossy accents, simply gorjuss bakers twine and stampin up! punch extra large petite pennants

I saw this sketch and thought it would be perfect for a car themed card with the bunting. I used the car stamp to create a background on kraft card. I then distress inked the card blank and some other white card to turn it blue. this was used to punch out the pieces for the bunting and cut out the banner. I cut a further piece of kraft to layer onto the blue banner. these were stamped with the sentiments and added to the card. I used a piece of twine to join the bunting and finish the design, using some glossy accents. I think the sketchy style of the lettering and cars work well with the simple design and limited colour palette for this card.
 
seize the sketch #10
 
Mx

Sunday 15 December 2013

toot toot !!


stamps: positively chevrons from stamping up!, toot toot and for him sentiments from LOTV 
inks: promarkers, tim holtz distress ink pads and memento (tuxedo black)
other: 6x6 card blank, craftworks cardstock, oval punch from stampin up!, sizzix oval die cut shape and twine
 
I made this nice, bright birthday card for my granddad, as he loves cars. I thought this LOTV image would be perfect for him. I coloured it with promarkers and coordinated the background in distress inks. the backing paper was inked and then stamped with the chevrons in the second shade of green. following the sketch, I added a message in an oval punch and 3 strands of twine across the backing paper. the ovals and card were edged in brown distress to stand out. the twine was fixed behind the chevron paper for a neat finish, with the topper stuck down using foam pads. I think the bold pattern of the backing paper and the colours work well together for a fun, masculine feel.
 
mojo Monday #323
 
'include a sentiment'
 
Mx

Thursday 12 December 2013

snow-flurries !!


stamps: more merry messages from stampin up! , spring jubilee by pink paislee
inks: archival ink (jet black), tim holtz distress ink pads (peeled paint, shabby shutters, barn door& spun sugar)
cardstock: craftwork cards digi cardstock, manila tag
dies/punches: tim holtz alterations on the edge (snow flurries, Martha stewart snowflake border punch
extras: glossy accents, sakura (clear star)

i created this tag for another present in a bag. i combined the colour scheme, sketch and snowflakes challenges for this one and i think it has worked well. i inked the tag using the green distress, then stamped some subtle twinkles in the same colour to add interest to the background. i cut the snowflakes borders and coloured them red to pop against the green. the band was coloured pink (it is pink honest ... i know its not obvious in the picture!!) and stamped with the sentiment. i added extra detail with mini punched snowflakes to tie the pink in further. i sparkled these and the edges of the red snowflakes for that essential finishing touch for christmas. 


Mx

Tuesday 10 December 2013

it's birthday time !!

 
stamps: sense of time, for my family from stampin up!
inks: archival ink (sepia), tim holtz distress (brushed corduroy &walnut stain)
 
I made this simple 5x5 card in just one layer. to get the triangle shape, I tore post it notes along the sticky edge and placed them on the card. this became the mask to protect from the distress ink. I stamped over the brown with a darker tone to add the cogs. I then removed the post its and stamped the dad with the archival ink. that's it !!


stamps: sense of time, for my family& wacky wishes from stampin up!, hunky-dory forever stamps time of your life
inks: archival ink( sepia & coffee), tim holtz distress ink pads ( antique linen, brushed corduroy & walnut stain)
cardstock: craftwork cards digi cardstock, kraft cardstock & 4x6 card blank
 

I used another sketch for this card that was a bit more complicated. to start, I inked the edge of the matt and stamped it with the cogs. I inked the edges of a smaller piece of card and stamped that with the clock image and 'husband'. I then hand cut the tag shape from kraft card and layered the small card onto it, to create a removable tag to be used as a page marker. I slotted this over the large stamped card. this was stuck down to a kraft card leaving the top edge loose to be able to slide the tag off. I created a matching insert for the card using some of the cogs and the happy birthday sentiment.
 
card with tag (reverse)


inside
 
http://cleanandsimplestamping.blogspot.co.uk/2013/12/270.html
 
I think these two cards show how you can take the same stamps and create two completely different cards, one clean and simple and another with a layered vintage feel.
Mx

Monday 9 December 2013

festive tag ...

 
stamps: festive decorations, simply sophisticated,christmas icons all from lili of the valley & spring jubilee by pink paislee
ink: memento (tuxedo black) tim holtz distress ink pads ( barn door, antique linen, brushed corduroy& walnut stain), promarkers, copic spica glitter pens
cardstock: manila tag, craftwork cards digi cardstock
punches/dies: scallop edge punch from stampin up!, oval framelit & big shot from sizzix
 
I made this tag to coordinate with a striped present bag I bought. the tag was inked with distress then stamped with the cute twinkles in a darker shade of brown. I stamped part of the LOTV image, not inking the fourth bauble to make sure it would fit inside the oval die. I used promarkers to colour the baubles, then added some sparkle with the Spica pens. I cut the oval and inked the edge with red to make it stand out. I also created a border strip, following the promarker sketch, by inking and stamping card and using the punch to give it a decorative scalloped edge. once I had all the pieces, I assembled the tag and finished it off with the simple sentiment at the bottom.
 
tag with the bag, using raffia to fasten
 
 
http://www.ribbongirls.blogspot.co.uk/2013/12/ho-ho-ho-christmas-challenge.html
 
http://ideastoinspire.blogspot.co.uk/p/challenge.html
 
http://abcchristmaschallenge.blogspot.co.uk/2013/11/x-for-out-of-box-no-squares-allowed.html
 
http://promarkerchallenge.blogspot.co.uk/2013/12/challenge-227-sketch.html
 
 Mx

Sunday 8 December 2013

keep it simple !!

 
stamps: hunkydory forever stamps for the gents, teeny tiny sentiments from stampin up!
inks: archival ink pad (jet black), tim holtz distress ink pads (shabby shutters, peacock feathers & black soot)
punches: scallop border punch, word window, modern label all from stampin up!
cardstock: craftwork cards digi cardstock & 4x6 card blank
 
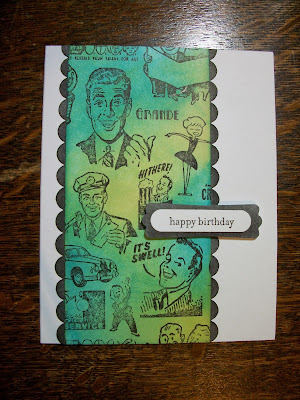
I used distress inks to create a multi-coloured base, which I stamped the design over. following the sketch, i then punched out the scalloped border. I used a further punch to cut the shapes out for the simple sentiment. I always struggle with mens cards but I think this simple approach works quite well.

http://freshlymadesketches.blogspot.co.uk/2013/12/theres-still-time-to-play-with-sketch.html

http://www.simonsaysstampblog.com/wednesdaychallenge/
Mx

Saturday 7 December 2013

gifts galore!!

 
stamps: wishing you, warmth& wonder and distressed dots all from stampin up!
inks: aquamarine, vermillion &olive archival ink pads
cardstock: craftwork cards digi cardstock & 4x4 card blank
extras: sizzix big shot & framelits circle dies
 
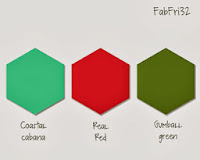
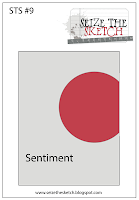
I made this little Christmas card as a simple and fresh take on the sketch. I thought that the dots stamped background worked well with the circle topper and the dotty present in the stamp. the fab Friday colour scheme really adds to the sense of fun for this card, with the turquoise to brighten up the traditional red and green.

inside

i added a sentiment stamped inside on the matching background with a little present to finish this card off. I kept things quite clean and simple for this one but I think the fun little touches just make it !!
 
http://fabfridaystampinchallenge.blogspot.co.uk/2013/11/fab-friday-32.html
 
http://seizethesketch.blogspot.co.uk/2013/11/seize-sketch-8-sweet-n-sassy-stamps.html
 
if you wanted to make things really simple for a large batch of cards, use a red card then just matt the dotty layer on to save time !!
 
Mx