Showing posts with label chocolate. Show all posts

Thursday, 11 May 2017

edna loves chocolate

  • stamping bella - 'edna loves chocolate'
  • mama elephant - framed tags 'union square' creative cuts/dies
  • DCWV - fresh floral stack
  • memento 'tuxedo black' ink pad
  • Neenah classic crest cardstock
  • copics- skin: E50, 51, 21. R00. hair/ chocolate: E55, 57, 59. Dark pink: R35, 85. Light pink: R00, 81, 83. Lilac: V15, 12, 01. Mint: BG10, 11, 34. Wings: BG70, BV0000, R000. Green: YG17, 25. Ground: W0, 2.
  • wink of stella 'clear'
  • black card stock
  • 6" square card blank
I stamped the image and sentiment onto Neenah cardstock. I coloured the image with copics, following the colour challenge for inspiration. I then die cut this using the centre of the die and cut three frames from black cardstock to layer up around the image. I cut a mat of black to fit across the card blank and a layer of patterned paper. I then glued these in place, along with the frames and slotted the image matt inside to complete the sketch. For the finishing touch, I added glitter to the wings.
 
I would like to enter the following challenges:
 
Mx


Saturday, 6 December 2014

spread the christmas cheer...

 
Here is another of my chocolate box cards. Just a quick post to say thank you to everyone for their lovely comments on my previous post with the box cards... I'm glad you're enjoying my free template. If you haven't seen it yet, here's the link to save you searching ( http://craftylilmouse.blogspot.co.uk/2014/11/chocolate-box.html )
 
Please share pictures of your makes, as I'd love to see what creative things you have made !!
 
Mx


Tuesday, 18 November 2014

chocolate box


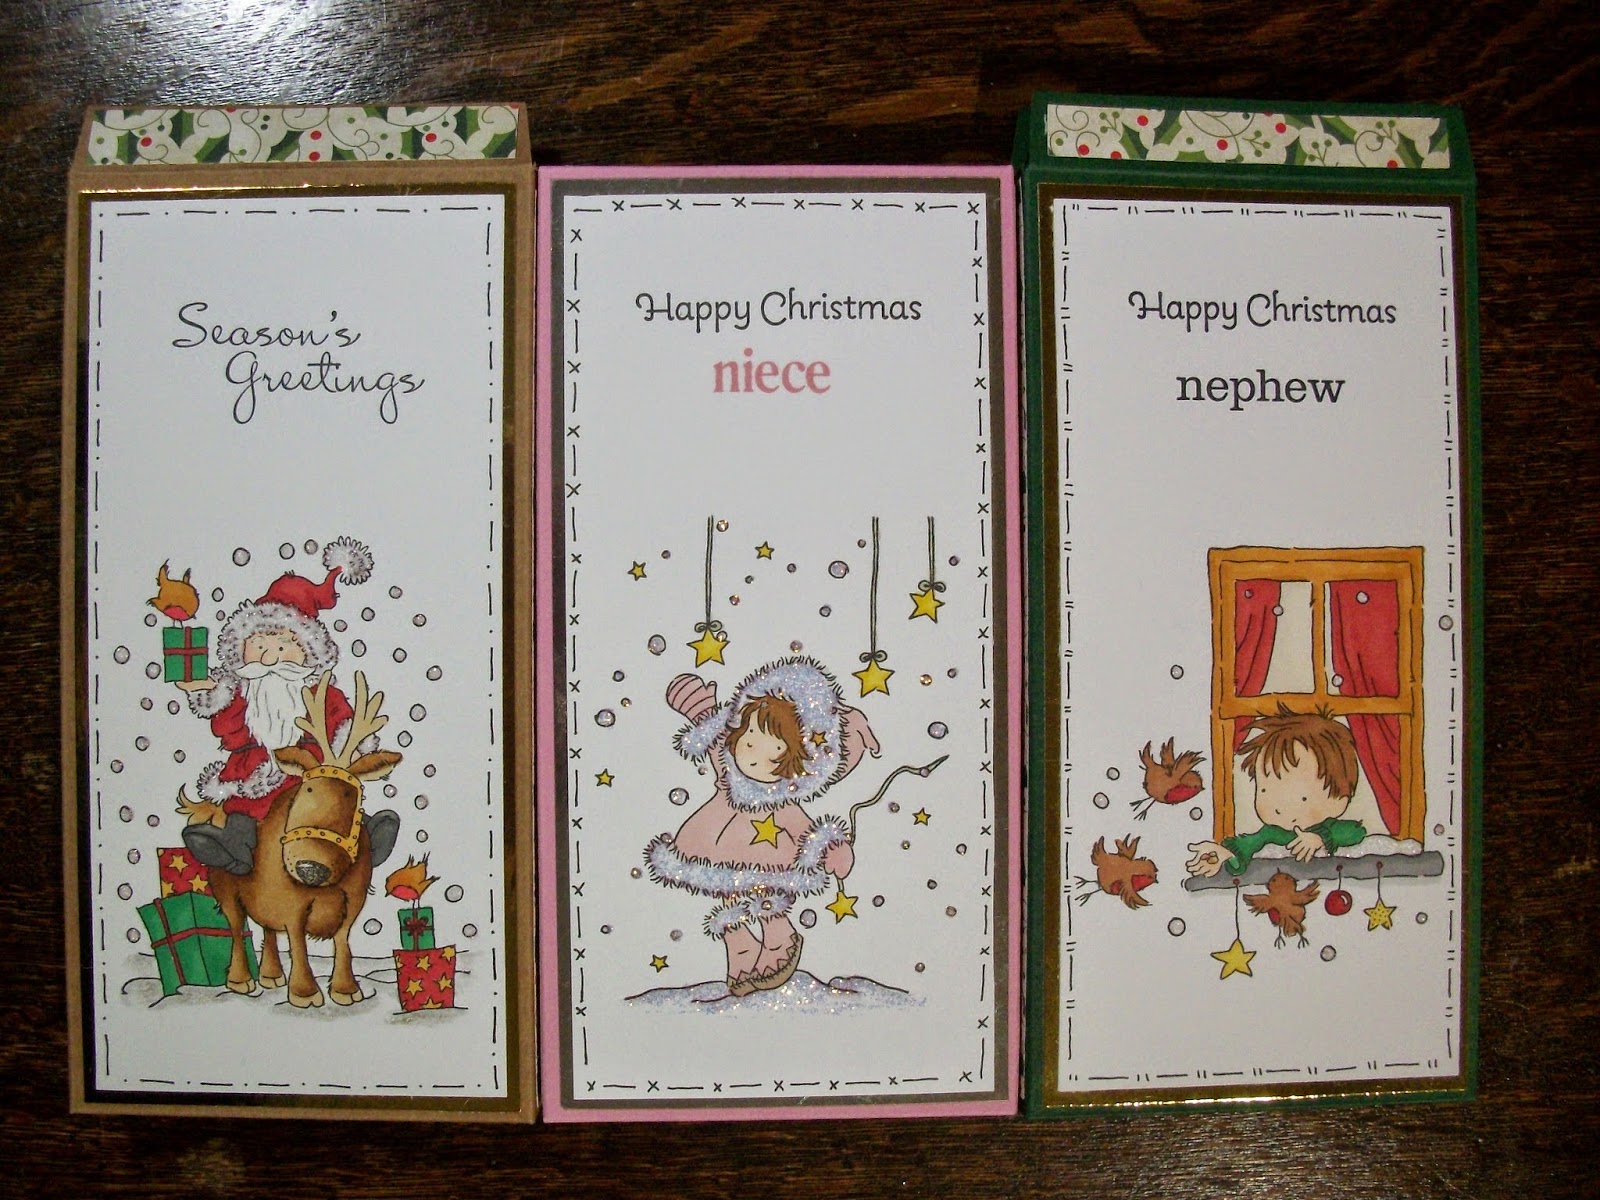
I've made these chocolate box cards to send the kids at christmas. I bought a chocolate bar and measured it to calculate the dimensions of the box. I took an A4 sheet of card and scored the net. folded it and cut it out. I then glued the box together. I then stamped and coloured an image from lili of the valley with a stampin up! sentiment on digi cardstock. I created a freehand border using the sekura micron pen, and added glitter to the images too. I layered mirri card behind the image and added this as a decorative panel to the front of the box. I also found coordinating papers to decorate the sides and top of the box. The chocolate was then sealed inside ready for the kids to open at Christmas.


I think this is a great idea to combine a card and a gift as the flap on the box creates somewhere to write your message and the box holds the gift. you can customise the boxes to have the card open at the front or back (depending on which way up you use the template!!) or make the box to fit a different sized gift. These aren't just for Christmas, change the image and you can send them any time of the year.
 
challenge #20 - Box it up!

'Merry Christmas'

Mx

Monday, 12 May 2014

cheery chocs !!

 
stamps: 'chocolate factory' from lili of the valley and 'petite pairs' from stampin up!
cardstock: DCWV 'all about boys' paper stack, craftwork cards digi cardstock and a 6x6 card blank
inks: memento ink pad (tuxedo black), tim holtz distress ink pad (spiced marmalade), sakura micron and promarkers
others: circles framelits from sizzix
 
I cut a matt in digi cardstock to fit the cardblank. I drew a border around the matt freehand, using the sakura micron pen. I then stamped the image and coloured it using promarkers, (picking out the colours from the paper). the paper was cut into a banner shape. the sentiment was stamped, die cut and edged with the distress ink to layer onto the banner. I inked the card blank using tim holtz distress ink and stuck down the layers, following the sketch.
 
 
Mx

Friday, 20 December 2013

the edible edition !!

 
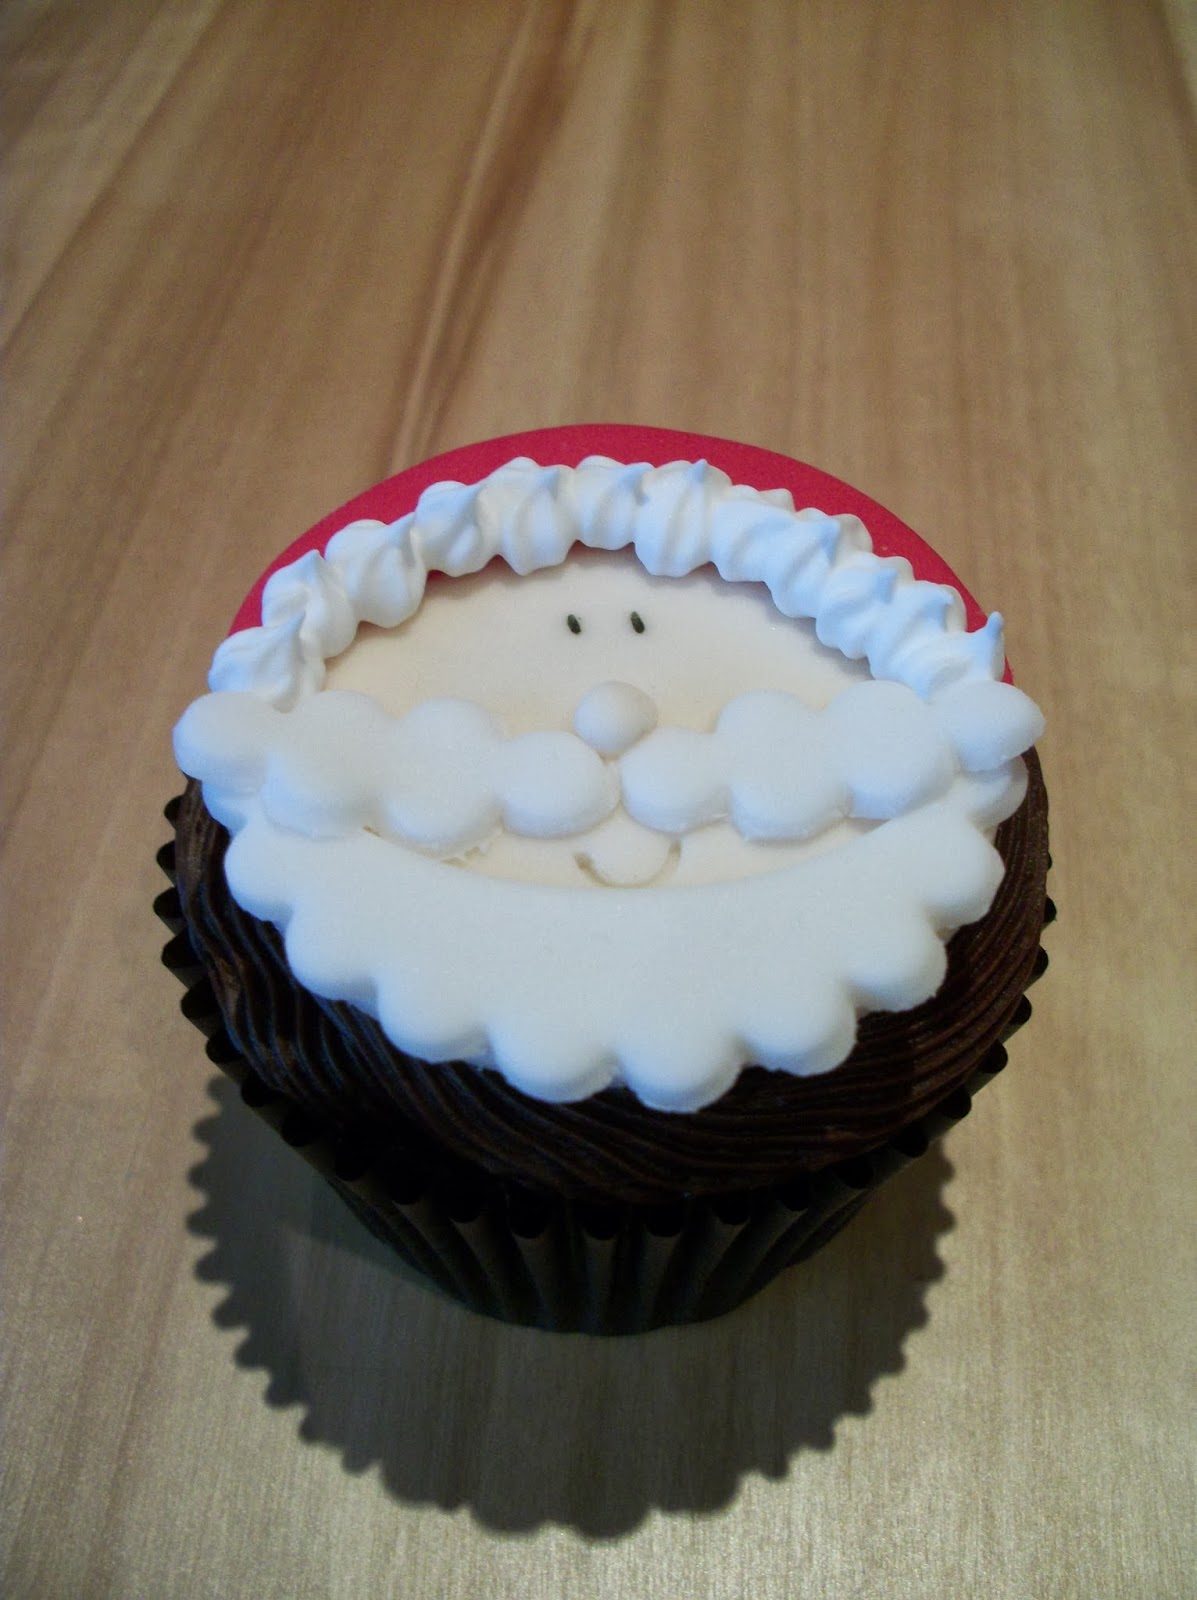
I thought id share a quick post to show some of my other creations. these are some of the festive designs i've added to cupcakes recently. the snowman and snowflake are vanilla flavoured, the santa and star are chocolate fudge (yum!!). each of them are decorated with icing and details like the eyes drawn with an edible pen. some edible lustre by sugarflare adds that extra festive feel. the really great thing about the designs is that you can have them made in advance and ready to add to the cupcakes when you've baked them. the star and snowflake are beautifully simple with the swirled frosting. snowmen and santas are a little more work but worth the effort for the fun they bring ... kids love them (I hope you do too!!) 


Mx

Tuesday, 30 July 2013

beach party!!

as promised, here are the pictures from a recent party. it was a joint celebration for my parents silver wedding anniversary and my sisters 21st!!
 

for mum & dad's (fruit) cakes I flat iced it, first in marzipan, then sugar paste. I added two colours of ribbon to the base of each tier. I then piped on the coral. I added flower paste shells, I made by pressing the paste into a chocolate mould, (bought at the cake decorating store.)
 

 for abbie's cake I made a topper with little beach huts. it was all made edible with sugar paste and brown sugar as sand.
 
pinwheels were bought from pipii.co.uk

ice-cream  cupcakes (which my dad loves... he thinks cupcake cases should be banned and only cones allowed!!) traditionally you would add a chocolate flake, but those are a little messy, so I think the chocolate wafer(from Tesco) was the perfect finishing touch for these.
 
these beach cupcakes use some brown sugar as sand a sugar paste towel and a paper drinks umbrella I got from asda
 
hope you like all the beach themed sweet ideas if you want any more details just leave a comment and ill help as much as I can...
 
Mx

Monday, 29 October 2012

Happy Birthday Mum !!

 
happy birthday to my mum
card and chocolate bar wrapper was made using
tim holtz distress picked raspberry ink pad, tim holtz printed tissue paper, kraft cardstock, stampin up! mixed bunch stamp set and matching blossom punch, and oval punches and petite pairs messages, lili of the valley tag message, and a few buttons and string.