Showing posts with label Mama Elephant. Show all posts

Friday, 22 March 2019

botanic thanks


  • Mama elephant- botanic thanks
  • Water colour cardstock 
  • Archival ‘jet black’ ink pad
  • Zig clean color real brush markers- 040,041,047. 036,037. 080,803. 070,052,050.021,026.027,202,200. 022,020. 
  • Black cardstock 
  • SU!- silver glitter tape
I cut a piece of water colour card roughly to size and stamped my image. I taped the card down and coloured the flowers, leaving the thanks without any colour. Once dried, I trimmed the panel to the size I wanted. I matted onto some black cardstock, so a band showed at the top and bottom. I folded my cardblank and added glitter tape to the top and bottom edges. I glued the coloured panel on top to finish my card. I did this flat for posting but using foam tape would be lovely too. 
Mx

Monday, 4 February 2019

bess the butterfly


  • Stamping Bella: tiny townie Bess the butterfly (stamp & die)
  • Mama elephant: Madison Avenue creative cuts die
  • Stampin up!: curly cute
  • Make it colour blending cardstock
  • Copics:E50,51,21,93. E42,43,44. Y15. BG10,53. BV0000,000,00,11. V25. RV00. C5,6,7,8.
  • Wink of Stella ‘clear’ sparkle brush marker
  • Tim holtz ‘dusty concord’ distress ink pad
  • Pattern Paper (from craftwork cards, don’t know the name)
To make this card I simply die cut my frame from copic friendly cardstock. I used the centre to stamp and colour my image, then cut it out using the matching die. 
I cut out a piece of pattern paper, which had the sentiment printed on. I inked my card blank with the purple ink then glue the paper to the centre. I added the white frame. I glued the image in place using foam for dimension. Final touch was a bit of sparkle to the wings.
Mx

Wednesday, 25 July 2018

Donut treats


  • Mama elephant: donut treats stamps & dies
  • Stampin up!: hello you thinlits dies
  • Craftwork cards: guilty pleasures paper pad(sprinkles)
  • DCWV: fresh florals (dots, i think only had a scrap left)
  • Neenah classic crest cardstock
  • Memento ‘tuxedo black’ ink pad
  • Copics: mice-W00,W1,R01. donuts-E41,E31,E55. frosting & hats- Y08,Y11,Y15. V01,V12. R81,R83,R85. BG34,BG23. box- BG10,BG11.
  • zig wink of stella 'clear' sparkle brush pen
I covered the front of my card blank in the pink dotty paper. I cut a mat of sprinkle cardstock as a layer. I diecut the ‘thanks’ from the centre top. I glued this onto the card.
I stamped coloured and diecut the mice and donut images. I played about til i had an arrangement i was happy with. Then glued all the pieces down using both glue and foam to add dimension. 
The final touch was to add sparkle to all of the donut frosting.

 
To decorate the inside of the card, i added a coordinating sentiment from the stamp set in the centre. I also stamped, coloured and die cut a small image, and glued this to the bottom corner of the card.
 
 
Mx

I would like to enter the following challenges (linked below):


Monday, 26 March 2018

Butterfly kisses


  • Mama elephant- butterfly kisses
  • Lawn fawn- thank you borders
  • Watercolour cardstock
  • Archival 'jet black'ink pad
  • Zig clean Colorado real brush markers (052,023,021,045,041,068)
  • Tim holtz 'worn lipstick & tumbled glass' distress ink pad
  • Wink of Stella 'clear' glitter brush marker
  • 4x6" card blank
I stamped and watercoloured my floral and butterfly images. I cut these out using the coordinating dies. 
I die cut the sentiment twice from black and a third time using cardstock that I coloured using the pink ink pad. (You could also use the watercolor marker instead). I glued these on top of each other to add dimension. 
I used the sketch as inspiration to add a bit of blue ink to the card blank, creating a soft circle. I glued all the elements on to the card blank following the sketch. I used foam on the outer edges of the butterfly wings and glued flat in the centre to add extra dimension. To finish the card I addded a bit of sparkle detail to the wings, sentiment and flower centers.
 

Saturday, 3 February 2018

Bundles of blossoms


  • My favourite things- bundles of blossoms background
  • Mama elephant- birthday script creative cuts
  • Stampin up!- endless birthday wishes
  • Distress embossing ink pad
  • Wow! Embossing powder
  • Indigo blu- lucious pigment powders 'purple, raspberry,coral & green'
  • Archival 'watering can' ink pad
  • White, black, grey and watercolour cardstock
  • 4x6" white card blank
 
I stamped and embossed the floral background onto some watercolour cardstock. I used the pigment powders and water to create the pearl wash of colour, making sure to wipe any colour off the embossed lines. Once dry, I trimmed the piece to fit the front of my card blank. I cut a thin strip of white card and stamped the 'wishes' sentiment. I glued this to a wider piece of grey card. I die cut the word 'birthday' from both white and black card. I layered the white onto the black, off set slightly to create a shadow. I glued this into position above the 'wishes' to complete my sentiment. I added this to the card flat, however, you could use foam for dimension.
Mx
 
I would like to enter the following challenges:

Friday, 15 December 2017

It's beginning to look a lot like Christmas

  • Hunkydory snowy season luxury card collection: It's beginning to look a lot like Christmas
  • Hunkydory little book of snowy scenes
  • Hunkydory essential book of Christmas sentiments
  • Hunkydory cardstock (offcuts from the other collections)
  • Hunkydory adorable scorable cardstock
  • silver mirri card
  • mama elephant union square creative cuts die
  • sizzix scallop square framelits die
  • white ribbon & bakers twine
  • A5, 7x7", 5x7"  6x6", 5x5" & 6x4" white card blanks

For the 7" square card, I mat and layered the card front with silver mirri card and the cardstock with the border feature. I added the tree topper to the main section of the cardstock and angled the essential book sentiment tag on top. The tag was raised on foam and embellished with a knot of ribbon. I cut the insert down so the inside coordinated with the background card on the front.
inside
I designed this A5 card using the large snow globe topper with some  other cardstock I found, to allow the image to stand out. I chose the adorable scorable cardstock to match the off cut of swirls cardstock, (from another collection) which I though complimented the colours in the topper. I cut the panels of cardstock to fit the card front, edging the swirls border with silver mirri to create a neat join. I positioned the image and sentiment toppers onto the card, using foam pads for dimension.
For this little 6x4" card, I made a feature of the printed image on the cardstock from this collection. I simply trimmed the cardstock to size, so it would fill the card front. I then wrapped the bakers twine around and secured at the back, before gluing down. I tied the twine in a bow and finished with the essential book sentiment placed off centre across the twine. I added the matching insert, cut to fit inside.
inside

I made this 5x7" card with the remaining printed scene cardstock in this collection. I found a little book image where the scene on the page matched the background cardstock. I simply matted the page onto silver mirri card to create a topper. I glued this to the card front, which I had covered with the cardstock. Again, I trimmed the coordinating insert down to fit inside the card, this time featuring the printed sentiment.
inside
I also created this cute little 5" square card using a little book page and the remaining cardstock from this set. I covered the card front with the snowflake cardstock. I die cut a frame from silver mirri card, then cut the little book page to sit neatly inside. I glued these onto the card flat, making a card which is perfect for posting! I finished the inside with the printed sentiment section of the insert, die cut to create a scalloped edge square to compliment the front.
inside
With this final topper, I felt that the colours of the little girls outfit didn't really suit the cardstock in the collection. I therefore made this 6x6" card using some patterned cardstock I had remaining from a previous hunky-dory Christmas set. I mat and layered the cardstock onto silver mirri for the card front. I then positioned the image and sentiment toppers on, using foam pads for dimension.
Mx

Thursday, 11 May 2017

edna loves chocolate

  • stamping bella - 'edna loves chocolate'
  • mama elephant - framed tags 'union square' creative cuts/dies
  • DCWV - fresh floral stack
  • memento 'tuxedo black' ink pad
  • Neenah classic crest cardstock
  • copics- skin: E50, 51, 21. R00. hair/ chocolate: E55, 57, 59. Dark pink: R35, 85. Light pink: R00, 81, 83. Lilac: V15, 12, 01. Mint: BG10, 11, 34. Wings: BG70, BV0000, R000. Green: YG17, 25. Ground: W0, 2.
  • wink of stella 'clear'
  • black card stock
  • 6" square card blank
I stamped the image and sentiment onto Neenah cardstock. I coloured the image with copics, following the colour challenge for inspiration. I then die cut this using the centre of the die and cut three frames from black cardstock to layer up around the image. I cut a mat of black to fit across the card blank and a layer of patterned paper. I then glued these in place, along with the frames and slotted the image matt inside to complete the sketch. For the finishing touch, I added glitter to the wings.
 
I would like to enter the following challenges:
 
Mx


Tuesday, 2 May 2017

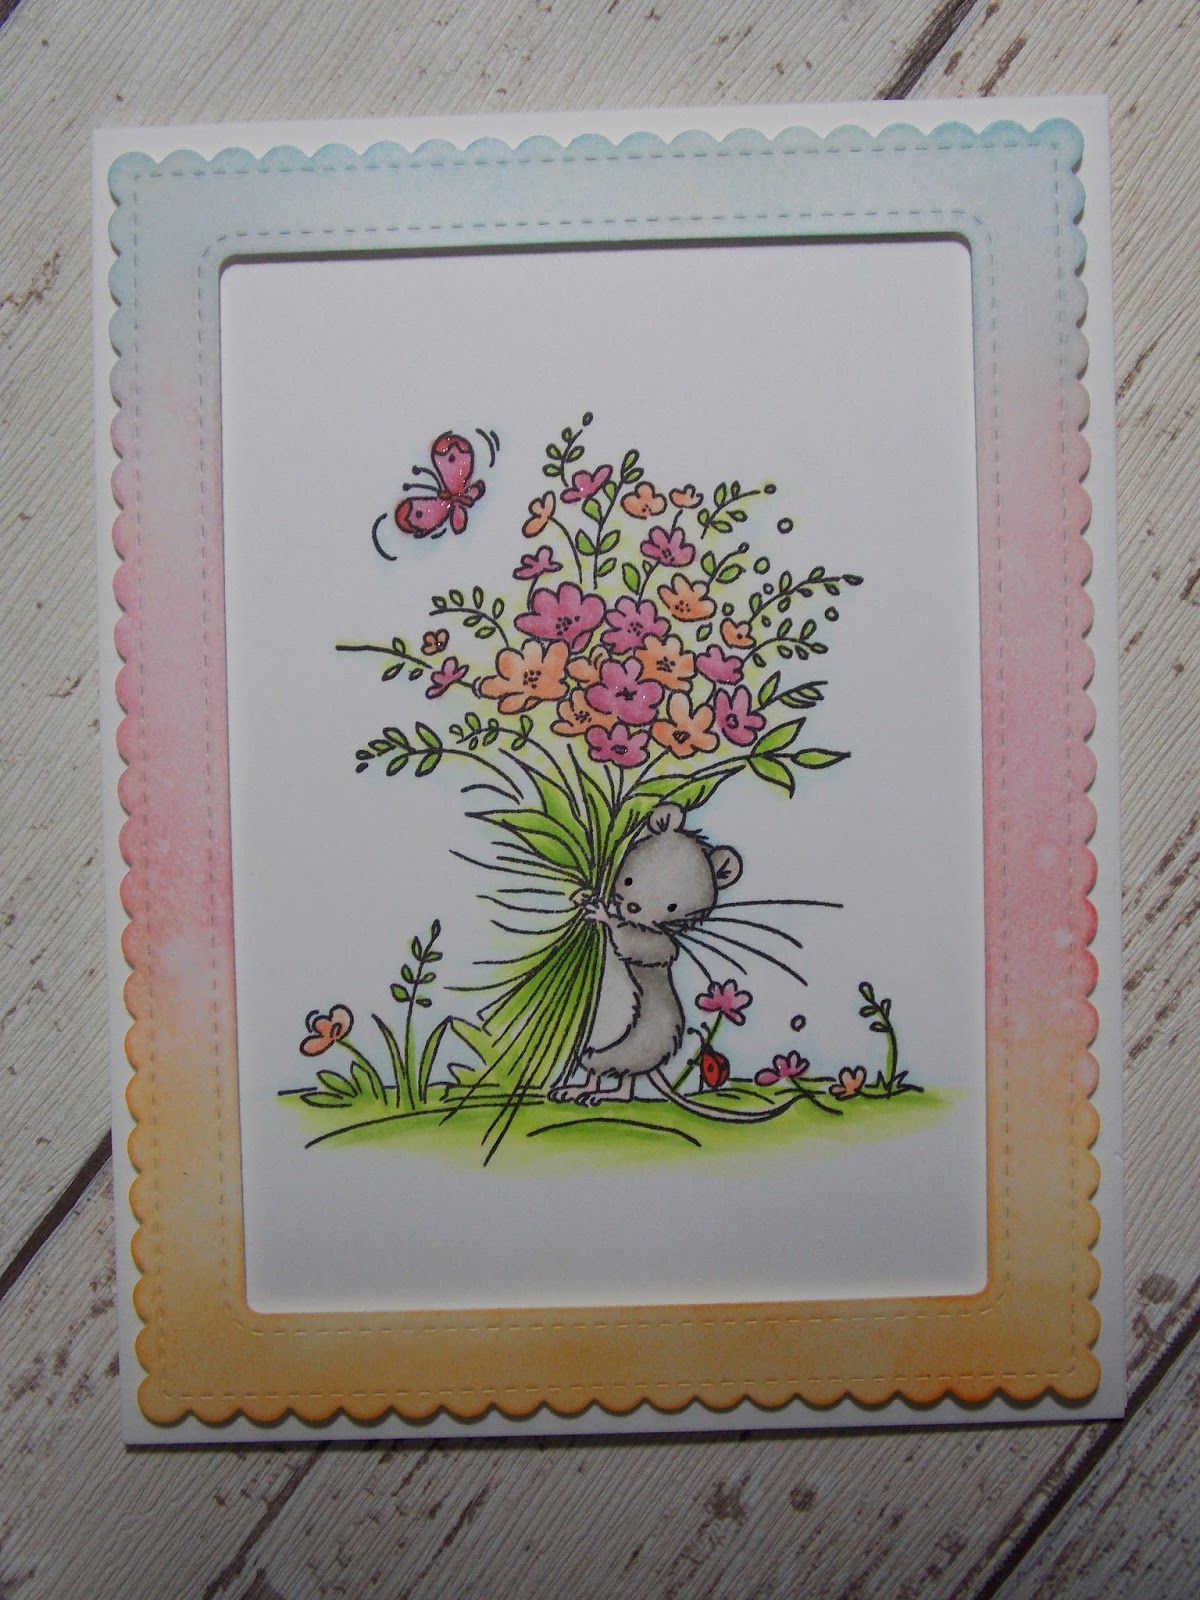
Big Bouquet...

  • LOTV 'Big Bouquet' stamp
  • mama elephant: Madison avenue framed tags
  • Tim Holtz distress inks: 'tumbled glass', 'worn lipstick', 'carved pumpkin'
  • copics: W00, 0, 2, 4. R000, 00. R85, 83, 81. YR 02, 01, 000. R05. B0000. YG25, 03, 01, 21, 0000
  • wink of stella 'clear' glitter pen
  • sekura glaze pen
  • 6x4 white vertical card blank
I inked up a piece of white card, blending the three colours together. I then die cut this to create the frame. I centred the image stamp on the card blank and coloured it with copics. I added the frame to the card using foam for dimension. I completed the card with glitter pen on the flowers and glaze pen on the eyes. I've kept this one nice and simple to make the most of the fresh spring colours and cute image.

Mx
 
I would like to enter the following challenge:

Wednesday, 22 March 2017

big news!!


  • SU!- big news
  • Mama elephant- rainbow high creative cuts
  • W plus 9- unforgettable
  • Daler Rowney- Aqua fine smooth watercolour cardstock
  • Tim holtz distress ink pads- tumbled glass, stormy sky, worn lipstick
  • Twine
  • Copics- sorry... got carried away with this one and forgot to make a note of which colours I used!! 
I water coloured the blue to create a background. On another piece of card, I stamped the sentiment, die cut into the balloon shape and water coloured it pink. I added darker pink to letters and sparkled once dry. I stamped, coloured and die cut the elephant from a further piece of card. I glued the background to card blank, then added the balloon using foam pads. I then tied twine around the elephant's tail and positioned it on the card, again using foam for dimension. I looped the loose end of twine around the balloon and secured with a knot. I finished with some dots of glue along twine to hold it in place.
Mx

I would like to enter the following challenges:
Seven hills 'tic- tac- toe': watercolour, big words/ letters, pastel shades or animals, big words/ letters and die-cutting

Saturday, 18 March 2017

Congratulations toast...


  • SU!- making spirits bright
  • Mama elephant- 'union square' framed tag creative cuts
  • Paper smooches-congratulations die
  • Memento 'tuxedo black' ink pad
  • Copics- E40,81. BG70. C00.
  • Wink of stella 'clear' glitter brush pen
  • Ranger glossy accents
  • White card
  • Cream glitter card
  • Bronze sequins
I cut a matt of glitter card to fit my card blank. I then cut a matt of white card to sit on top and stamped my image in the centre. I coloured this with copics, then added a clear glitter to make the bubbles glisten, followed by a layer of glossy accents to add shine to the glasses. Whilst this dried, I created the shaker element. I die cut the aperture from the centre of a matt of white cardstock. I then added a piece of acetate to the back of this panel and edged this with foam tape (making sure there will be a full seal with no gaps for sequins to escape!) I made sure the glossy accents were dry, before adding a neat pile of sequins on top. I then positioned the shaker frame onto the card, trapping the sequins in place. To complete the card, I die cut a sentiment from the glitter card and added this across the front of the shaker.
Mx

Thursday, 16 March 2017

wonderful mum...


  • Mama elephant- butterfly kisses
  • SU!- wonderful mum
  • Zig clean color real brush markers-025 pink,200 almond pink, 047 may green, 037 cornflour blue
  • Versamark ​ink pad
  • Wow! 'opaque bright White's embossing powder
  • Dealer Rowney-aqua fine smooth watercolour cardstock
  • Sakura micron '005' pen
 
 I wanted to create a soft, water colour style card for mothers day. I stamped the image with the versamark ink, then added the white embossing powder. I also added the sentiment in the same way and used the heat tool to melt the embossing powder. I then coloured the flower using the brush markers, blended out with a water brush. I added a background of blue, concentrated around the message to make the white writing pop. As a finishing touch, I used the micron pen to freehand a border to edge the card.
 
Mx

Thursday, 9 March 2017

Winnie the pooh

  • Disney Winnie the pooh- honey pot fun metal die
  • Avery elle- woodland wonders
  • Mama elephant- Madison avenue framed tags
  • Memento 'tuxedo black'ink pad
  • Neenahclassic crest cardstock
  • Copics- E55,57,59 &47. YG63,67. R24,27. Y15,18. 100.
  • Sakura 'clear star' glitter pen & #849 (black) glaze pen
  • Sakura  01 micron pen
  • Tim holtz 'tumbled glass'distress ink pad
  • White, yellow, red & brown cardstock

I created a background by stamping the trees and colouring with copics. I then masked the trees and inked the card blank blue. I die cut a frame to fit the card. For the sentiment, I stamped the banner, positioned the sentiment inside and die cut into the banner. Finally, I took the winnie the pooh and die cut him from white cardstock as a base layer. I then die cut the relevant pieces from coloured cardstock and paper pieced onto the base layer. I used my copics to add shading to the banner and pooh bear, as well as colouring the bee. I added the lines on the honey pot and face with the sakura micron pen. I glued down all the pieces onto the card blank, using foam to add dimension and finished off with glazing to the nose and glitter on the bees wings.
Mx
I would like to enter the following challenge:

Wednesday, 14 September 2016

arctic penguins...


  • Mama elephant- arctic penguins 
  • SU!- sweet essentials 
  • Tim holtz distress 'salty ocean' ink pad
  • Memento 'tuxedo black' ink pad 
  • Copics- C00,1,3. Y35,38.
  • Sakura belly roll 'clear star's glitter pen
  • White cardstock 
I inked my card blank with a blue ink pad. I cut a White matt of cardstock cut to 12.2x17.3cm. I used my misti stamping tool to position and stamp all my images and a sentiment. I added a small amount of colour and shading using copics. I then glued my panel onto my card blank and added sparkle to the sentiment to finish.
Mx
perfect for a batch make !!
Challenges I'd like to enter:

Wednesday, 3 August 2016

edna loves icecream!!


  • stamping bella- edna loves icecream
  • mama elephant- Madison avenue framed tag die
  • LOTV- for her sentiments (set20)
  • tim holtz distress ink pads- shaded lilac, spun sugar &tumbled glass
  • Neenah classic crest cardstock
  • memento 'tuxedo black' ink pad
  • copics- skin:E50,51,21. hair:E34,57,59. skirt:BG11,32,34,57. dark pink:R56,85,83. light pink:R83,81,RV19,000. wings:BV00,RV00,BG10. cherry:R24,29,59. chocolate:E47,49. icecream:E40,41,42. ground:C1,00
  • white funky foam
  • wink of stell 'clear'
  • ranger glossy accent

i die cut a piece of cardstock with the frame die. i stamped the central section with my image and sentiment. i coloured the image using copics and added sparkle to the wings and glossy accents to the glass and cherry. while i left these to dry, i worked on the frame section. i inked the frame with 3 colours of ink to make a ombre effect. i then die cut a piece of funky foam, with the same die. i glued the foam to the cardstock frame together, to create dimension. i glued the raised frame to the card blank and added the image panel inside, gluing this flat.
Mx
 
the challenge i would like to enter:

Saturday, 9 July 2016

Whale of wishes...


  • Mama elephant -whale wishes (stamps & dies)
  • Mama elephant - framed tags- park avenue 
  • Mama elephant - waves trio dies
  • Tim holtz distress ink pads- tumbled glass, salty ocean & blueprint sketch
  • Archival 'jet black' ink pad
  • Sakura 'white' jelly roll pen
  • Wink of stella 'clear' glitter pen
  • White funky foam
  • White cardstock 
I cut 3 pieces of cardstock to fit my card blank. The first I die cut using the frame die (and put this to one side to use this later). The second I die cut using the waves dies to make one medium height wave and one small wave. The third I just kept as is. 
I started to create my scene by using distress inks to colour my background, creating an ombre effect from dark blue at the bottom, to light blue at the top. I sprayed and flicked the panel with water to lift some of the ink away with a towel and create more texture. I did the same for all the wave layers. i stamped my greeting using black ink on the base layer, adding white pen highlights to help make it stand out. I stamped two of the whale images and die cut these, before adding them to my scene. Once I was happy with the lay out I glued all the pieces down, keeping the waves flat and the whales fixed using foam tape. I secured this to my card blank.
 I went back to my cardstock die cut frame and die cut another one out of funky foam. I then glued these together to create a more dimensional frame which I added to my card blank. The final touch was to stamp the water splash images to the card and glitter those (sorry they don't show up well in the photo).
Mx

Challenge I would like to enter:

Tuesday, 14 June 2016

bear hugs...

  • mama elephant- bear hugs stamp & dies
  • SU! guy greetings
  • lawn fawn- large stitched rectangle stackables
  • memento 'tuxedo black' ink pad & copics
  • tim holtz distress inkpads (various bright colours and black soot)
  • black card blank
  • black & white cardstock
  • black funky foam
  • uni-ball white gel pen

 I cut a piece of white cardstock slightly smaller than my card blank and used distress inks to create a night sky background. For the background, I first covered the card with spots of bright colours and then covered the entire sheet with black ink. I sprayed some water on, added bigger drops in places and lifted off some colour with a paper towel. I added water to some white paint and flicked it over my panel to create the look of stars. finally I stamped a moon image in the top corner and coloured it using a white pen. I glued this flat on to the centre of my card blank. I die cut a frame from black cardstock and funky foam and glued these layers together. I then glued this to the card blank. I stamped my sentiment onto some green cardstock and cut this into a banner shape. I used some more funky foam to glue this onto my card. I stamped, coloured and die cut the bear image. I used foam tape to attach this to my card and give it even more dimension. the final touch was a couple of silver confetti stars to complete the sketch.
Mx

challenges I would like to enter:
cas(e) this sketch- #176
simon says 'fathers day/for a guy'

Saturday, 28 May 2016

unicorns and rainbows!!


  • mama elephant- unicorns and rainbows (stamps & dies)
  • SU!- cottage greetings stamp set
  • mama elephant-landscape trio, rainbow high creative cuts
  • 6x4" white card blank, white cardstock & vellum
  • memento 'tuxedo black' ink pad
  • wink of stella- clear
  • tim holtz distress ink pads (tumbled glass, abandoned coral, dried marigold, squeezed lemonade, cracked pistachio, mermaid lagoon, shaded lilac, wilted violet)
  • copics (E40,81,43,44,93. R14,24. Y13,15,35,38. YG11,13. B01,02. BV02. V17. C1)
I used a ink blending tool and tumbled glass ink pad, to create a background on the card blank. I die cut the cloud landscape die 3 times: 1 cardstock, 1 vellum, 1 in scrap paper. I used the scrap paper as a mask to add more depth to my background. I stamped the sentiment on to the white cardstock and layered the vellum behind, off setting them to create the look of multiple clouds. I die cut the rainbow from white cardstock and inked each piece of the rainbow with appropriate coloured distress inks. I stamped and die cut my 2 unicorns. I coloured these using copics and added some sparkle to the hair and wings. I glued all my pieces on to the card blank, using foam tape for the unicorns to add dimension.
I just love this stamp set and can't wait to make some more cards...
Mx
 
  I would like to enter the following challenge:

Monday, 16 May 2016

Penguins in paradise!!


  • My favourite things- penguins in paradise (stamps & dies)
  • Lawn fawn- stitched large rectangle stackables dies
  • Mama elephant-stitched hillside dies
  • Memento 'tuxedo black' ink pad
  • Copics-YG03,05,06. G14. E35,39,29,93. RV09,1906. Y35,38. C00,1. W7,8,9
  • Versamark ink pad & pen
  • WOW- bright white & black embossing powder
  • Wink of stella-clear
  • Textured coloured cardstock, 6x4" card blank, white copic friendly cardstock

I planned my design to match the sketch, then die cut all my coloured cardstock panels. I stamped a small flower image all over the pink panel using versamark ink and used white heat embossing powder. I die cut a strip of orange card and stamped my sentiment. I then used black embossing powder to give a shiny finish to this. I die cut and stamped my images and coloured using copics. I added wink of stella to the pink ring on my penguin image. Since I had black embossing powder out I used a versamark pen to add powder to the penguins eyes. I added all the card stock panels flat to my card base to create the background. I used 1mm foam to add the palm tree and 2mm foam tape for the banner and penguin. I think this will make the perfect card for my sister's birthday this summer.
Mx

Challenges I would like to enter:
Freshly made sketches #236
MFT card challenges: colour challenge 45
Seven hills craft challenge blog- may theme 'embossing'

Wednesday, 27 January 2016

both for baby...

main supplies:
  • SU! big news 
  • craftwork cards Amelia & Jacob papers
  • lawn fawn- stitched square stackables dies
  • mama elephant- stitched landscapes dies
  • 5x5"card blank & white cardstock
  • memento black ink pad
  • wink of stella- clear
  • American crafts white twine
for the baby boy card you will also need:
  • tim holtz 'squeezed lemonade' distress ink pad
  • promarkers- pastel blue& denim blue
  • big yellow button
for the baby girl card you will also need:
  • tim holtz 'spun sugar' distress ink pad
  • promarkers- cocktail pink & pale pink
  • white paper flower & small pink button
 
to make these cards, I inked my card blanks with the coordinating colours. I die cut the stitched square from white cardstock. I added my large sentiment stamp to this, placing it near the bottom. I coloured the open areas in the sentiment to match some paper I had chosen. I added wink of stella over the colouring for a bit of added sparkle. I cut a strip of the patterned paper and die cut with the same stitched square die so this detail would follow right around the edge of the card. I then used a landscape die to create a curve on the bottom edge to follow the sketch. i threaded some twine through the button and tied in a knot. I glued all the layers on to my card blank before finally adding my button. to finish the card, i also stamped a matching 'congratulations' sentiment inside the card.

 
i made a slight change on the girl card, using a white paper flower and a small pink button instead of the large button. i still added the white twine, but tied this in a bow to be more girly.
Mx
 
i would like to enter this card into the

Monday, 18 January 2016

hoppy anniversary!!


  • W plus 9 wishing you stamp and dies
  • Lawn Fawn stitched stackables square
  • Mama elephant- landscape dies
  • Memento tuxedo black ink pad & copics friendly cardstock
  • Copics (w00,01,02. R00)
  • Archival jet black ink pad
  • wow white embossing powder & tim holtz embossing ink pad
  • Tim holtz distress InkPad (tumbled glass, Brocken China, fafded jeans, chipped sapphire, crushed olive and peeled paint
  • watercolour &black cardstock
  • 5x5" white card blank
I used a stitched square die to cut 2 pieces of watercolour cardstock. I then die cut 1 piece a second time, using a hill die to create a landscape. I coloured both pieces with distress ink pads and used a water sprayer to create some interest. for another little touch I added a small shooting star to the sky, I embossed this to make it bright white. I placed the sentiment on to my clear block, in a slight arch to match the line of the hill. I stamped this using black archival. I stamped, coloured (using copics) and die cut my bunny characters. I used the same sized die as before and a second slightly larger die to create a black frame to complete my card. I glued my layers onto my card using different depths of foam tape to give extra dimension.    
Mx

the challenges I would like to enter are:
 
cas(e) this sketch -#155  (I would like to include the image in my post but unfortunately I am unable to add the picture, so don't forget to click on the link and take a look at all the great examples)
simon says Wednesday- " ombre"