Showing posts with label pink. Show all posts

Friday, 19 July 2019

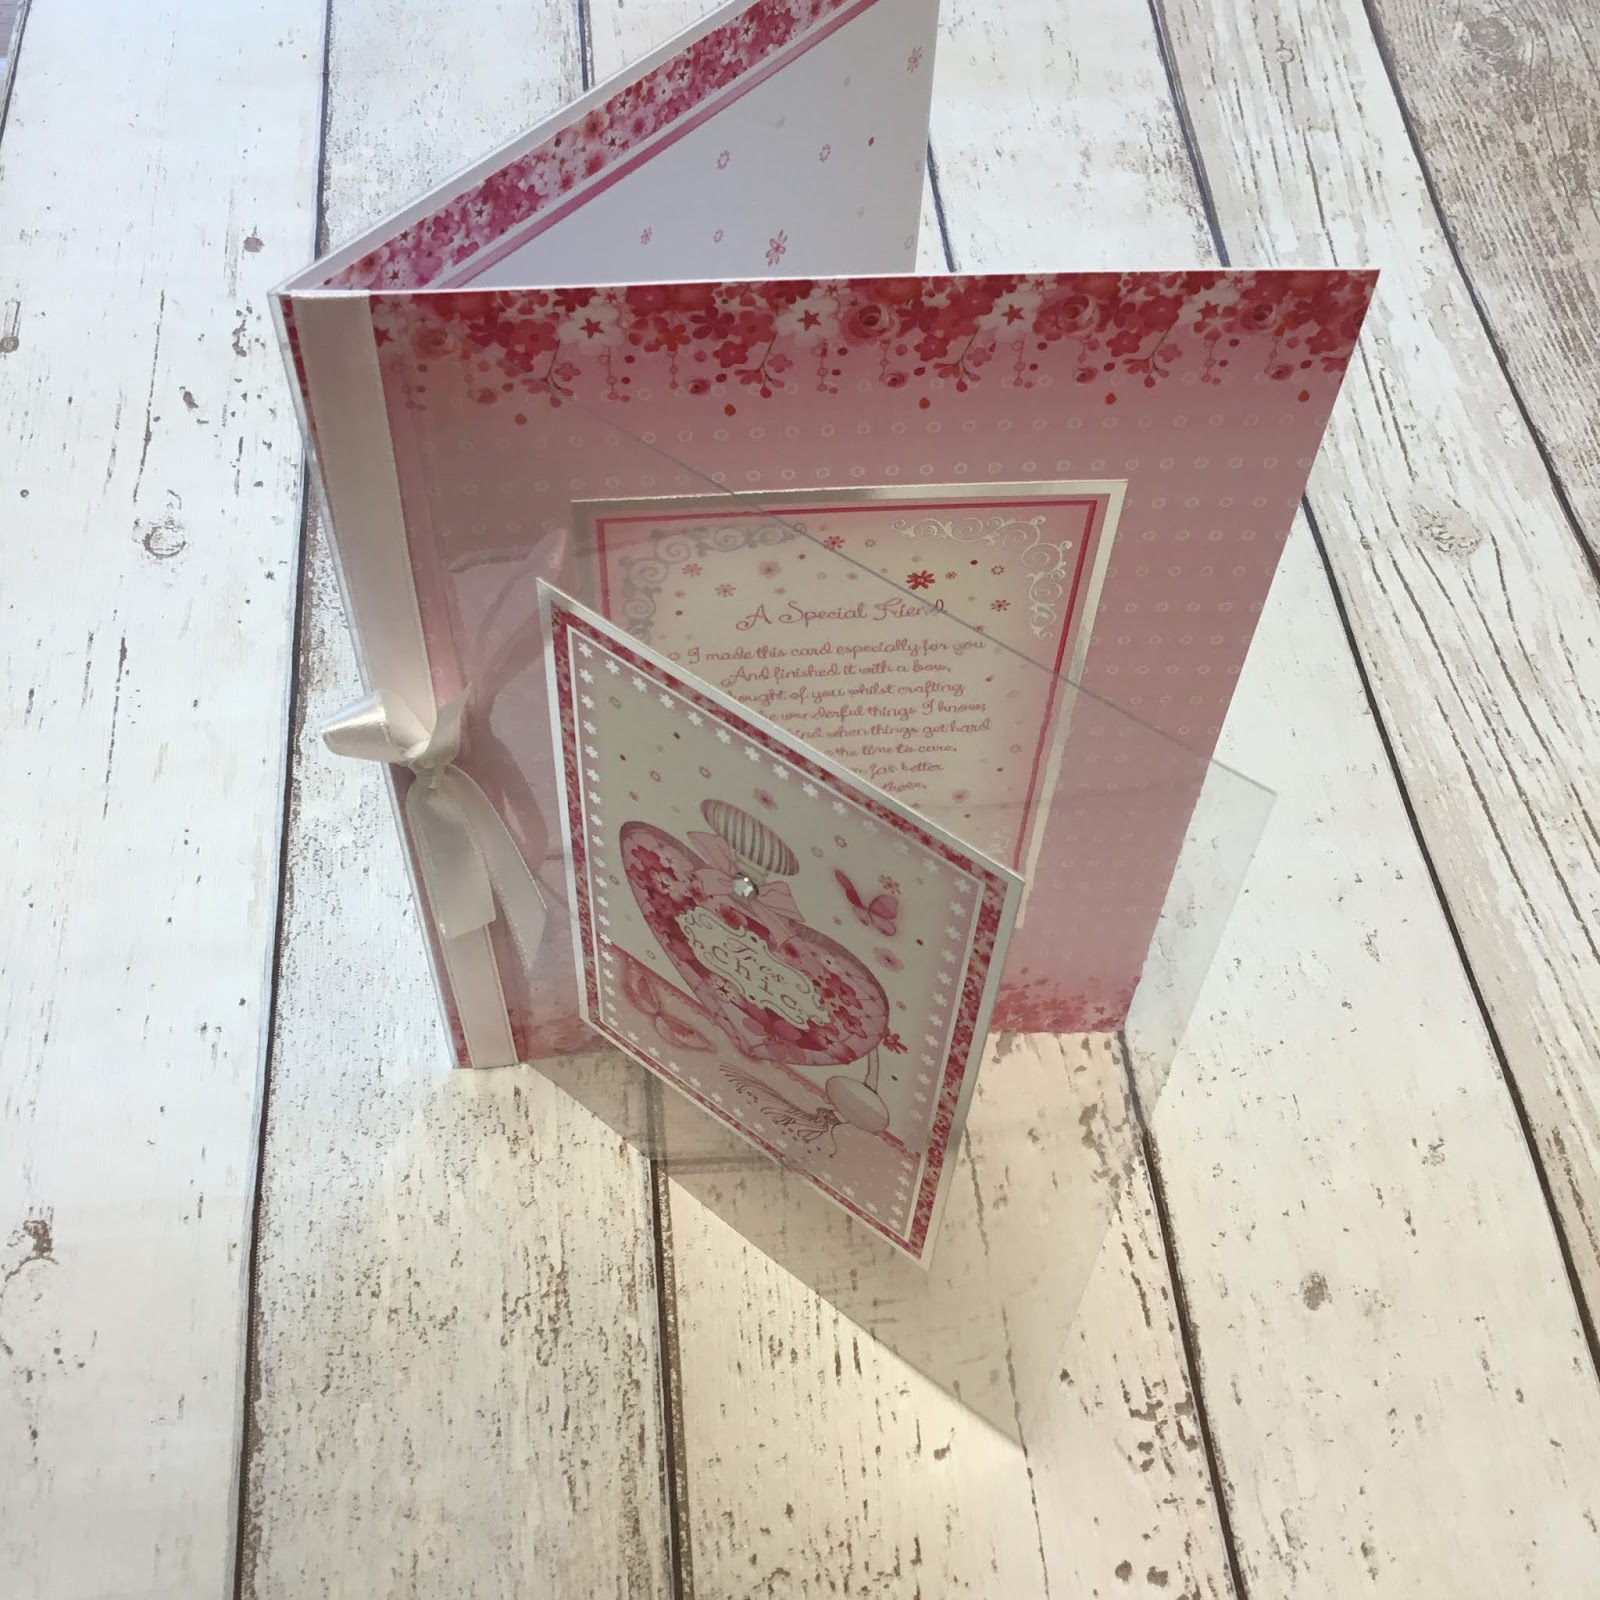
Chic 60th


So I wanted to make a special card for a friends 60th birthday. I instantly thought of using the hunkydory window to the heart postcard collection. I used the a special friend toppers, matching paper and insert. 
 
 
I folded an a5 cardblank and covered the front with patterned paper. I scored a piece of a4 acetate in the centre, then on one side scored a second line 2.5cm away. I creased the folds, added a couple bits of tape in the folded strip and glued it to my card blank. I wrapped some white ribbon around the card front and acetate to cover the glue, then tied in a bow. 
 
 
I trimmed the picture side of the insert to fit the inside of the card. I stamped my 60th sentiment and added some glitter pen to add sparkle. I trimmed the greeting side of insert to be the same size as the toppers.
 
 
I glued the first topper in position on the front of the card blank. I positioned another on top of the acetate in line with the one on the card front. I then used the insert greeting paper to cover the glue on the reverse of the acetate. As a final touch, I added a stick on gem to the perfume bottle.
 
Mx


Friday, 1 March 2019

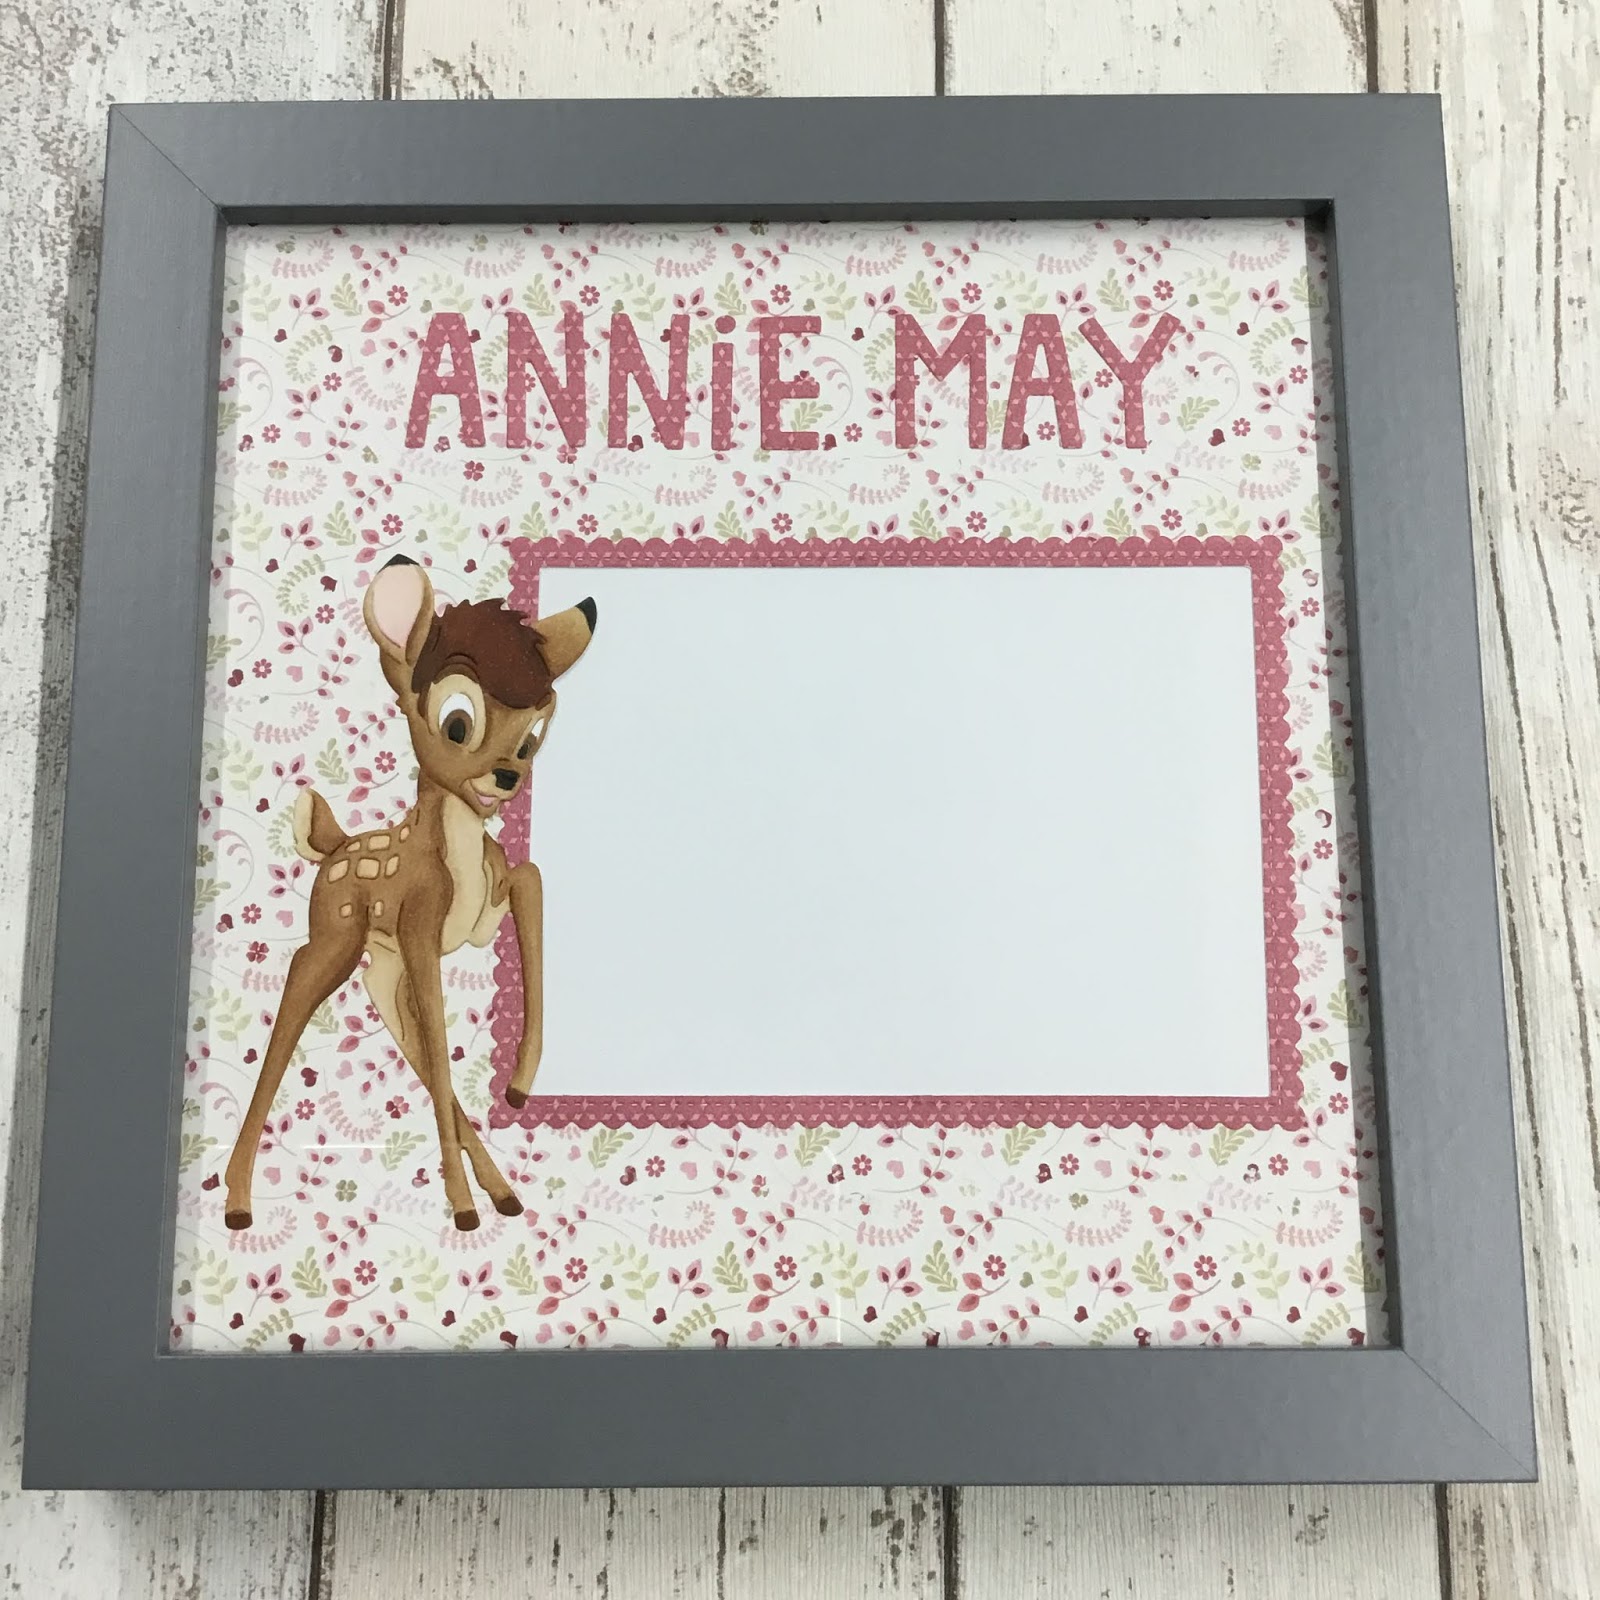
Bambi frame gift


  • Disney bambi metal die
  • Nit wit & LOTV- always & forever paper pad
  • My favourite things- stitch rectangle scallop edge frames
  • Lawn fawn- finley’s ABC’s dies
  • Copic friendly cardstock
  • Copic markers- E30,31,34,35,37,39,57,59. W8,10. R000,81,83.
  • Grey 8” square frame (mine was from wilko)
To make this frame gift, I selected two pieces of coordinating paper. I chose one 8x8 piece for the background and the other to die cut from for embellishments. I diecut the frame and letters to spell the name from the patterned paper. I also diecut my bambi image from white card and added tape to the back, whilst all the pieces where still in the metal die, to hold the sections together. I then removed the bambi from the die and added back in any pieces that had fallen out. I used copic markers to colour the image, using a picture online as reference. 
I decided on the best layout and glued all of the pieces onto the background paper. I used a craft knife to remove any paper showing through the die-cut frame to create an aperture for a photo to sit behind.
I slotted this finished piece into the frame and added a sheet of white card behind, to make it look nice for gifting. I prefer to leave it for the child’s parents to decide which picture they want to display rather than selecting one you like.
Mx

Thursday, 24 January 2019

sending love

 
  • hunky-dory 'gift of love...' foil topper sheet
  • patterned paper (found loose in my stash)
  • 6x4" card blank
This card was so quick and easy to make, it would be perfect for a beginner. The hunkydory foiled toppers always make your cards feel very professional too.
To make this card, I folded my card blank and creased the fold. I cut my patterned cardstock to fit the front of the card, then glued in place using double sided tape.
If you don’t feel confident you can place it perfectly, you can cut the patterned cardstock slightly bigger than your card front and glue in place. Then, turn your card over and using scissors trim to size, using the edge of the card blank as a guide.
After this, I added the toppers and used foam tape/squares to add dimension, to make it feel more special. I chose to raise the frame for this card. You can either glue the frame down, then add the image in flat after. Alternatively, you could place the frame in the centre of your card without any glue, allowing you to position and glue the image topper inside. Once in place, you remove the frame, add your foam tape and glue it down using your centre as the guide.
It really is that simple!
Mx

Saturday, 22 December 2018

for the grandparents


  • LOTV- twice as nice
  • Neenah classic crest cardstock 
  • Copics- C00,0,1,3,4,5,6. E21,50,51,93. RV91. R81,83,85.
  • Lawn fawn- large stitched rectangle stackable 
  • Wink of Stella ‘clear’ glitter brush marker

I was asked to make a grandparents card to say congratulations on the arrival of twins. As I was struggling to find the perfect sentiment, I created a custom one digitally and printed onto cardstock. I then stamped my image above the sentiment and coloured it with copics. I used stitches stackable dies to cut the cardstock and patterned paper into panels. These were simply glued down flat to the card blank. I added a touch of sparkle to the hearts to complete.
Mx
Thursday, 20 December 2018

twins !


  • LOTV- twice as nice
  • SU!- inspired events
  • Lawn fawn- finley’s ABC dies, dotted circle stackable 
  • Neenah classic crest cardstock 
  • Copics- C00,0,1,3,4,5,6. E21,50,51,93. RV91. R81,83,85.
  • First edition paper- sweet nothings paper pad
  • Pink glitter paper
  • Wink of Stella ‘clear’ glitter brush marker


  • To make this card, I stamped my image and sentiment onto cardstock. I coloured the image with copics and die cut into a panel. I also die cut the letters to spell out 'twins' from glitter paper to complete the sentiment. I cut a mat of patterned paper to fit the card blank, leaving a small white border and glued into position. I then added the panel with the letters beneath and finished with a touch of sparkle on the image.
    Mx

    Monday, 12 November 2018

    sweet baby


    • LOTV- sweet baby stamp set
    • Lawn fawn- large rectangle stitched stackables
    • LOTV & nit wit- country meadow paper pad
    • Neenah classic crest cardstock 
    • copics- E21,50,51,93. C00,0,1,2. R85,83,81. RV91. Y15,13,11. YR30
    • Wink of Stella ‘clear’ glitter brush pen
    I printed my custom sentiment made on the computer, onto cardstock leaving space for the image. I stamped the image above the sentiment and die cut into a panel. I coloured with copics and added sparkle to the dots. I then diecut some patterned paper using the larger die which fits neatly onto the card blank. I simply layered these together flat and glued onto the card front to finish.
    Mx

    Wednesday, 25 July 2018

    Donut treats


    • Mama elephant: donut treats stamps & dies
    • Stampin up!: hello you thinlits dies
    • Craftwork cards: guilty pleasures paper pad(sprinkles)
    • DCWV: fresh florals (dots, i think only had a scrap left)
    • Neenah classic crest cardstock
    • Memento ‘tuxedo black’ ink pad
    • Copics: mice-W00,W1,R01. donuts-E41,E31,E55. frosting & hats- Y08,Y11,Y15. V01,V12. R81,R83,R85. BG34,BG23. box- BG10,BG11.
    • zig wink of stella 'clear' sparkle brush pen
    I covered the front of my card blank in the pink dotty paper. I cut a mat of sprinkle cardstock as a layer. I diecut the ‘thanks’ from the centre top. I glued this onto the card.
    I stamped coloured and diecut the mice and donut images. I played about til i had an arrangement i was happy with. Then glued all the pieces down using both glue and foam to add dimension. 
    The final touch was to add sparkle to all of the donut frosting.

     
    To decorate the inside of the card, i added a coordinating sentiment from the stamp set in the centre. I also stamped, coloured and die cut a small image, and glued this to the bottom corner of the card.
     
     
    Mx

    I would like to enter the following challenges (linked below):


    Sunday, 22 April 2018

    Birthday bus


    • Avery Elle- birthday bus
    • My favourite things- big birthday die
    • Lawn fawn- large dotted rectangle stackable
    • Memento ‘tuxedo black’ ink pad & dual marker
    • Neenah classic crest
    • Copic- C00,C1,C3,C4,C6,C8. W00,W1,W3,W5. E53, E55,E57,E70,E71,E74,E77,E93. RV42,R43,R32. Y32,YR21. BG70.
    • Watercolour cardstock
    • Tim holtz ‘squeezed lemonade, worn lipstick’ distress ink pads
    • Cosmic shimmer ;burnt orange, straw yellow, scarlet mist’ pixie powders
    • Wink of stella ’clear’ glitter brush marker
    • White embroidery floss
    I made my background using inkpads, pixie powders and water. Once dried, I die cut into a panel with the largest rectangle. I then die cut the birthday into the panel, making sure to keep all the cut pieces. I glued the panel and the inside letter pieces onto my white card blank. On another sheet of cardstock, I stamped my images and coloured using copics. I fussy cut all the pieces and glued the little white smoke puffs flat. I added foam tape to the bus for dimension. To attach the balloons, I first tied 2 strands of embroidery floss onto the balloon with a little knot. I then added foam tape to stick it in position and used a few dots of glue to keep the string in place where I wanted. The final touch was a bit of glitter to the hats and balloons.

    Saturday, 3 February 2018

    Bundles of blossoms


    • My favourite things- bundles of blossoms background
    • Mama elephant- birthday script creative cuts
    • Stampin up!- endless birthday wishes
    • Distress embossing ink pad
    • Wow! Embossing powder
    • Indigo blu- lucious pigment powders 'purple, raspberry,coral & green'
    • Archival 'watering can' ink pad
    • White, black, grey and watercolour cardstock
    • 4x6" white card blank
     
    I stamped and embossed the floral background onto some watercolour cardstock. I used the pigment powders and water to create the pearl wash of colour, making sure to wipe any colour off the embossed lines. Once dry, I trimmed the piece to fit the front of my card blank. I cut a thin strip of white card and stamped the 'wishes' sentiment. I glued this to a wider piece of grey card. I die cut the word 'birthday' from both white and black card. I layered the white onto the black, off set slightly to create a shadow. I glued this into position above the 'wishes' to complete my sentiment. I added this to the card flat, however, you could use foam for dimension.
    Mx
     
    I would like to enter the following challenges:

    Thursday, 1 February 2018

    mason jar of flowers


    • Stamping Bella: mason jar of flowers
    • Lawn fawn: cross stitches rectangle stackable 
    • Paper smooches: friend word die
    • Memento 'tuxedo black' ink pad
    • Neenah classic crest card
    • Copic: R81, 83& 85. RV00. BG0000, 70. C00, 1 & 2. Y15, 17 & 38. YG03 & 25
    • Gold mirri card
    • Yellow and gold bakers twine
    • Kraft 4x6" card blank
     
    I die cut a panel of white cardstock using the cross stitch die for detail. I stamped the floral image in the bottom corner and coloured with copic markers. I die cut the word friend from gold mirri card and glued this on to the panel. I glued my panel to the card blank, and tied some bakers twine around the top tied in a bow to finish.
    Mx

    Monday, 22 January 2018

    Carnation garden girl


    • Stamping bella- tiny townie garden girl carnation
    • Avery elle- a tag for all
    • Lawn fawn- stitched scalloped borders
    • DCWV-fresh floral 12" paper stack
    • Neenah classic crest cardstock
    • Memento 'tuxedo black' ink pad
    • Copics- skin:E50,51,21,93. Hair:E55,57,59. Pink:R81,83,85. Green:G14. YG13,17. Yellow:Y0000,11. YR21,31. Ground:W00,1.

    To make this card, I chose two coordinating papers. I cut side panels from one and scalloped borders from the other. I also die cut the sentiment from the pink dots. For the main feature, I cut Neenah cardstock to create the central panel. I stamped the girl, making sure she fit nicely below the sentiment, then coloured her with copics to match with the papers. I glued the panels and sentiment in place to complete the card.
     
    Mx
     
    I would like to enter:

    Wednesday, 17 January 2018

    Lovely sympathy


    • Concord & 9th- hello lovely
    • Avery elle- with sympathy die
    • Memento 'desert sand' ink pad
    • Zig clean color real brush markers: 043,046,052,028,220,222,230.
    • Phil Martin's watercolour cardstock
    • Pink texture cardstock
    • 4x6" card blank
    
    For the card front, I cut a piece of watercolour cardstock the same size as the card front. I stamped the floral image to create a band going across positioned up towards the top of the card. I coloured the image with light colours and added more water for a softer look. Once dry, I glued the watercolour panel onto the card blank. I chose a plain cardstock which coordinated with the flower colours to die cut the sentiment from. I glued the sentiment in place beneath the floral band to complete the card. I think the soft colours create a nice subtle, feminine look to suit a sympathy card.


    Mx
     

    Wednesday, 3 January 2018

    All our dreams


    • Lili of the valley- all our dreams
    • Lawn fawn- small stitched circle stackables, large stitched rectangle stackables, stitched borders
    • Forever friends (docrafts) Kraft notes 12" paper pads
    • Neenahclassic crest cardstock
    • Memento'tuxedo black'ink pad
    • Copics- skin:E50,51,21,93. leaf:YG61.G21,24. Pink:R85,83,81,0. Bunny:E41,42.
    • Wink of stella 'clear' glitter brush pen
    I cut 2 strips of lilac paper and glued these to down each edge of the card front. I then cut a strip of checked paper, using the stitched borders to add detail. I glued this down the centre of the card to complete the background. For the topper, I cut a mat of cardstock, stamped the image onto it and coloured using copics. For added detail, I brushed glitter onto the hearts. I glued the topper down flat onto the card. Using another piece of cardstock, I stamped then die cut the sentiment. This completed the sketch, glued down with foam for dimension.

    Mx

    Challenge I would like to enter:


    Friday, 1 December 2017

    Selfies in the Snow

    • Hunkydory cute Christmas luxury card collection: Selfies in the Snow
    • Hunkydory essential book of Christmas sentiments
    • Hunkydory adorable scorable cardstock
    • silver mirri card
    • 7x7" & 5x7" portrait & landscape white card blanks
    For the 7" square card, I mat and layered the card front with the patterned cardstock on silver mirri. I then arranged the frames and image topper at various angles and raised them up onto different depths of foam pads to create dimension. I completed the front with the sentiment, positioned on the printed border edge. I added the insert trimmed down to cover the inside of the card.
    inside
    I used the remaining cardstock for the portrait 5x7" card. I positioned the border to run vertical on the card this time, mat and layered onto mirri card. I then positioned the little square toppers and sentiment onto the card, all on angles and glued down with foam pads. I used the remaining insert to cover the inside of the card.
    inside
    I made a feature of the image printed on the other sheet of cardstock for the next card. I mat and layered onto silver mirri to fit the front of this 5x7" card blank. I chose a sentiment from the essential book to coordinate and glued this in place using foam pads for dimension.
    For the final card, I arranged the remaining toppers and frame to create the design. I mat and layered the card front with mirri card and blue adorable scorable. I then glued the image topper on shallow foam pads in the centre. I added the frame raised up on deeper foam pads and overlapped the two with the sentiment in the corner.
    Mx

    Monday, 20 November 2017

    Christmas Delight


    • Hunkydory snowy season luxury card collection: Christmas Delight
    • Hunkydory little book of snowy scenes
    • silver mirri card
    • pink & white satin ribbons
    • A5, DL & 6x4" landscape & 8x8" white card blanks
    For the A5 card, I cut the cardstock to size to cover the front of the card blank. I then simply positioned the image and sentiment toppers overlapping on different depths of foam pads. I cut the coordinating insert down to complete the card.
    inside
    Using the same cardstock, I cut a 6x4" section with the border running across the base for this card. Again, I simply arranged an image and sentiment topper from the collection on foam pads. I trimmed the sentiment section from the centre of the remaining matching topper sheet to finish the inside.
    inside
    I created this DL card to make a feature of the image section on the other patterned cardstock sheet from the collection. I trimmed it to fill the card front, then angled the sentiment on top using foam pads for dimension and a knot of ribbon as embellishment. The insert sheet featured the mirror image of the card front, trimmed down to fit neatly inside.
    inside

    For the final card, I used a little book image to compliment the large sentiment from this set. I cut the  mat of silver mirri card to cover the 8" card blank. I then cut a layer of the patterned cardstock. I wrapped the satin ribbon around opposite corners, with a bow tied at the top. The ribbon was secured on the back of the cardstock before gluing onto the card front to keep a neat finish. I matted the little book page onto silver to create the topper and glued down off centre using foam pads. I overlaid the sentiment topper using deeper foam pads for added dimension. I glued the remaining insert inside to complete the card.
    inside
    Mx

    Monday, 13 November 2017

    polar bear presents


    • Hunkydory cute Christmas luxury card collection: polar bear presents
    • Hunkydory essential book of Christmas sentiments
    • snowfall acetate
    • white twine
    • 8x8", A5 & 6x4" card blanks

    For the 8" square card, I covered the card front with the patterned paper, positioning the border and swirl to the base of the card. I then arranged the frame and topper image on angles to sit within the space. The frame was glued down flat, with the topper raised on foam pads. I completed the front with the essential book sentiment in the top corner, also on foam pads. The coordinating topper sheet was trimmed down to fit inside.
    inside

    I created this A5 card using snowfall acetate as the card front. I cut away the front of the card blank and replace with acetate, with was secured to the inside of the card. I then covered the join with the patterned cardstock, trimmed to fill the inside of the card. I then completed the card front, adding the image topper, frame and sentiment.

    Finally, I made this cute little 6x4" card using the printed image on the patterned cardstock. This section was left over from the card above, so I trimmed it to fit the card front with space for a border. I used the border edge and pattern from the other cardstock in this set to create a nice piece along the folded edge. The sentiment tag was then glued into position on the border, using foam pads and finished with a little twine bow. I trimmed down the insert to fit with the printed sentiment to complete the inside of the card.
    inside
    Mx

    Sunday, 5 November 2017

    Champagne chic

    • Hunkydory especially for her luxury card collection: champagne chic
    • Lawn fawn custom craft dies: happy birthday border & Finley's 123's
    • Avery elle custom steel dies: a tag for all die
    • gold trimmed pink organza ribbon
    • Gold mirri card
    • A5 & landscape 5x7" white card blanks
    For the first A5 card, I used the lady in the little black dress topper with the black frame and coordinating cardstock to create my design. I cut the cardstock down to fit the front with a mat of gold mirri card. I then positioned the topper image and glued this flat. I added the frame and sentiment, raised up on foam pads. I finished the card with the coordinating insert, trimmed to fit inside.
    inside
    I used the remaining rose cardstock as a background for the pink lady. I cut a mat of gold mirri to cover the card and trimmed the rose cardstock as a layer, but didn't glue this down. I die cut the happy birthday sentiment from gold mirri card. I then laid everything in position and wrapped the ribbon around the cardstock in place and secured at the back. I then glued the cardstock onto the card front. I glued the sentiment and image topper in place. and finished with a ribbon bow.
    Using the other cardstock from the collection, I created another A5 card. I cut the mat and layer of gold mirri and patterned cardstocks to fit the front. I then diecut the '50' and birthday sentiment from gold mirri. I arranged these onto the card along with the two ladies topper and rose frame. Once happy with the design, I glued the die cuts and image down flat and raised the frame up on foam pads. For the inside, I trimmed the coordinating insert down to fit neatly.
    inside
     For this 5x7" card, I made a feature of the printed image on the remaining cardstock. I trimmed the top border from the cardstock, layered onto mirri and glued to the inside of the card. I then cut away the card front to reveal the panel inside. I cut the image section down to fit the card front, on a mat of gold mirri card. To complete, I glued the friend sentiment from the collection in the space beside the ladies, using foam for dimension.
    inside
    Mx