Showing posts with label decoration. Show all posts

Tuesday, 24 January 2017

50!!

 
  • MDF/ laser cut wooden shape
  • melody ross- homespun chic 12x12" paper pad
  • studio paint and brushes
  • anna marie designs- flowers etc
  • pink ribbon
  • scrabble tiles (travel edition)
 
I painted the edges and the base with brown paint. I covered the front and back of the '50' with patterned paper. I placed the 50 into the base. I then created arrangements of fibres and flowers for decoration, which I secured in place with hot glue. I also added 'mum' in small scrabble tiles using the hot glue gun. I finished it with a ribbon around the base and tied it in a bow, then added another bow onto the corner arrangement.
 
Mx
 
Challenges I'd like to enter:

Friday, 4 September 2015

baby love !!


  • LOTV- 'baby with bunny' & 'rocking horse' stamps
  • SU! 'simply wonderful' sentiment stamp
  • mdf heart shape from the mdf man
  • tim holtz tissue wrap- terminologie
  • Claudine hellmuth studio paints and brushes
  • docrafts artiste- flesh
  • golden gel medium
to make this heart hanging decoration, i first painted it cream. I covered my mdf blank with the tissue wrap, then painted another coat of cream over the top. i used brown paint on a sponge to distress the edges. i stamped my chosen images and used the studio paints to colour them. i use a fine brush to do the black outline and details, to give a neater finish as most of the detail is lost during painting the colours. i threaded a ribbon through the hole at the top and tied a couple of bows to finish.
Mx

Saturday, 6 December 2014

padded puddings!!

 
I've been hand sewing some tree decorations. these are my christmas puddings.. they are so cute and really simple to make. I took 2 felt circles (find a lid or any good size circle to draw around then cut it out). I also added a white half circle to make the icing, with the wiggly edge secured using satin stitch. I used french knots to create some texture on the main body of the pudding. the holly leaves were cut from some green felt and stitched into place at the top of the pudding with buttons for berries. I chose some gingham ribbon to be able to hang the puddings from the tree or cupboard handles. once everything was in place, I stitched the two halves together, (padded out with some wadding for nice fat puddings) using a decorative blanket stitch. 
 
I'm really pleased with how these have turned out. If you like them too, keep checking my blog as I'm busy stitching and creating more little bauble designs !!
 
Mx

Tuesday, 17 June 2014

christmas tree ..


stamps: set 20 by paper artsy, JOFY and dictionary by stampin up!
inks: memento (tuxedo black), tim holtz distress ink pads, sakura micron pen, sakura glitter pen and stickles
cardstock: DL card blank and craftwork cards digi cardstock

I stamped the tree image onto the cardstock. I then coloured it using promarkers, leaving the main area of the tree. I then stamped the tree again on another piece of card and inked it with tim holtz distress. I then stamped the text block in green to add some interest to the tree. I then cut this out and layered it onto the card. I used a red distress ink to colour the card blank and stuck the pieces down. I stamped a sentiment, then added a decorative border using the sakura micron pen in a freehand stitch design. I also used the glitter pen to sparkle the star, and the stickles to create coloured baubles. I think this makes an interesting design, and can be done in stages to create a batch of the cards in preparation for Christmas.
 
Mx

Wednesday, 8 January 2014

floral fun!!

 
stamps: positively chevron, flower shop, express yourself(hostess) from stampin up!
inks:archival ink pads(jet black, magenta hue, venetian orange, aqua marine) ,tim holtz distress ink pad (dried marigold)
cardstock: craftwork cards digi cardstock, 6x6" card blank
extras: adhesive gems, washi tape, pansy punch from stampin up!
 
I coloured the card blank pink and stamped the large chevron background on to a mat using yellow ink. I created 3 flowers in my chosen colours by stamping and punching them out. the sentiment was stamped and cut it into a banner shape. I glued my layers into position, then added pieces of blue washi tape to accent the top and bottom of the card and tie in the colour scheme. the final touches were adhesive gems for a bit of sparkle on the centre of each flower.


Mx

Tuesday, 24 December 2013

12 days of christmas...

so ive been a little busy this year and haven't done an official 12 projects for Christmas, but ive put together some of my favourite projects from this year ...
 
 
Christmas cake simply decorated with icing, using the holly leaf cutter, with a little help from the family in the spirit of Christmas !!


I used craftwork card products to create this door hanger... you could take this idea to make your own version using any scraps and off cuts of paper or card left over from this seasons makes!!


I hope you have all enjoyed my makes this year, have a lovely Christmas and a fab new year !!
 
 Mx

Friday, 20 December 2013

the edible edition !!

 
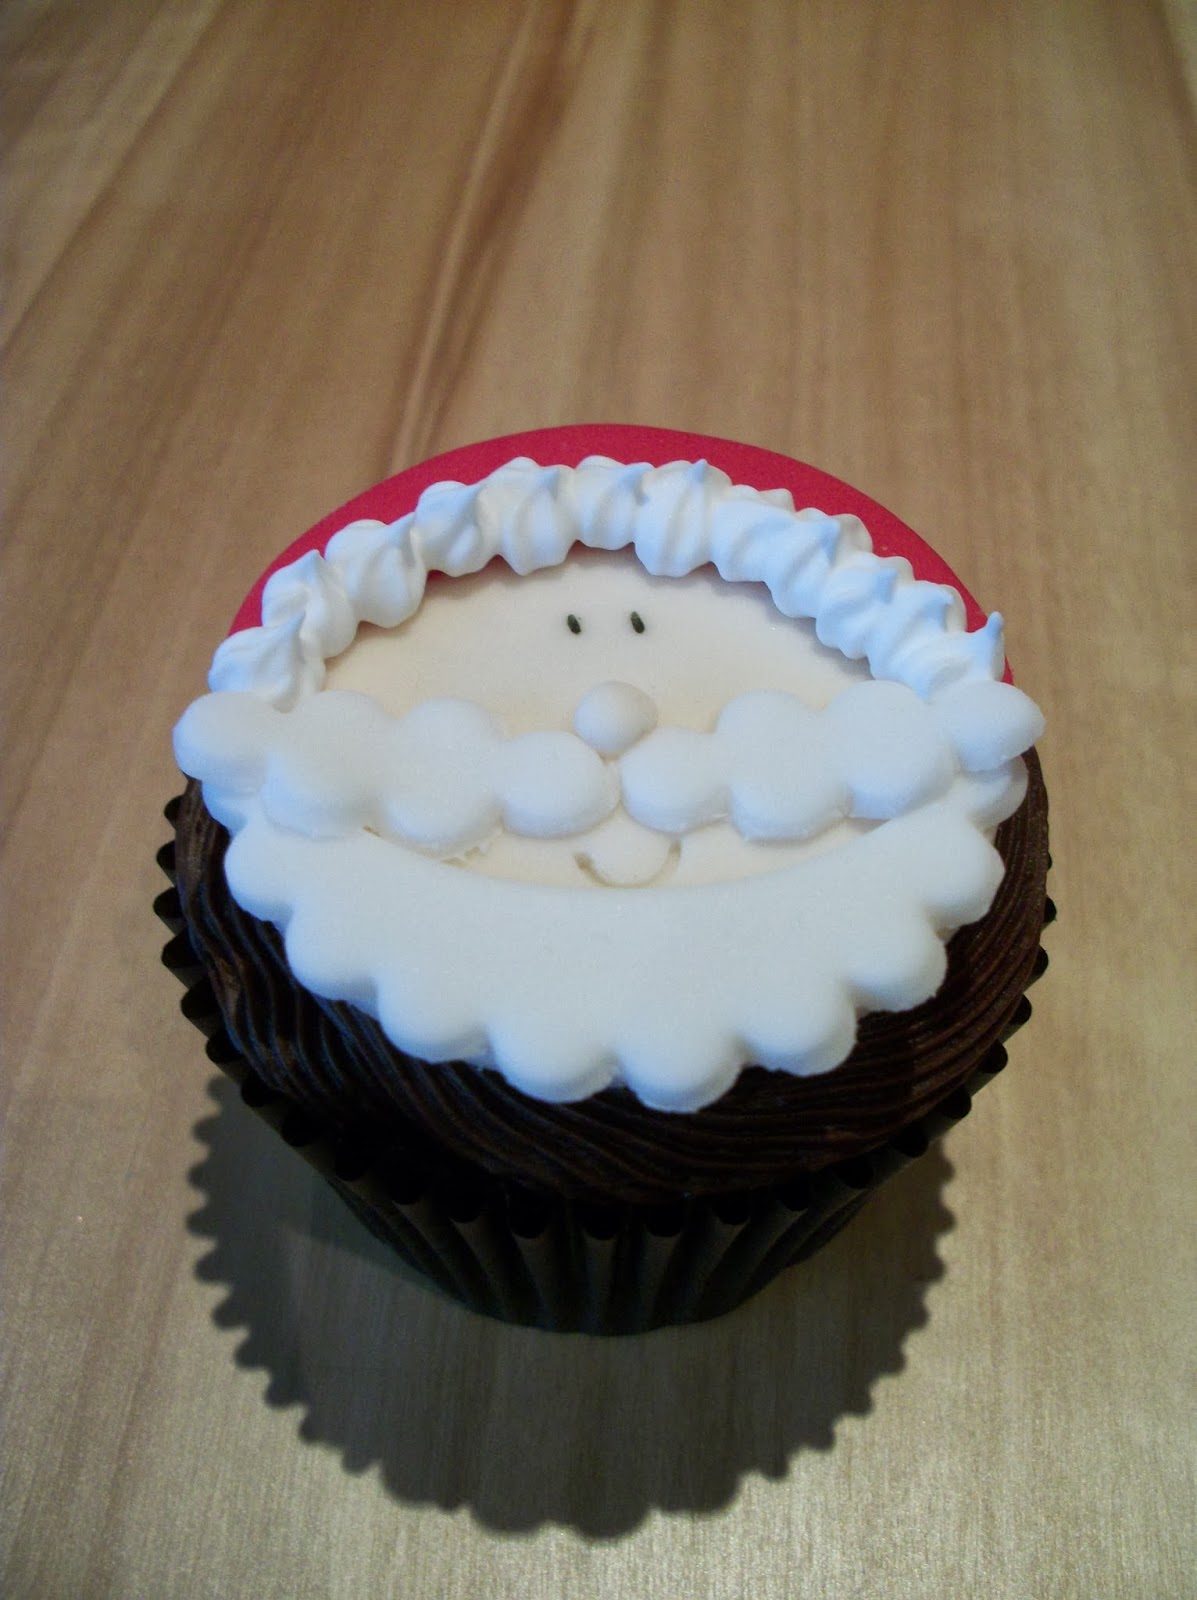
I thought id share a quick post to show some of my other creations. these are some of the festive designs i've added to cupcakes recently. the snowman and snowflake are vanilla flavoured, the santa and star are chocolate fudge (yum!!). each of them are decorated with icing and details like the eyes drawn with an edible pen. some edible lustre by sugarflare adds that extra festive feel. the really great thing about the designs is that you can have them made in advance and ready to add to the cupcakes when you've baked them. the star and snowflake are beautifully simple with the swirled frosting. snowmen and santas are a little more work but worth the effort for the fun they bring ... kids love them (I hope you do too!!) 


Mx

Thursday, 19 December 2013

sparkling sophistication !!

 
stamps: festive decorations and simply sophisticated from lili of the valley
ink: memento (tuxedo black), promarkers and copic spica glitter pens
cardstock: craftwork cards digi cardstock and black cardstock
other: ornate #3 framelits dies from sizzix, simply gorjuss bakers twine and black organza ribbon
 
I made this tag as a variation on the one I did (below). this time I stamped the whole image to fit inside this curved shape, including a sentiment at the top. I kept the colouring minimal, just highlighting the detail using grey tones in promarkers, using glitter to for extra emphasis. I added some coordinating twine and a black organza ribbon to the top and secured beneath. this was then matted onto a piece of black, die cut using the next sized shape. overall I think it gives a more sophisticated, grown up take on the Christmas tag.
 
 
'include a sentiment'
 
Mx

Tuesday, 12 November 2013

spot on !!

 
stamps: ornament keepsakes, more merry messages & distressed dots from stampin up!
inks: tim holts distress ink (barn door), archival ink (vermillion & jet black)
extras: craftwork cards digi cardstock, 4x4 card blank, holiday ornaments framelits dies from stampin up! and sizzix big shot die cutting machine

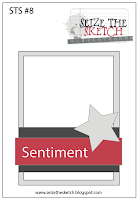
for this card I used the sketch as the basis of my design, using just three elements. I kept this one really simple, with just the red and touches of black on the white. the background was stamped with the dots, then the sentiment matt and layered on top, with the Christmas ornament placed as the focal point. I think the dots and the classic contrast between the colours gives the card a clean modern feel. keeping things this simple also means it could be a great one to make in batches this Christmas !!
 
 
http://seizethesketch.blogspot.co.uk/2013/11/seize-sketch-8-sweet-sassy-stamps.html
'seize the sketch #8'
 
http://www.simonsaysstampblog.com/wednesdaychallenge/
'keep it clean & simple'
 
Mx


Saturday, 24 August 2013

make it festive !!


stamp: Christmas robins stamp from LOTV
paint / ink: archival jet black ink pad, claudine hellmuth studio paints and matt medium (and brushes too!!)
other: cut mdf shape, rope trim, tim holtz ideaology tissue wrap (melange), scrabble letters, pinflair snow dust, stickles rock candy by tim holtz, hot glue gun.

I wanted to do something a little different for Christmas so I decided on a hanging plaque. MDF shapes are available, but if you have a handy neighbour like mine, there's no need to buy one.. just put your order in !! fix the rope trim to the wood (staples work well) and you have an instant base to work on.
I covered this one in the tissue wrap and painted over the top for a vintage feel. the stamped image compliments the theme well and the scrabble letter message gives it that quirky edge. of course glitter is needed for that finishing festive touch.

 
i'd like to enter it into the 'make it festive' monthly challenge ... I hope it fits the brief !!
 
Mx

Friday, 16 August 2013

a seasonal star !!

 
stamps: Christmas icons and sentiment from set 10, a5 by LOTV
inks: tim holtz distress inks, sepia archival ink pad, claudine hellmuth studio paints (and brushes)
other: craft card blank, organza ribbon, bakers twine, brad,mdf blank star, claudine hellmuth studio matt medium and tim holtz idea-ology terminology tissue wrap.


I made this card to incorporate the gift, with the removable Christmas ornament (perfect for the tree!!). I added a brad to the card, before sticking the topper down, to hold the ornament in place. I created the aged effect on the card and star using distress ink and sponged paint. i think the overall feel is a vintage, handmade take on Christmas.
 
 
inside


Mx

Tuesday, 11 December 2012

christmas wreath project!!

 for todays project i have made up one of the craftwork cards  christmas wreaths kits, these are fab, it comes with instructions and its says there is enough flowers to make 3 (i think it depends how layered you do
your flowers though).
kits contains
i have 3 different coloured packs. on www.craftworkcards.co.uk they have 6 colour options at £7.50. but i could only find 2 options on www.theglitterpot.co.uk at £7.49 .
these are my other coloured kits
basic equipment is water in a spray bottle, a bone folder or something to shape the flowers, glue (pva or silicone) something to colour the ring (i used a distress ink pad). then once you have completed the wreath you might want to embellish some more. i sprayed with prefect pearls mists and added crystal gemstones.

it was a fast and easy to make project that could easily be done with the kids, ace little festive project.
mine is hung over the fireplace, but they would look nice on a 8x8" card or as a table decoration with a large candle in the centre.
Mx